“I’m dreaming of a white Christmas
Just like the ones I used to know
Where the treetops glisten
and children listen
To hear sleigh bells in the snow.”
It’s hard to believe that Christmas is in 1 week. Up until today, because as I sit and type this, my view is getting whiter by the second, it definitely hasn’t felt like Christmas; the weather has been mild and there really hasn’t been any snowfall. It has been so nice not having to worry about snowy roads, scraping my car, or forgetting my mittens. I am thoroughly enjoying the extra months of being able to forage in the woods for berries and evergreens with relative ease versus last year when I had to defrost every branch because the needles were frozen together. But, here’s to hoping we have a white Christmas
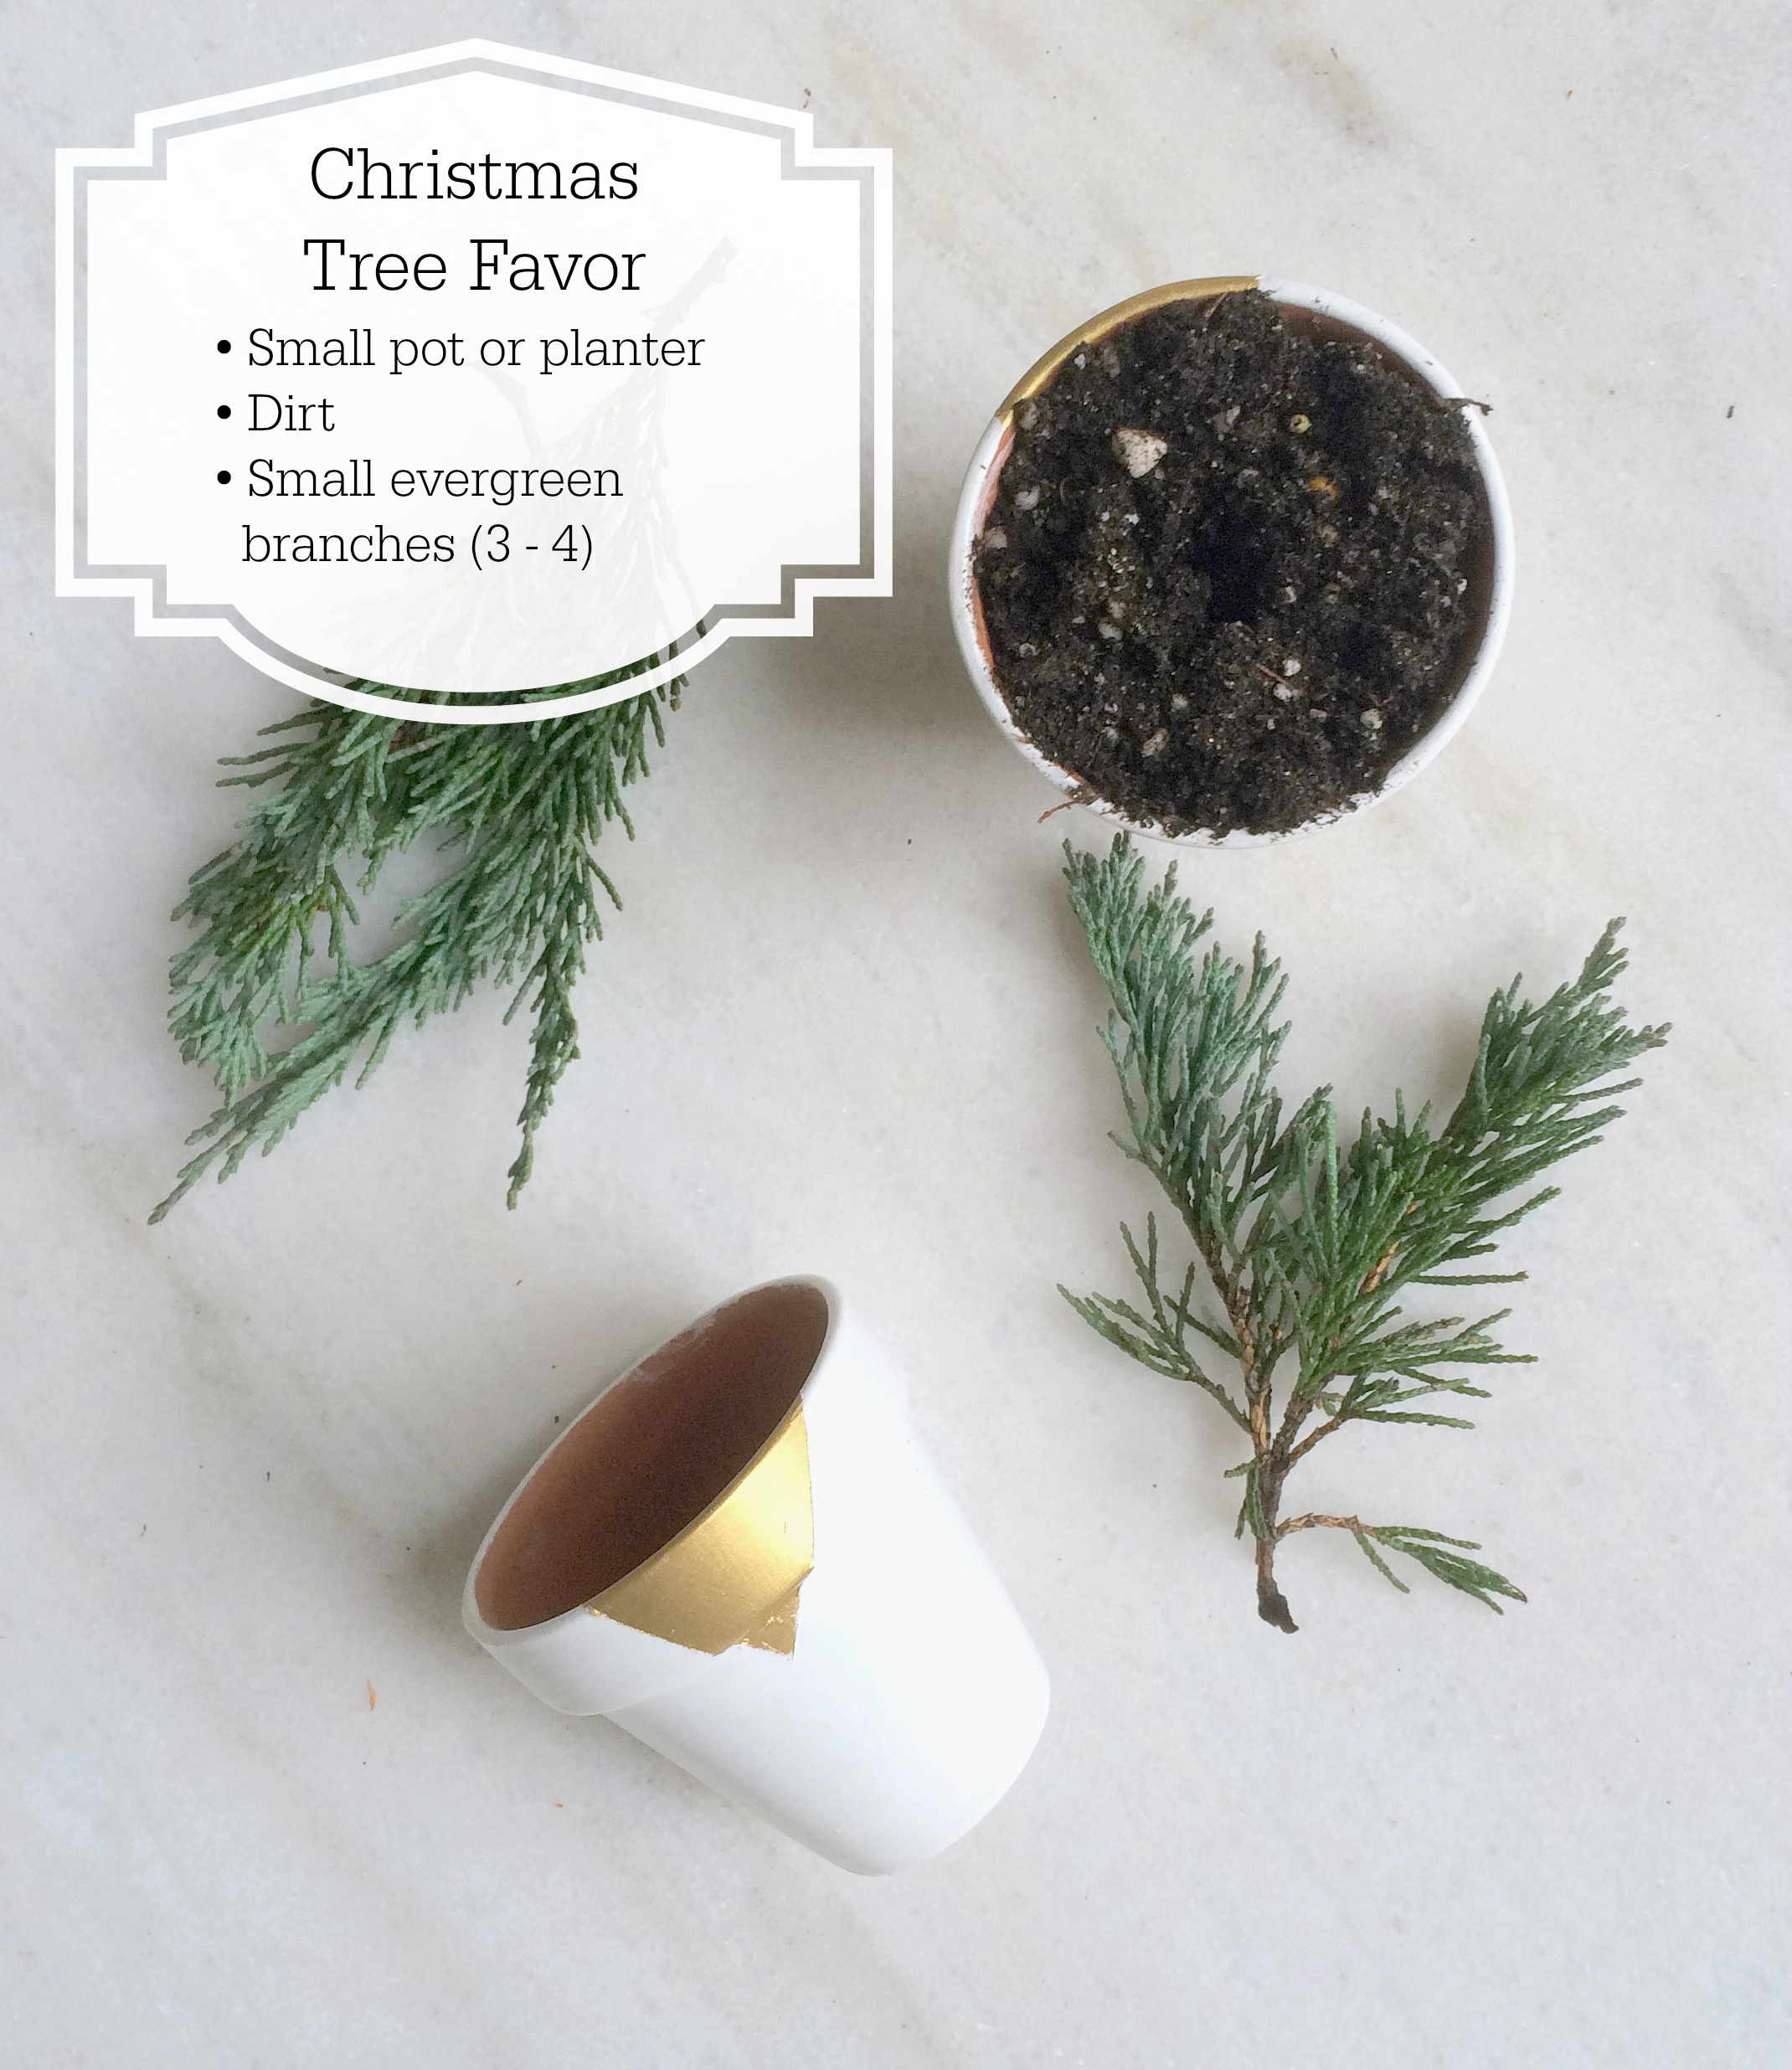
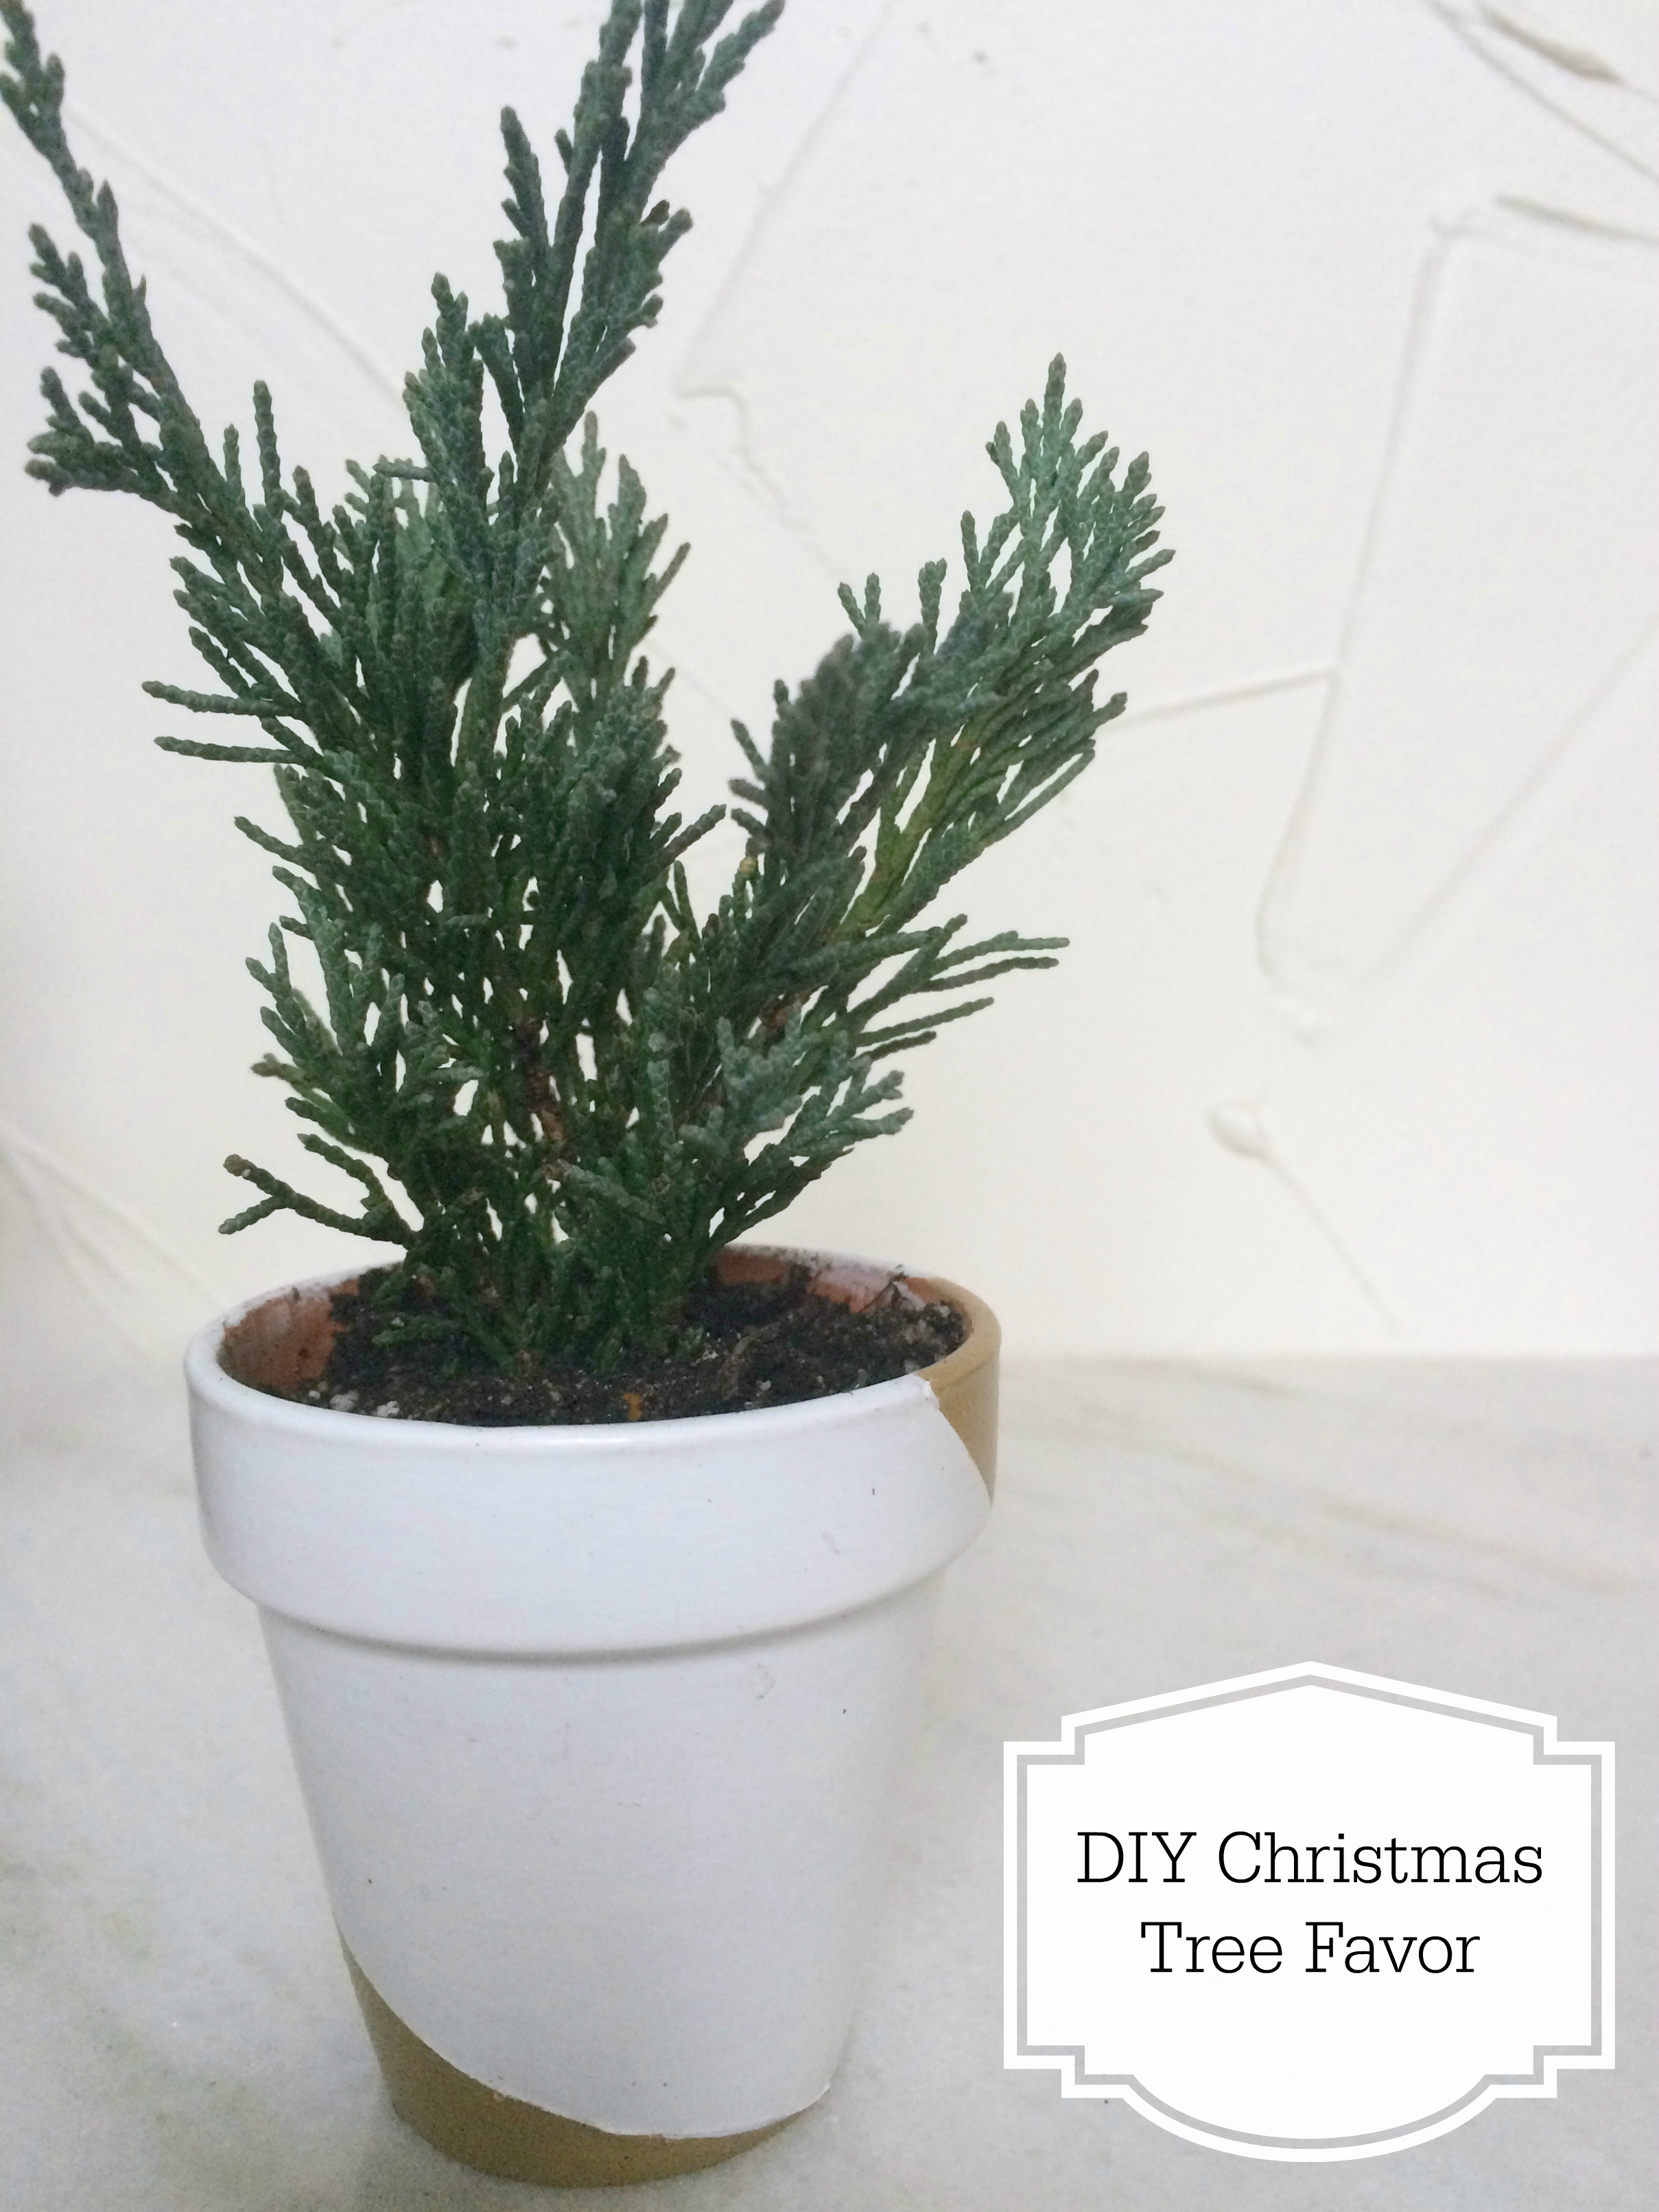
That being said, since it’s so close to Christmas, here is another quick and easy DIY Christmas favor, just in case.
What you’ll need:
• Small pot or planter (I used mini terra cotta pots and painted them)
• Dirt
• Small evergreen branches (I used 3 small ones)
Instructions:
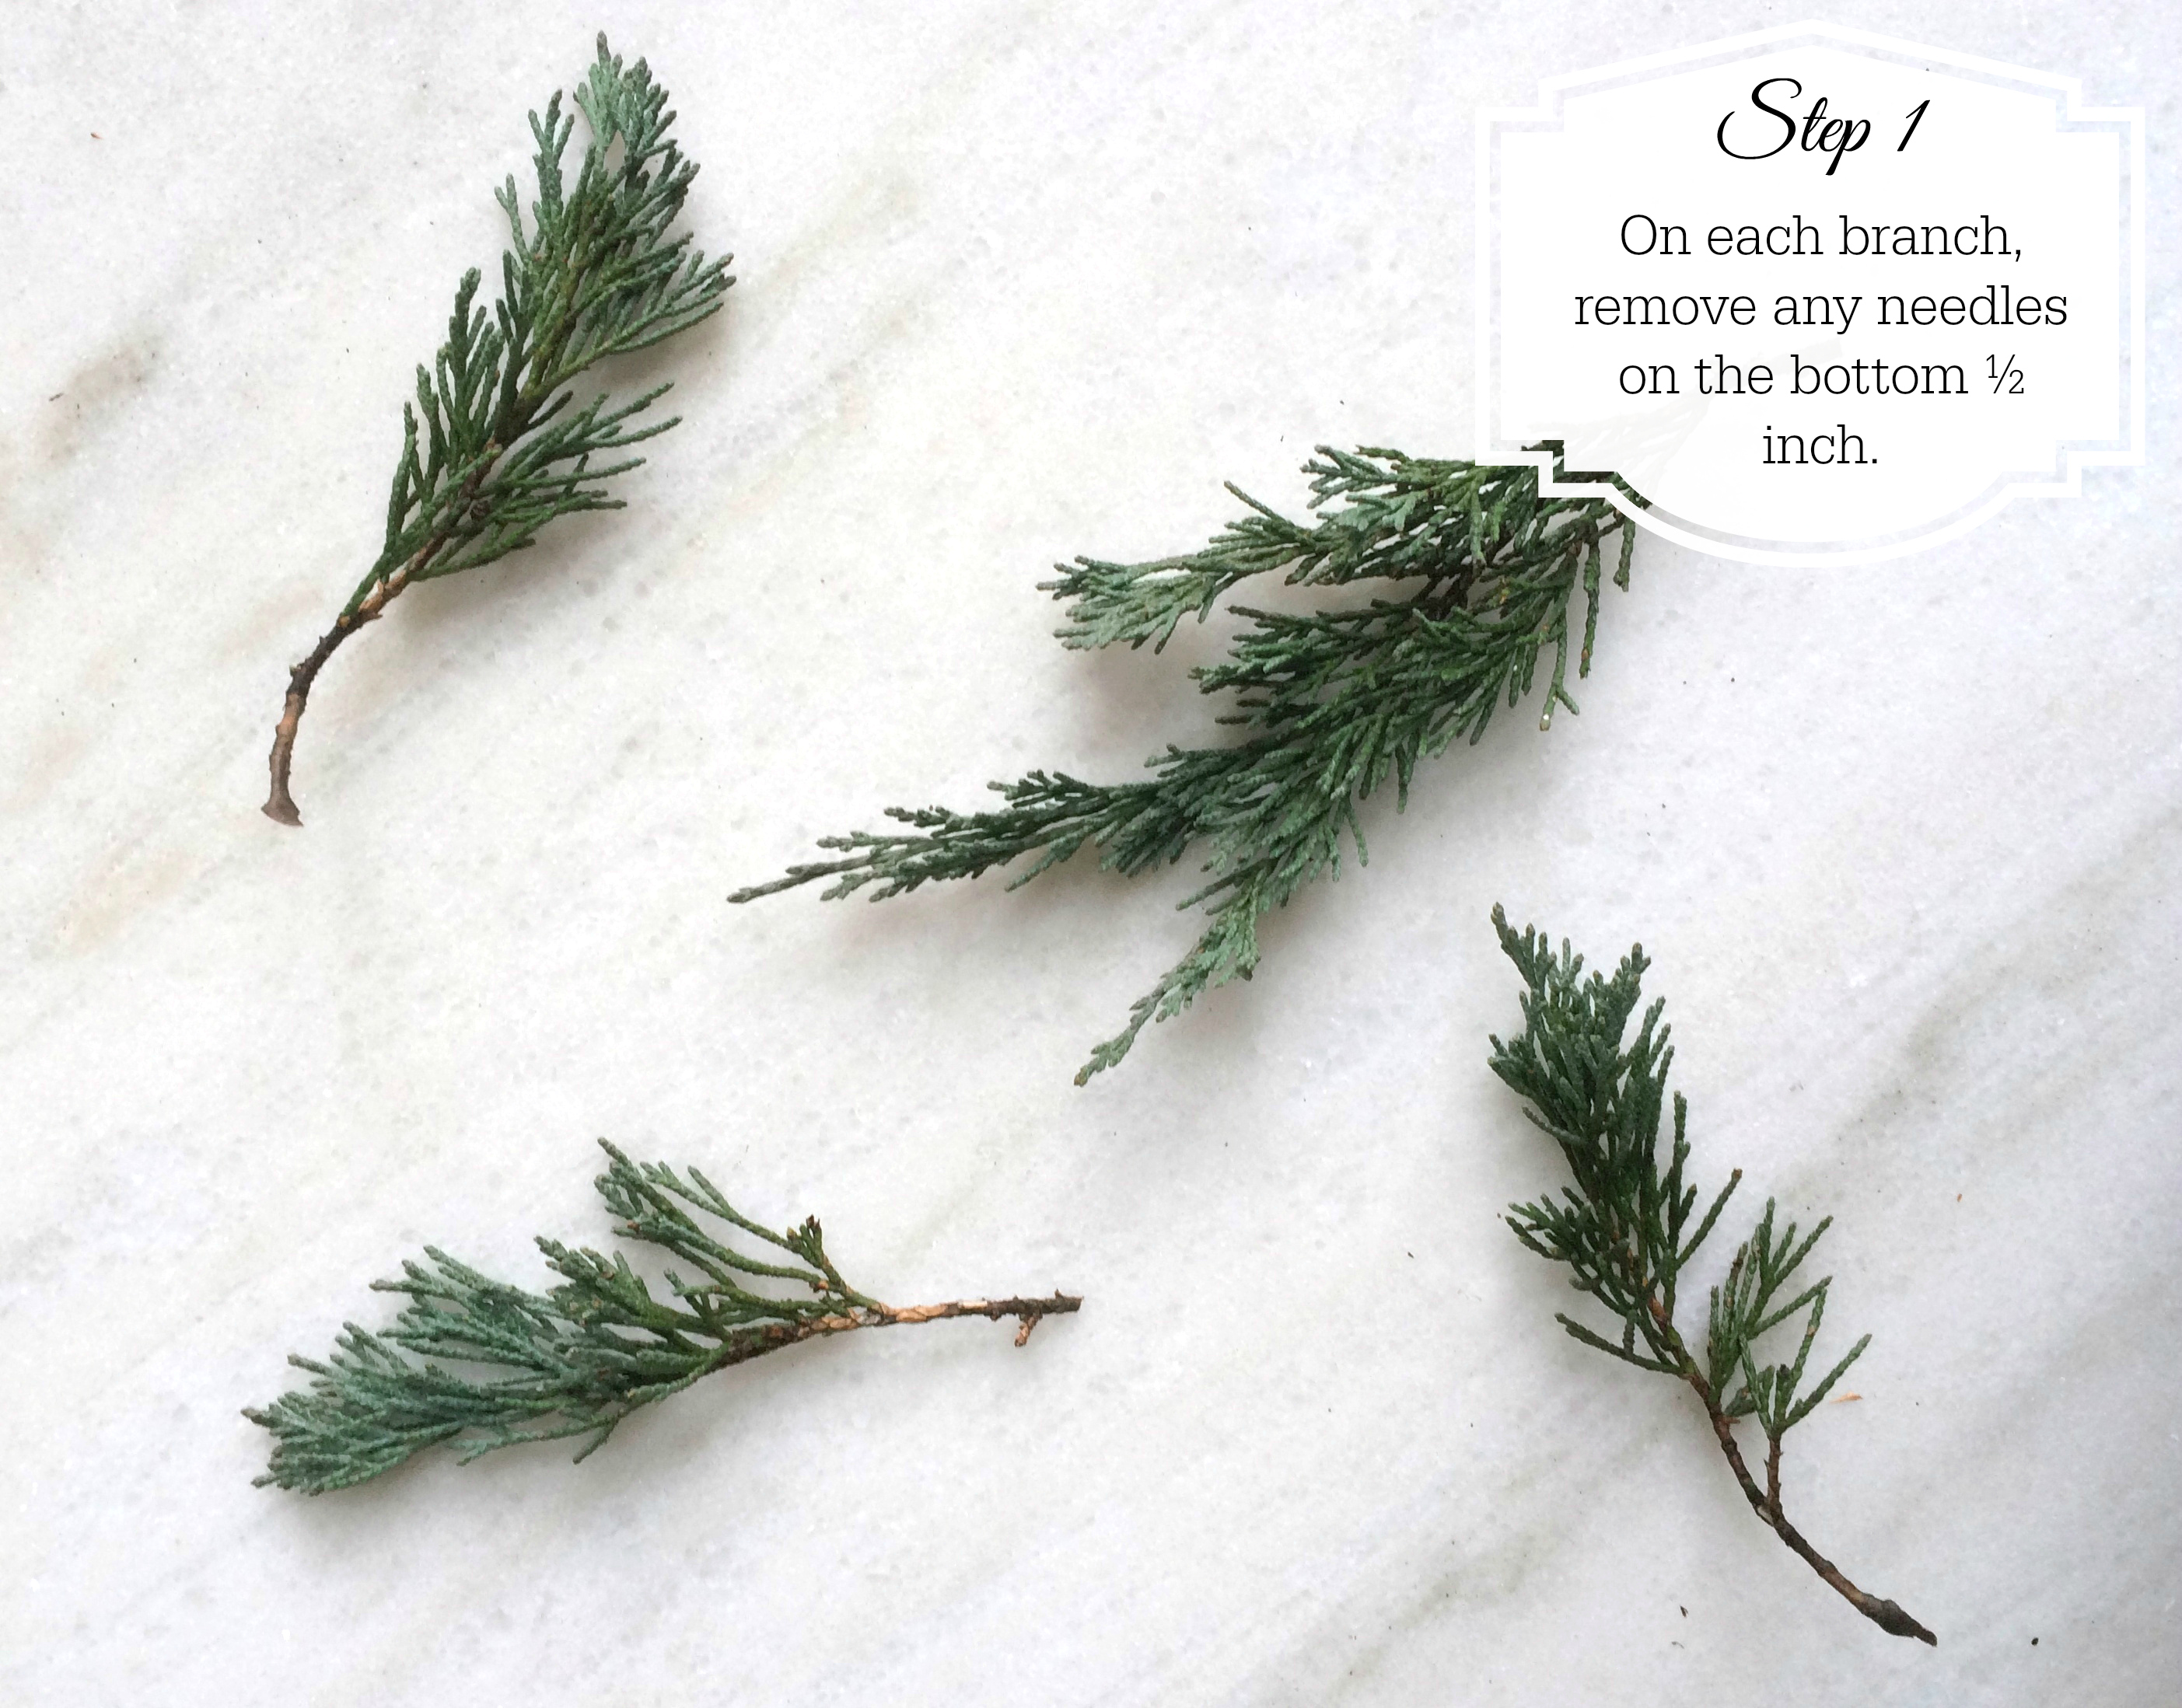
1. On each branch, remove any needles on the bottom ½ inch. Having this ½ inch of clean branch makes placing it in the dirt a lot easier.
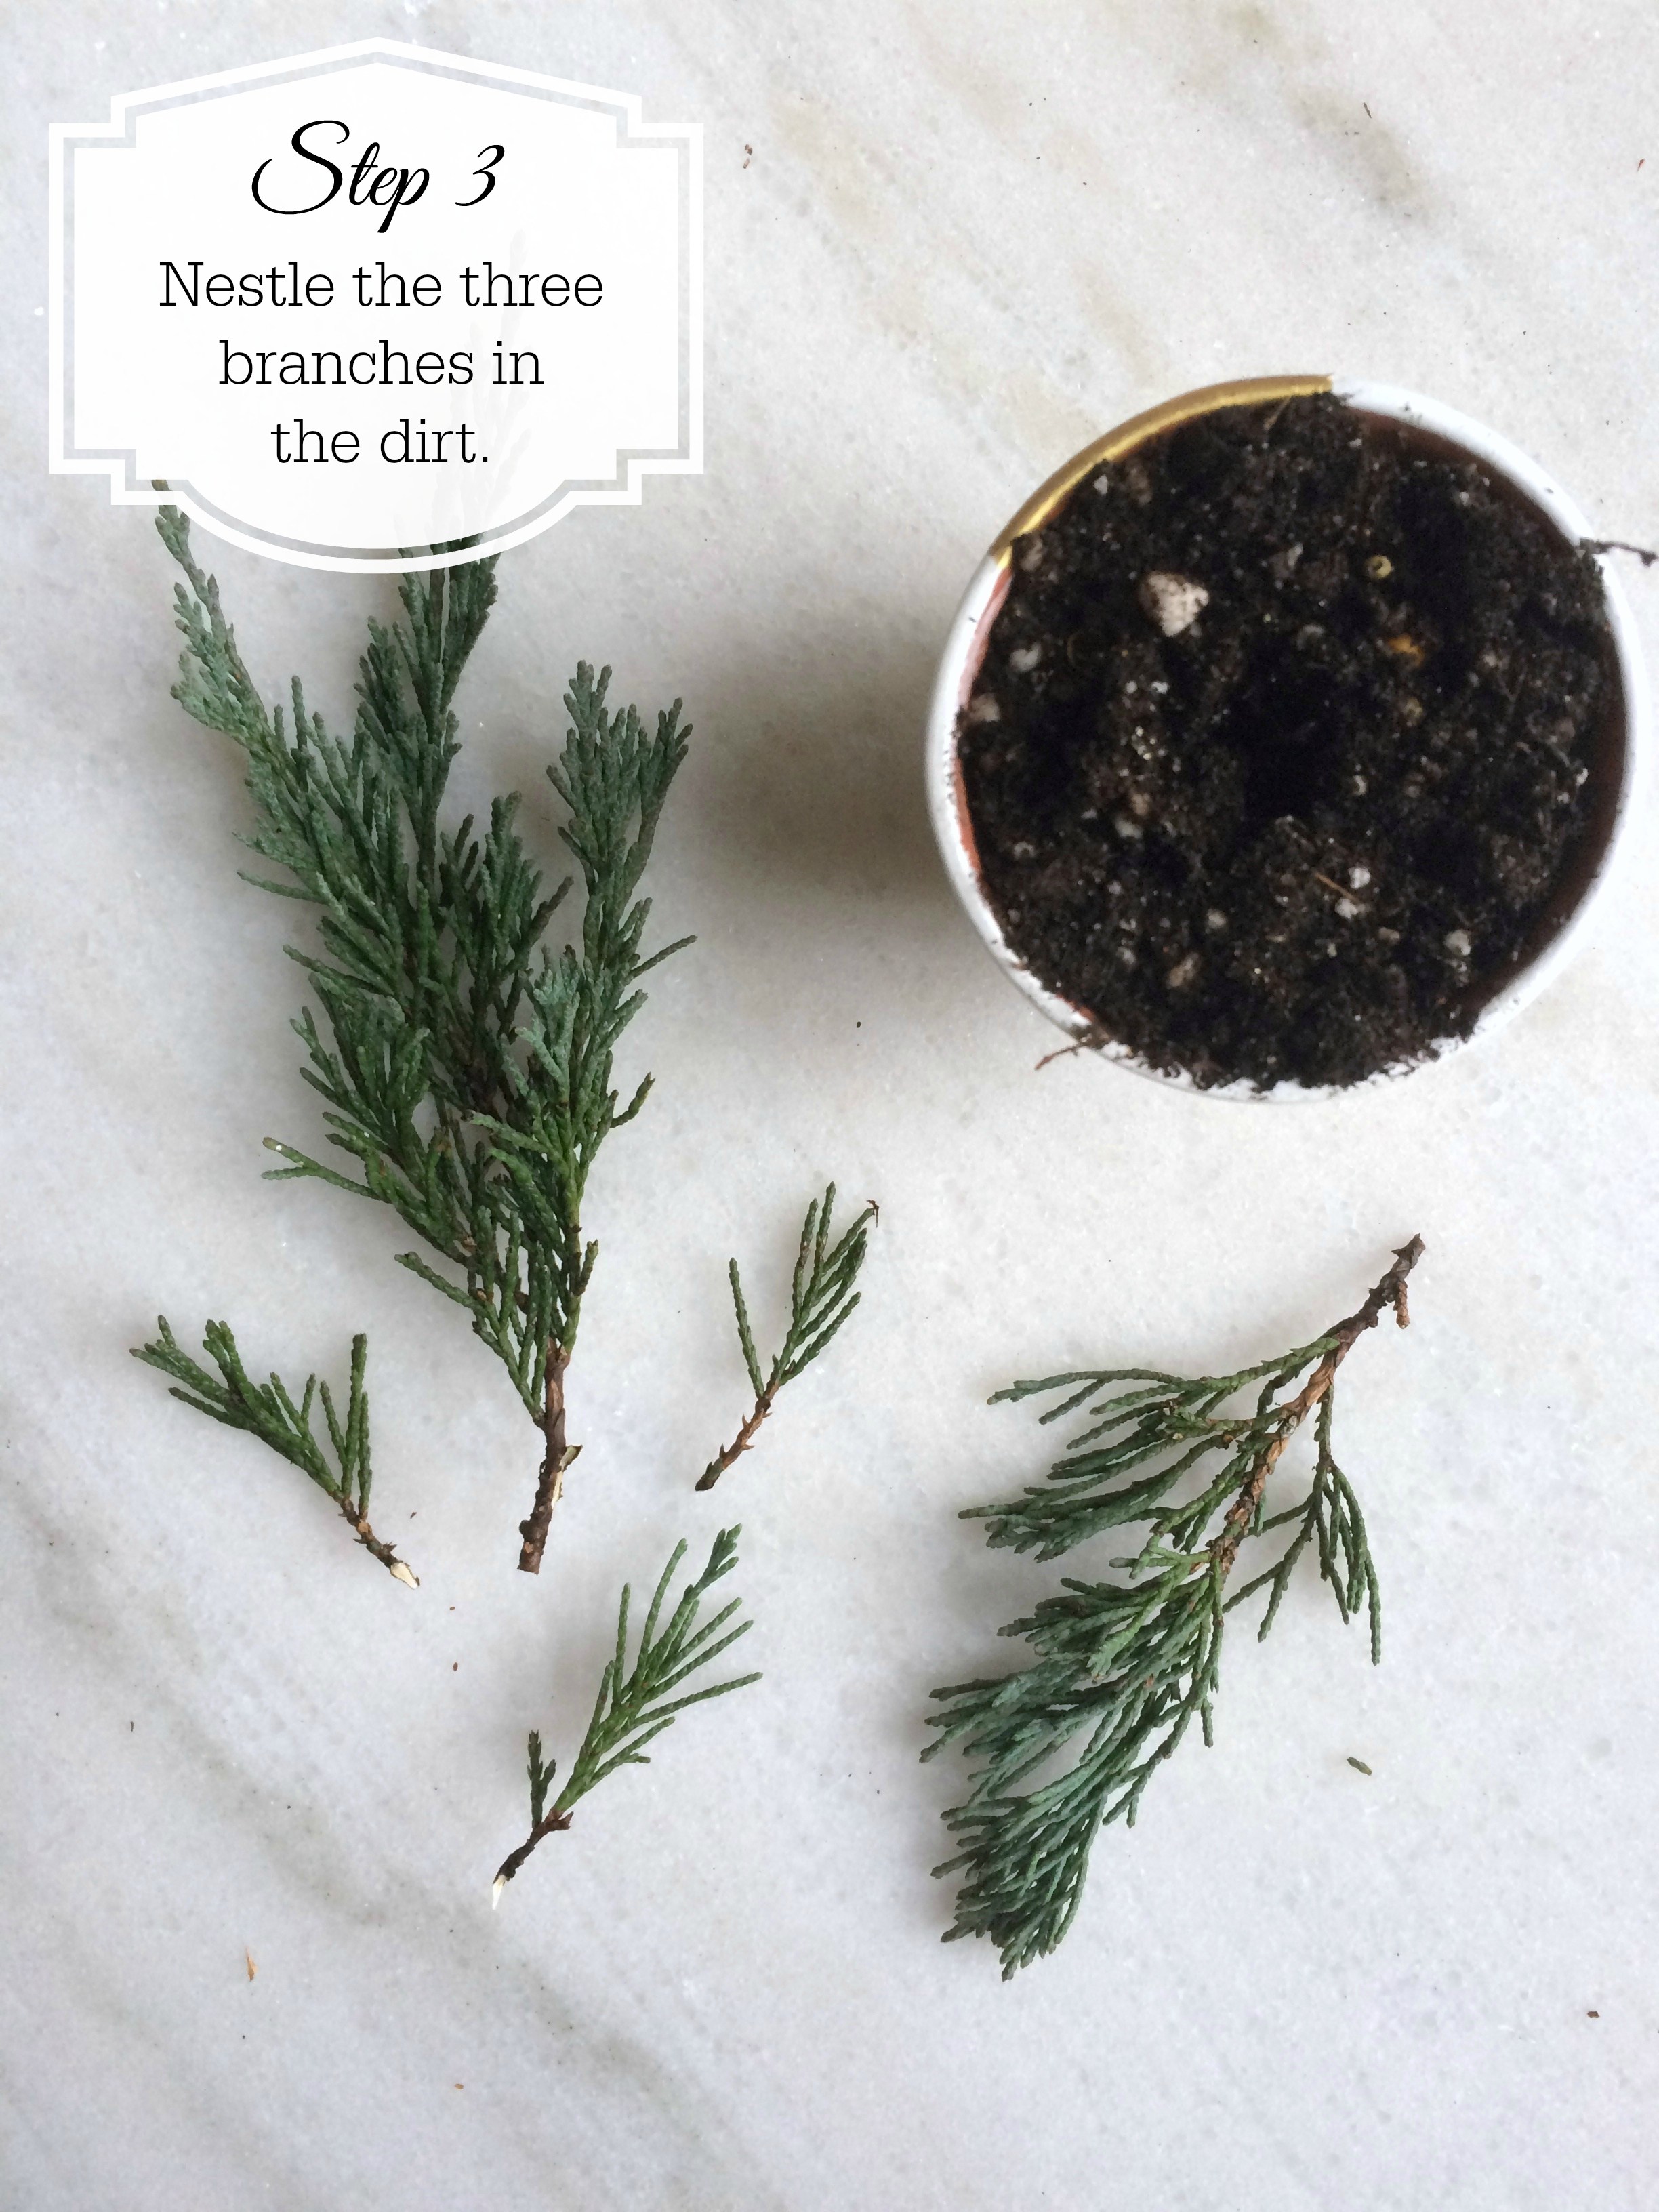
2. Fill your pot with dirt all the way to the top edge.
3. Take the three branches and nestle them in the dirt in the center of the pot.
https://jsevents.com/wp-content/uploads/2021/08/logo-pink-1030x925.png00Jessica Swagmanhttps://jsevents.com/wp-content/uploads/2021/08/logo-pink-1030x925.pngJessica Swagman2015-12-18 13:54:552015-12-18 13:54:55DIY Christmas Tree Favor
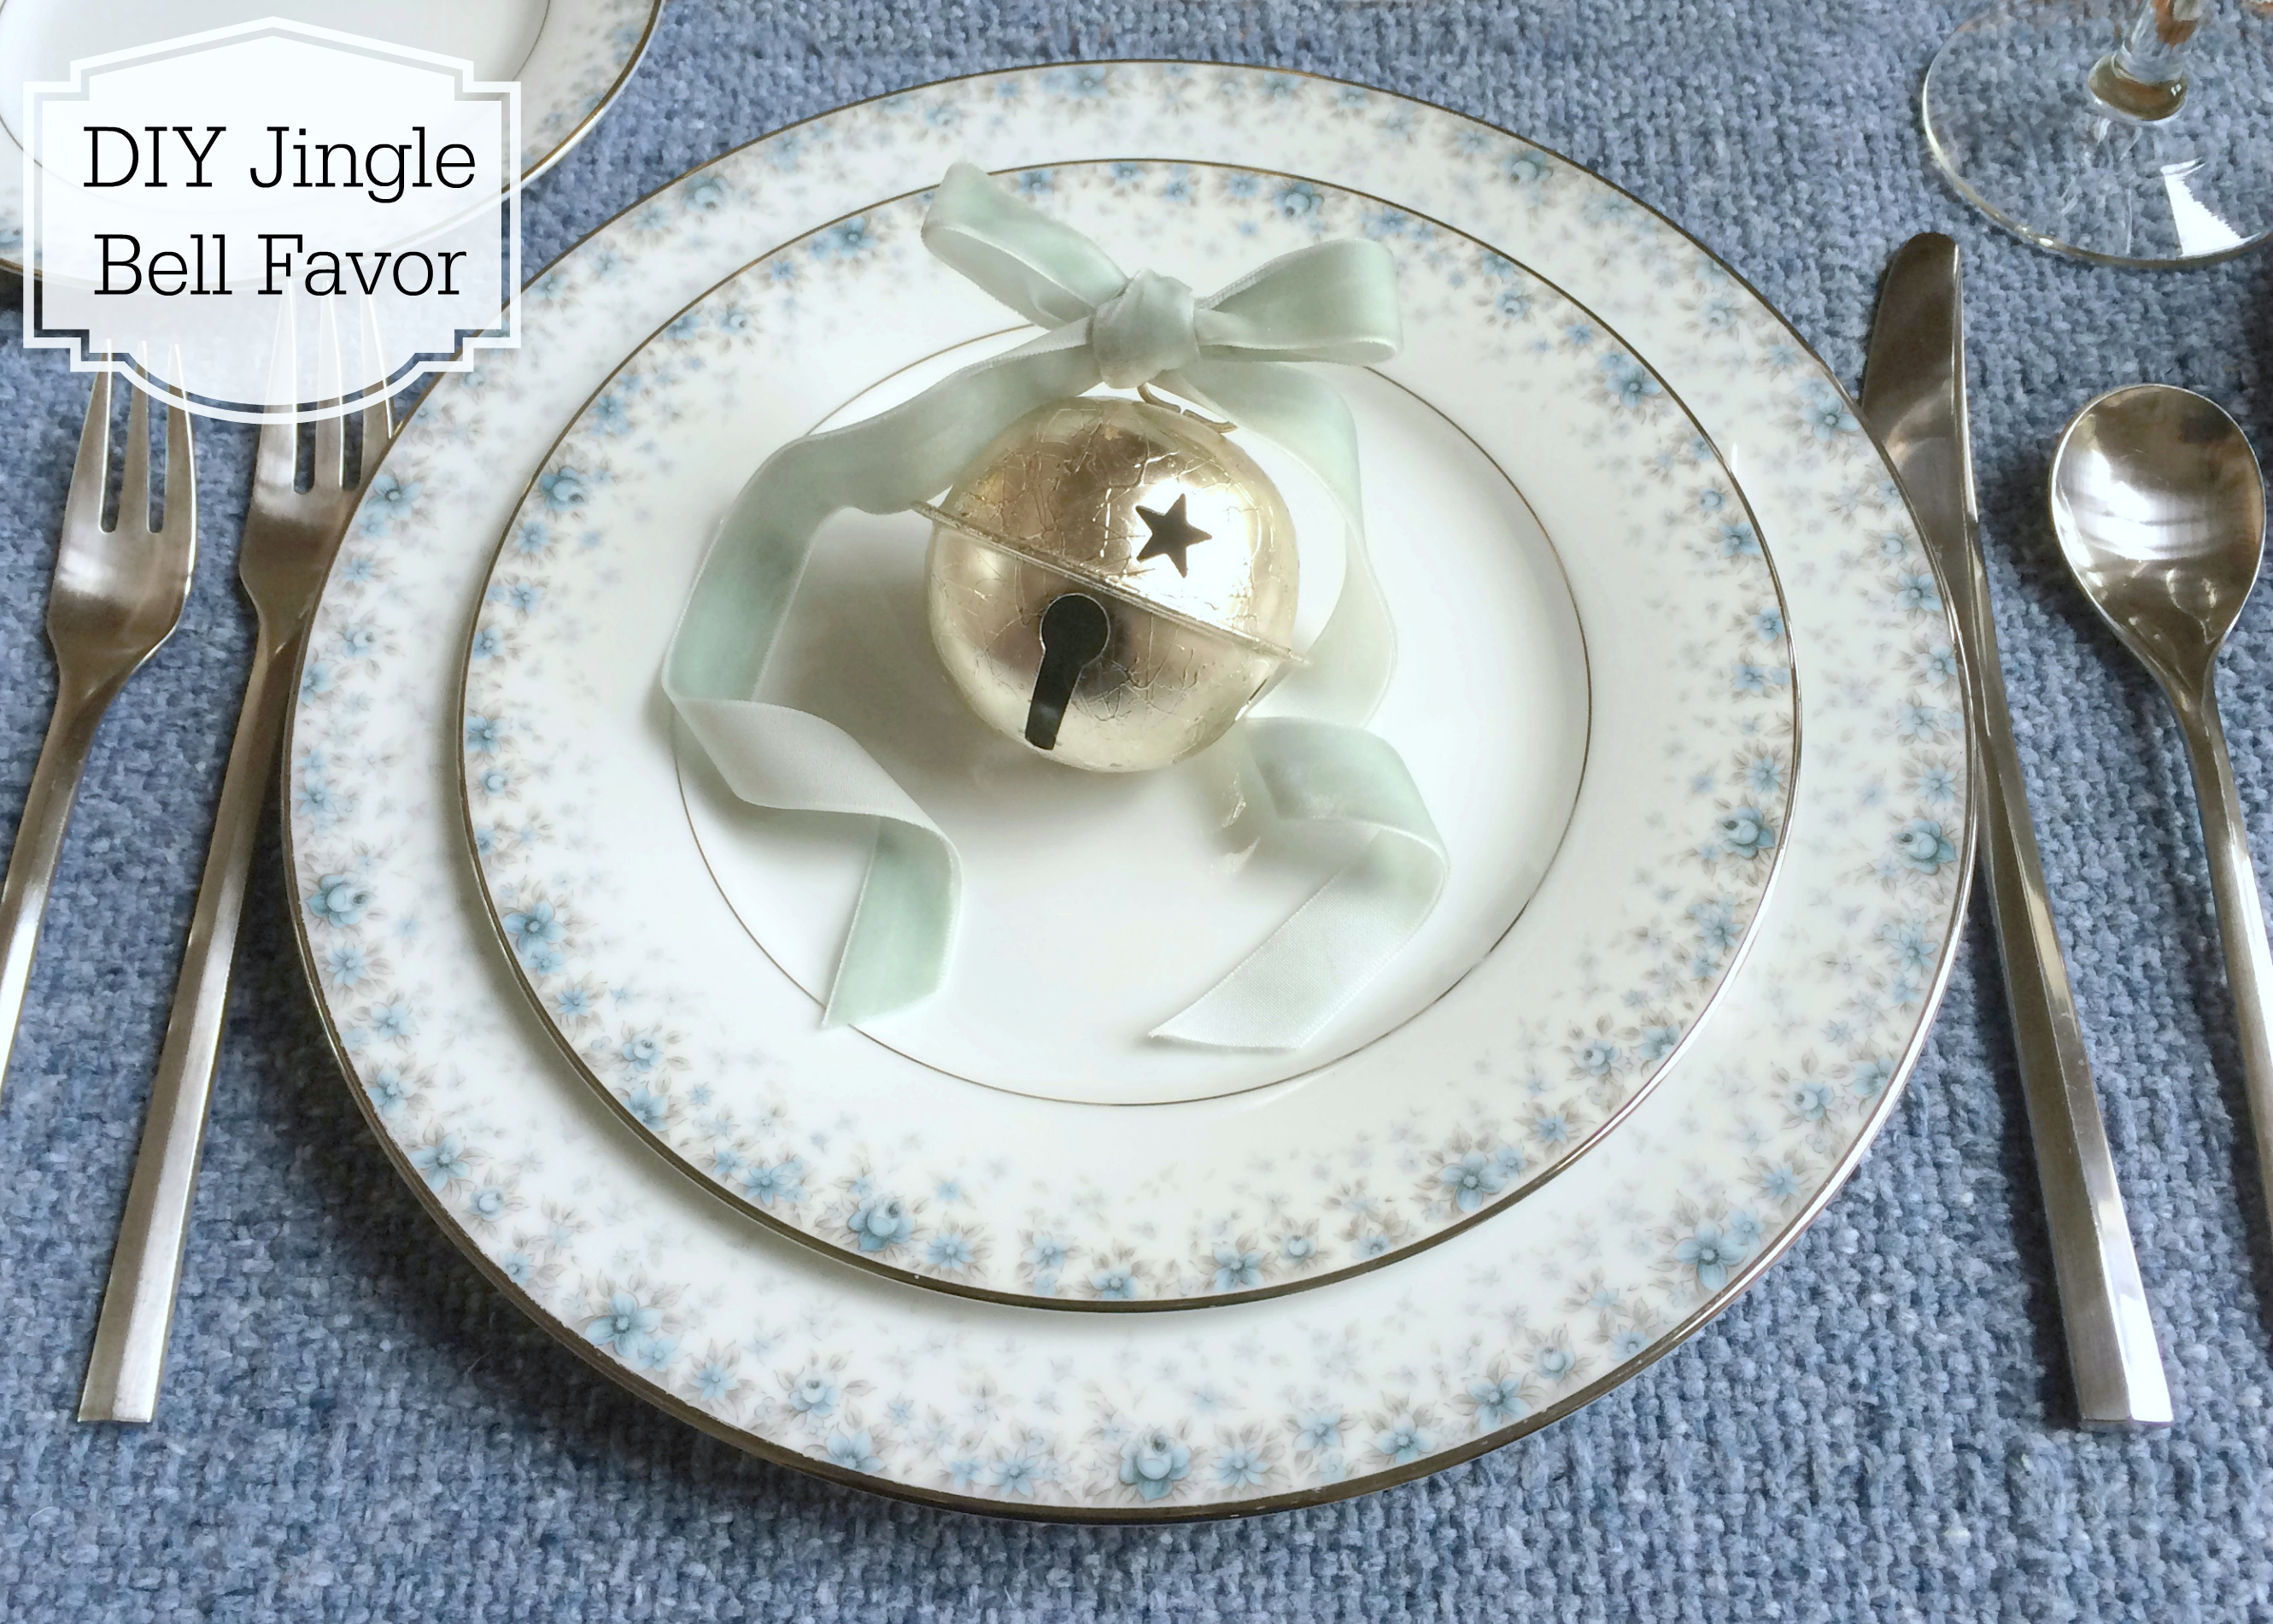
“What I wanted more than anything was one silver bell from Santa’s sleigh.” Chris Van Allsburg, The Polar Express
Growing up, every Christmas, my parents would read us The Polar Express. The book was gifted to my brother in 1986 from my parents, who even had Chris Van Allsburg write him a little message. Over the years, some of the pages have wrinkled and the dust jacket has acquired a few small tears, but all of these things indicate that this book has been well loved.
A wonderful children’s book and the simple gift of a bell is the inspiration for this DIY.
I know that the holidays can be very busy for all of us, rushing around, shopping, attending party after party, and perhaps even hosting a party or two. For those of you that are hosting a holiday party, there is so much involved and sometimes you just don’t have time for the little things. Apart from having me help you, the one piece of advise I can give is to slow down, relax, and just enjoy this time of the year. Also, to do lists are a must and keep things simple!
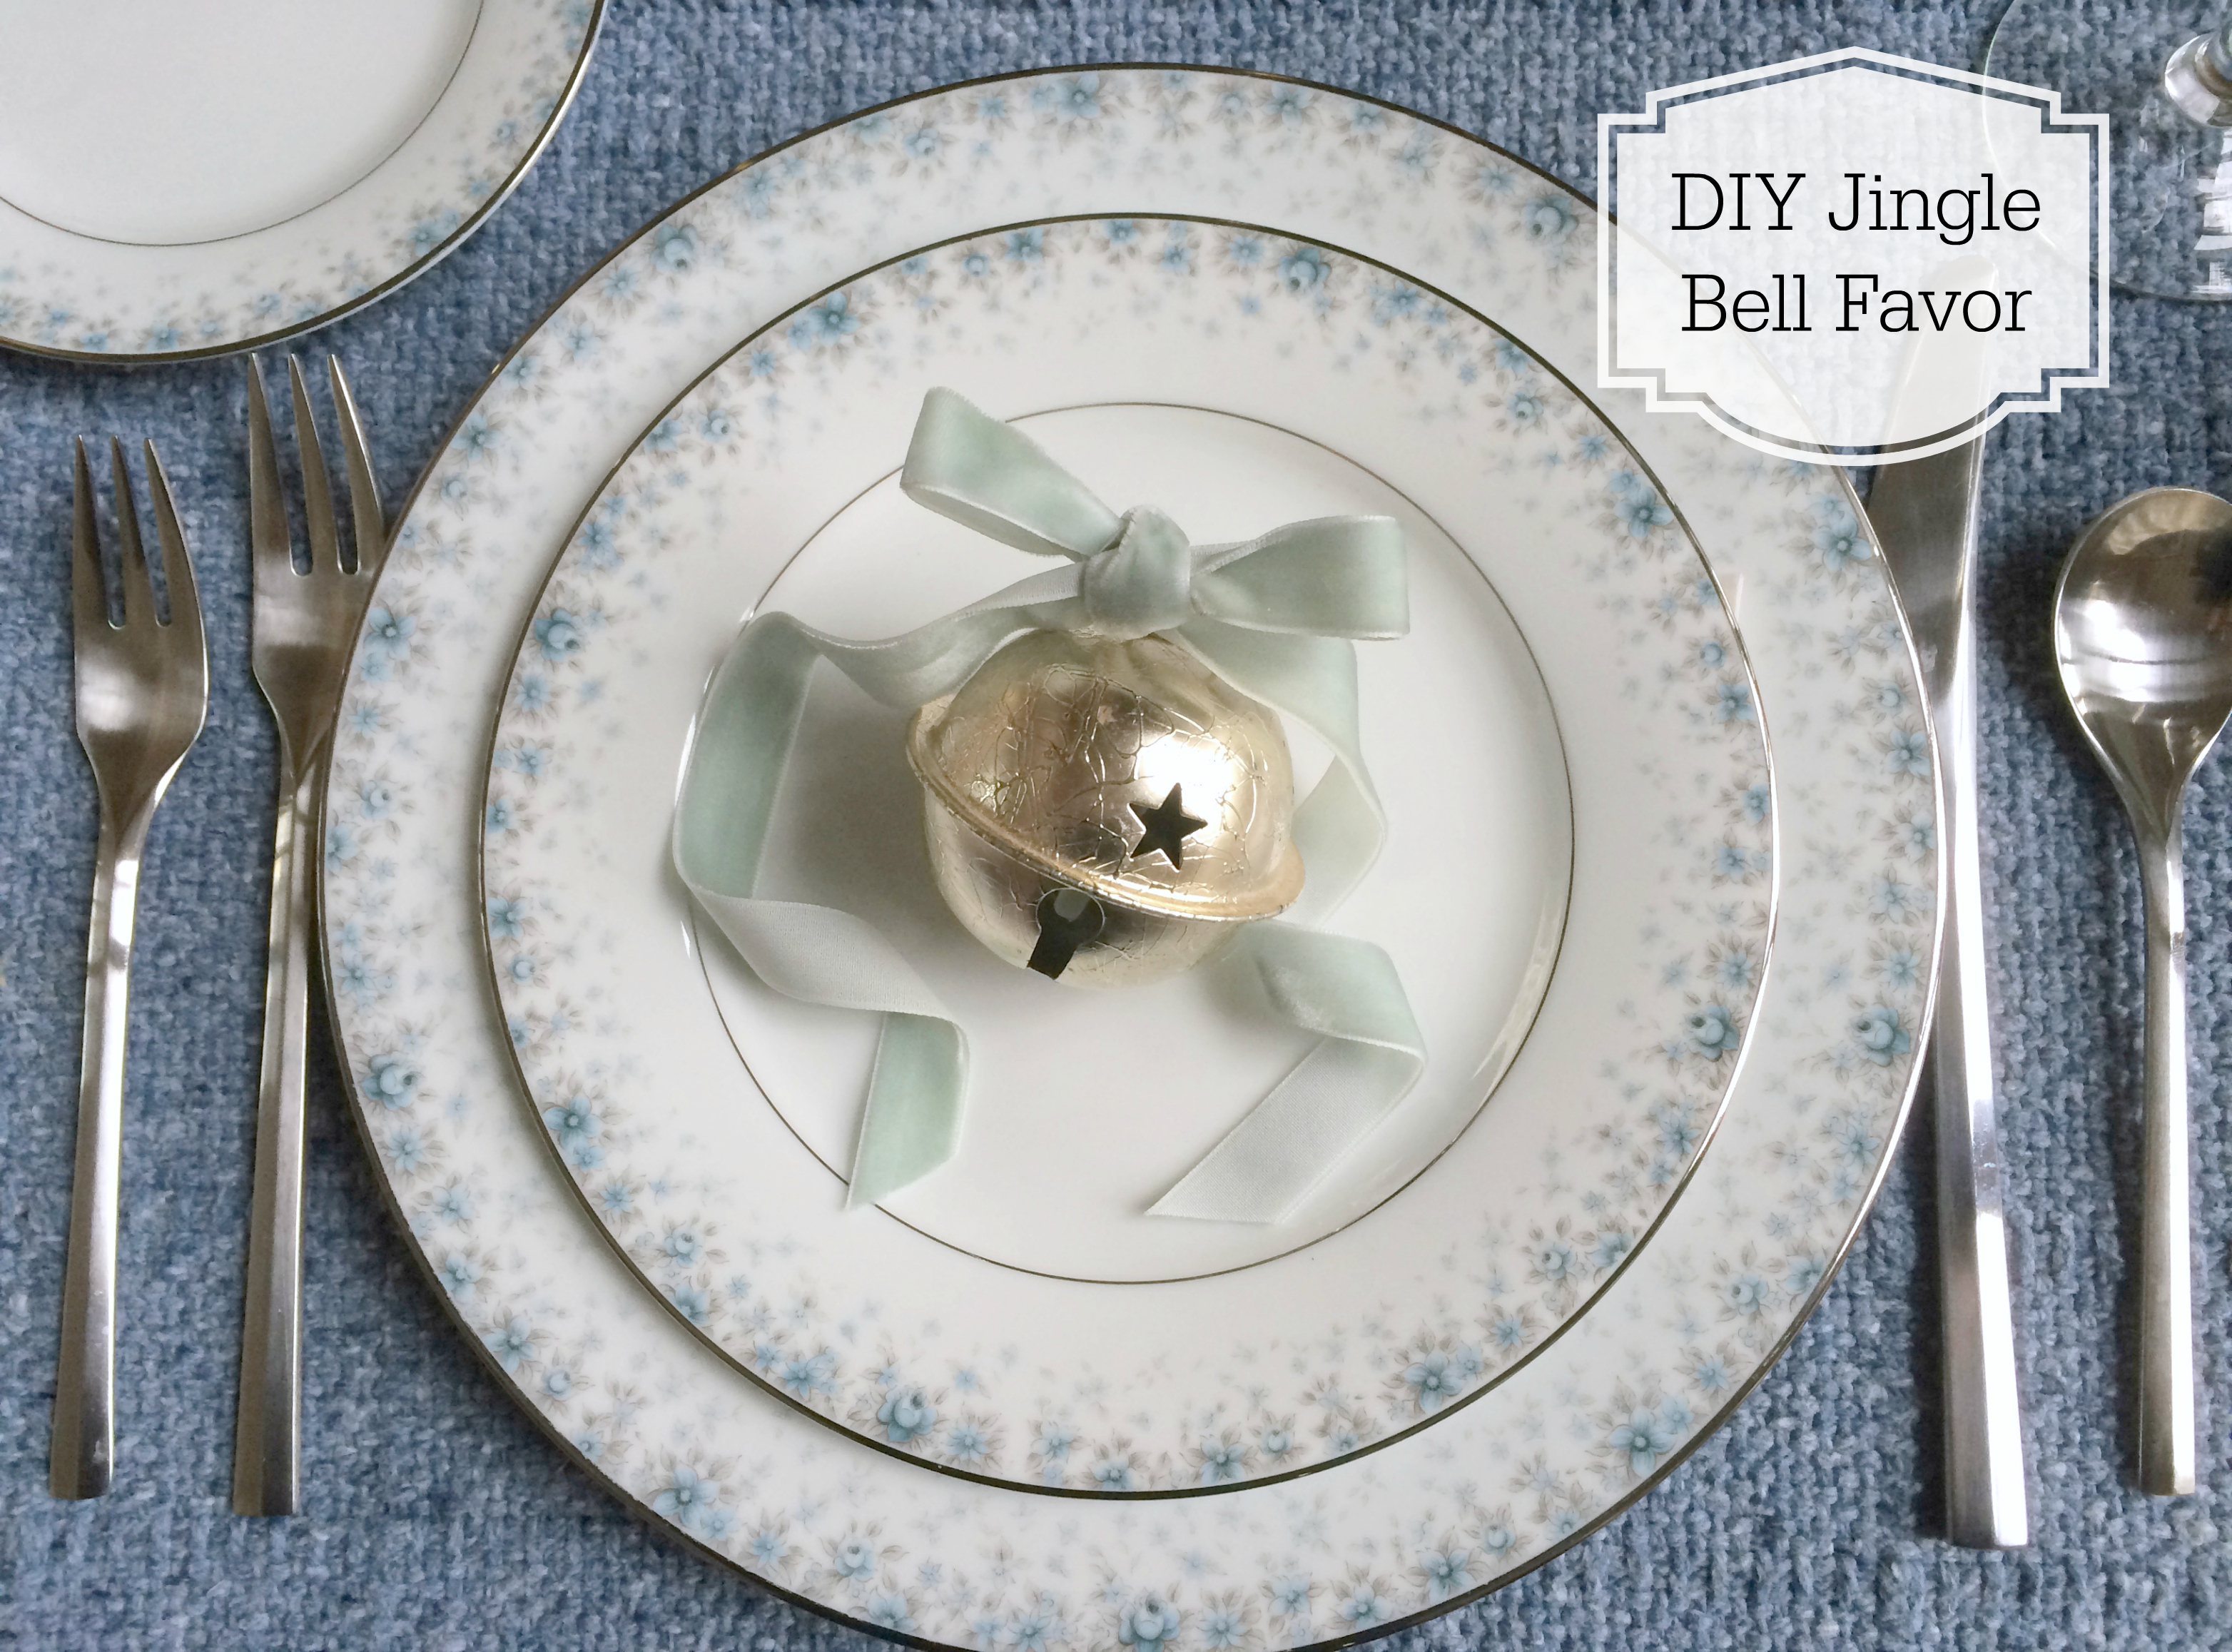
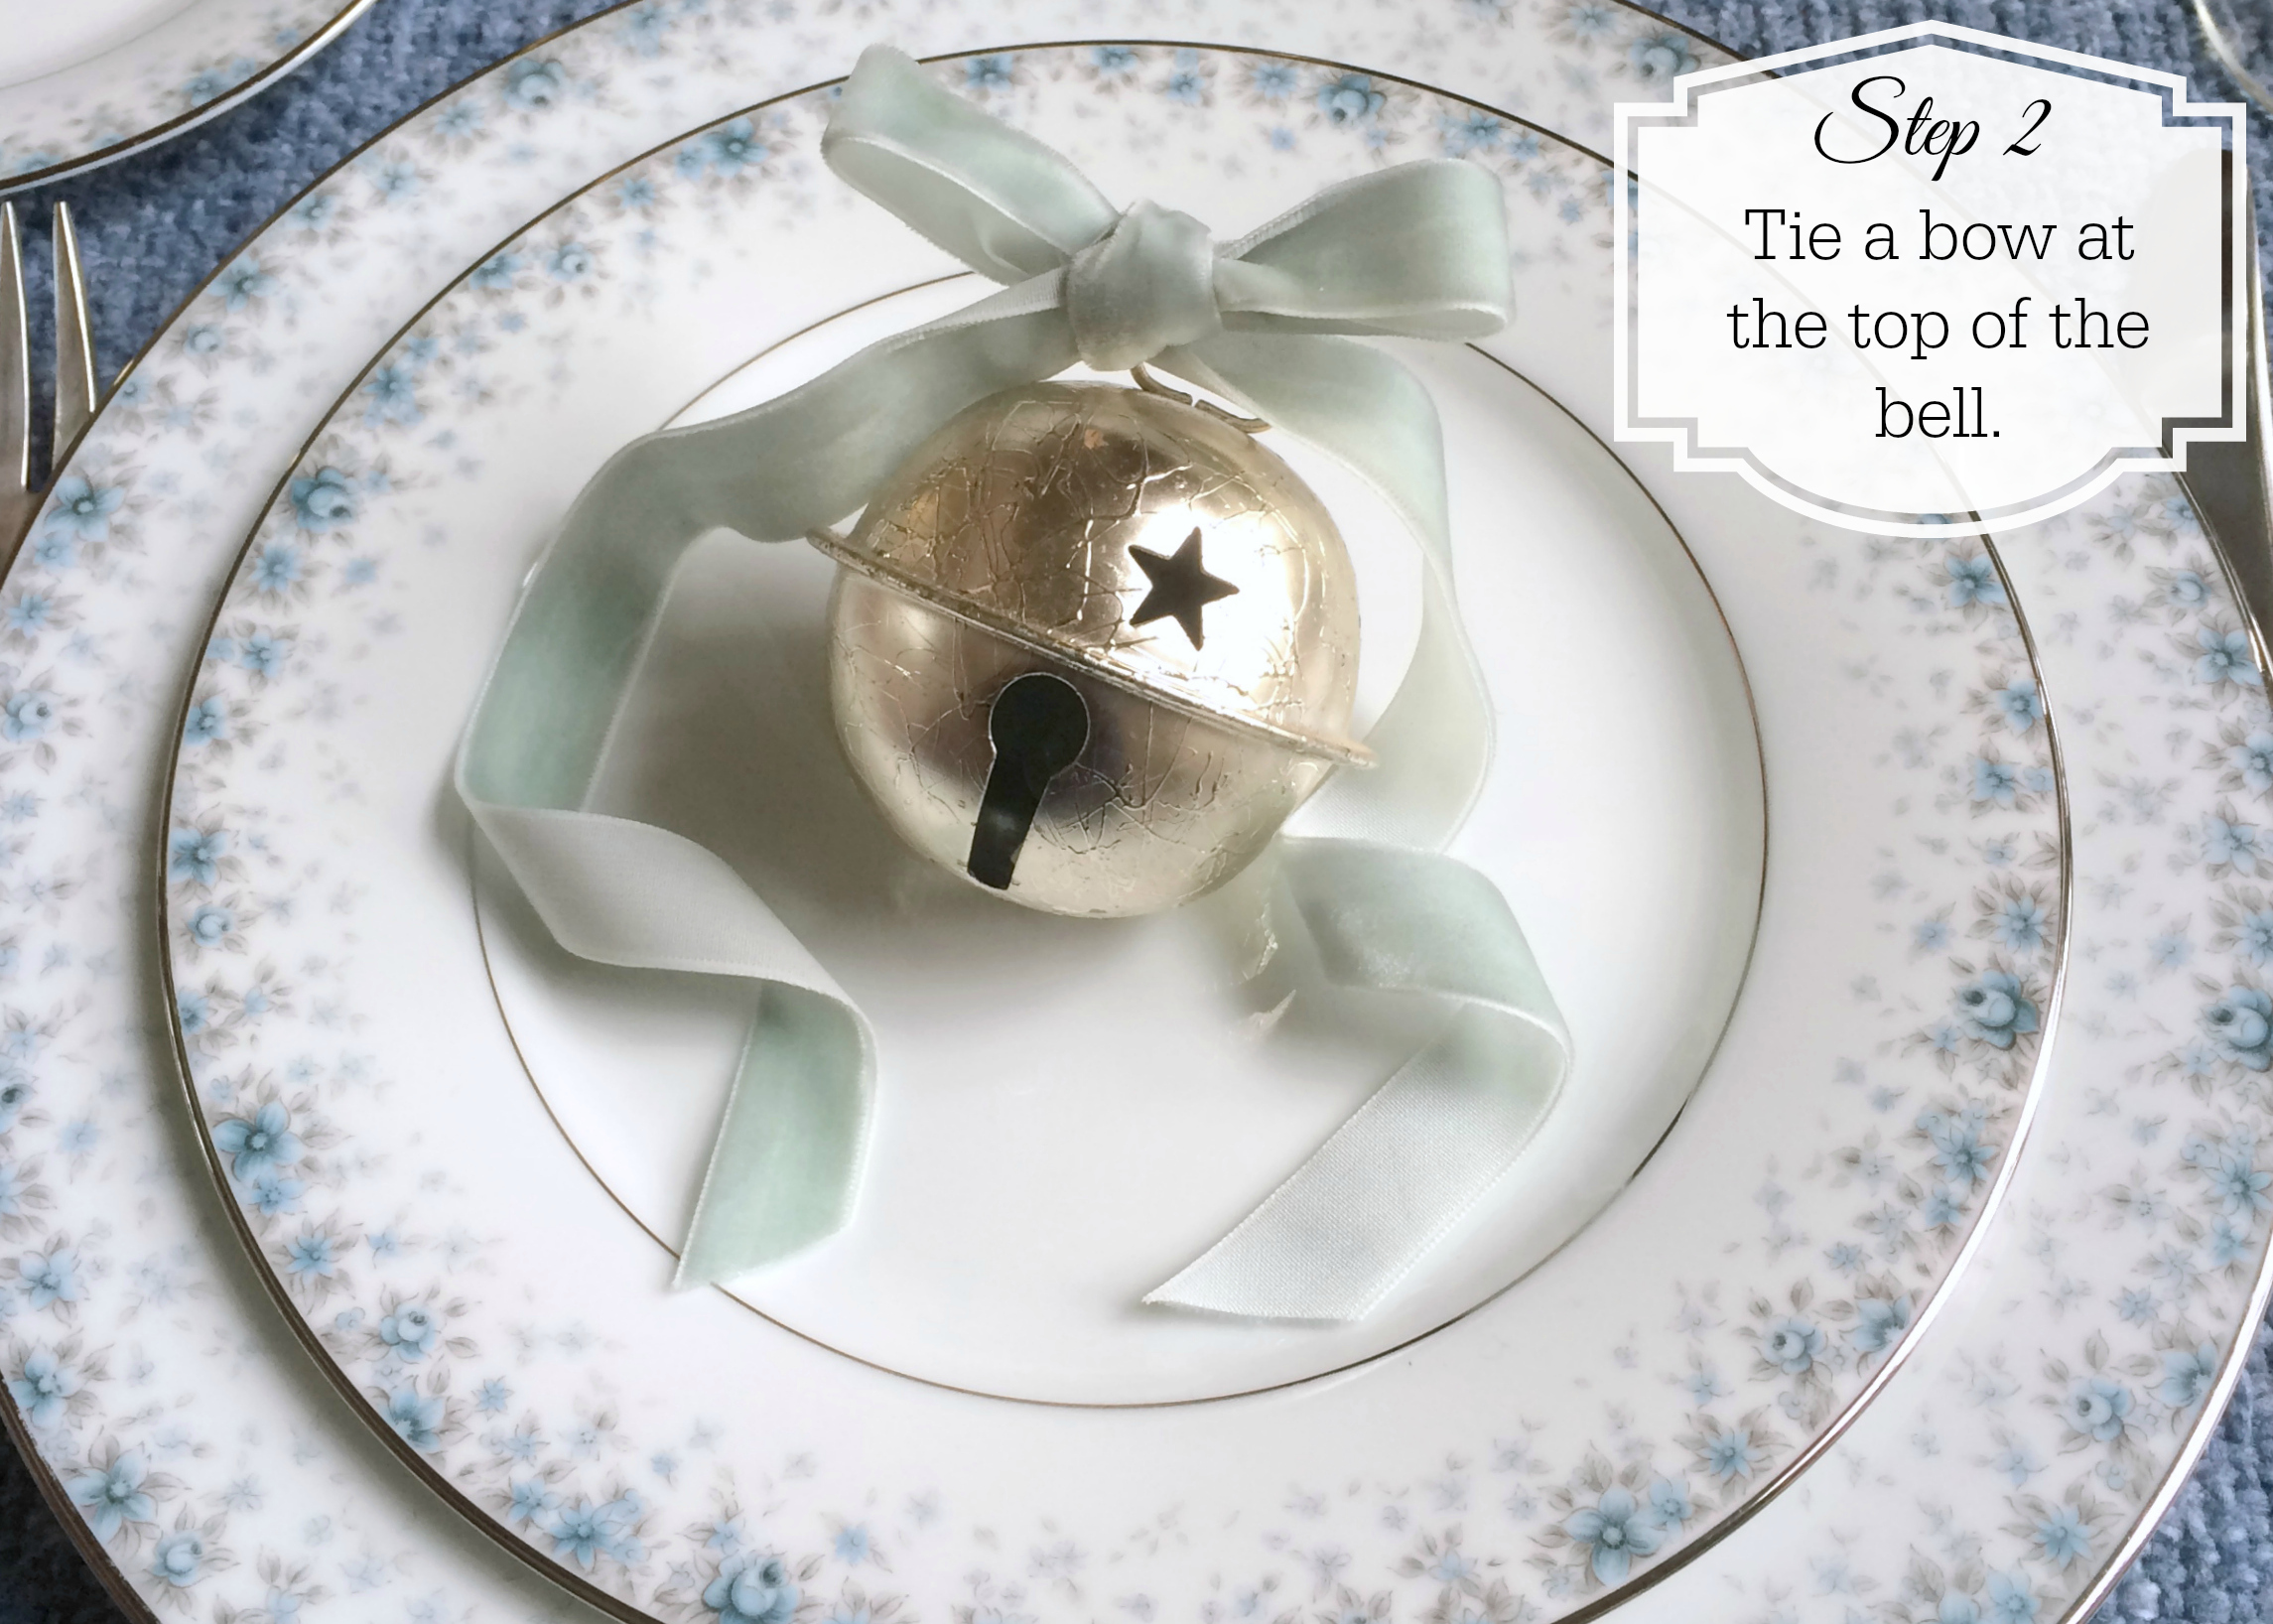
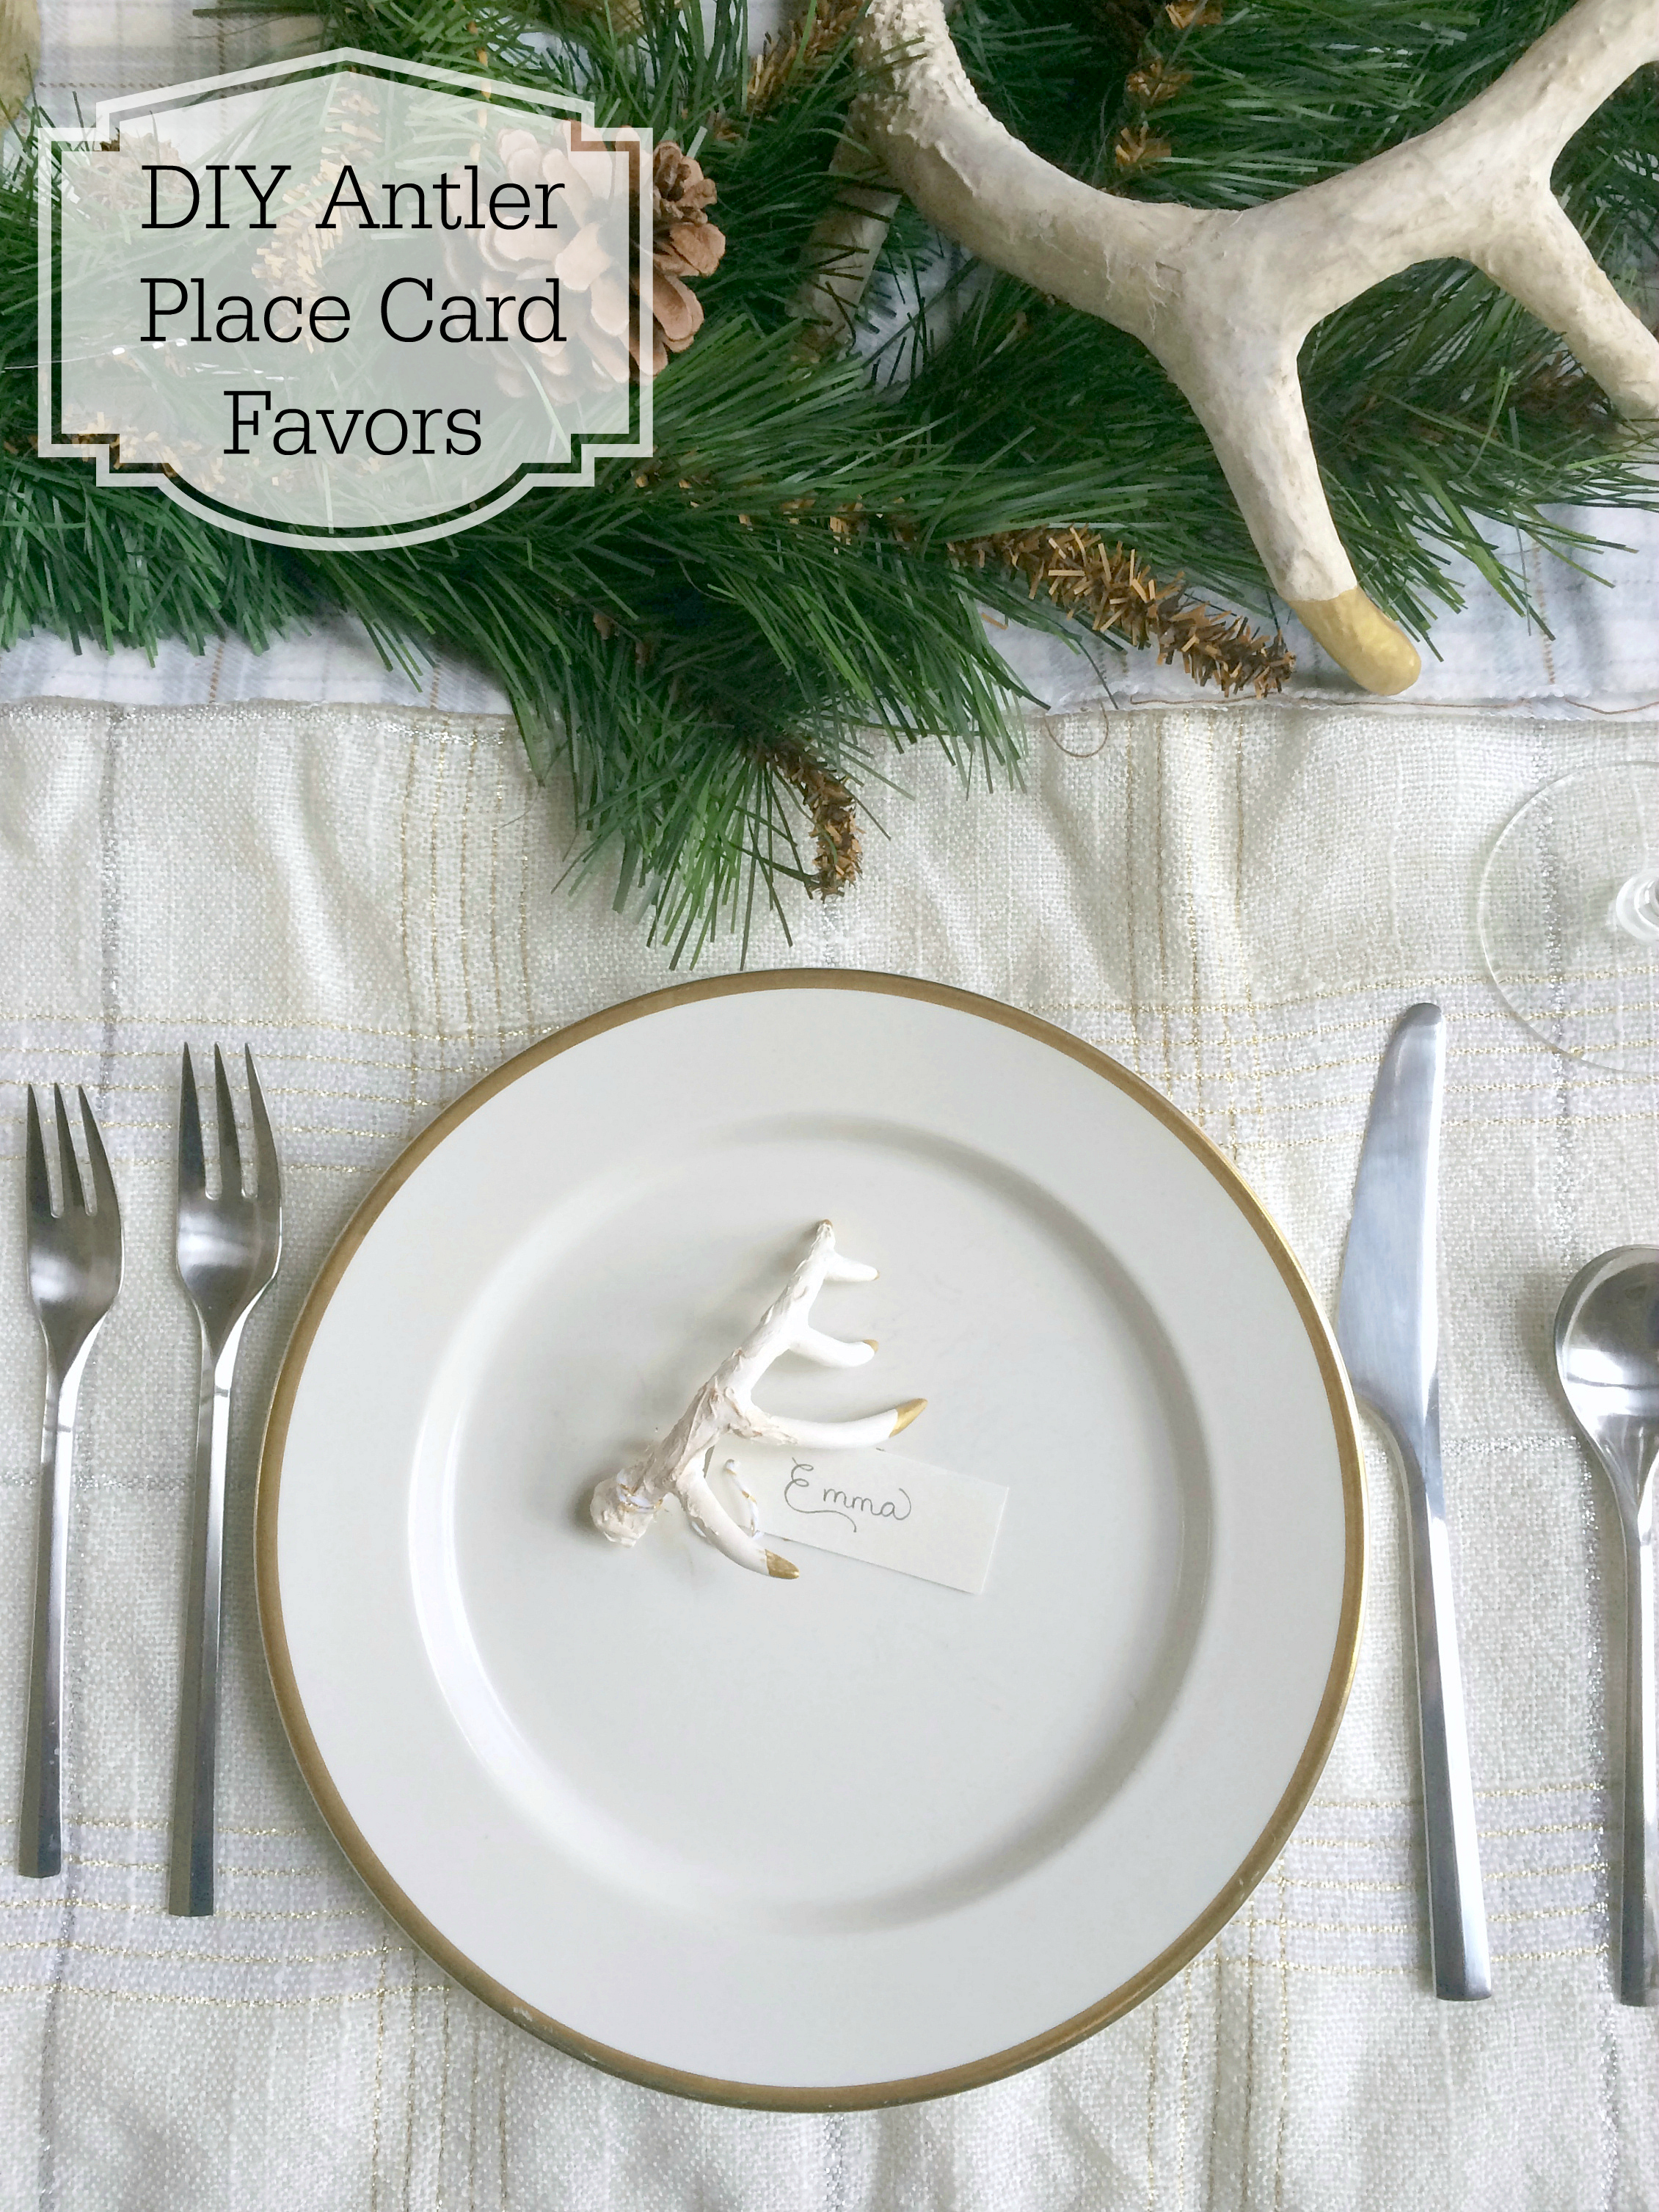
If you find yourself hosting a holiday dinner party, I have DIY favor that is super easy and can later be hung on the Christmas tree. If you want, you can even write the guest’s name on the bell and use it as a place card.
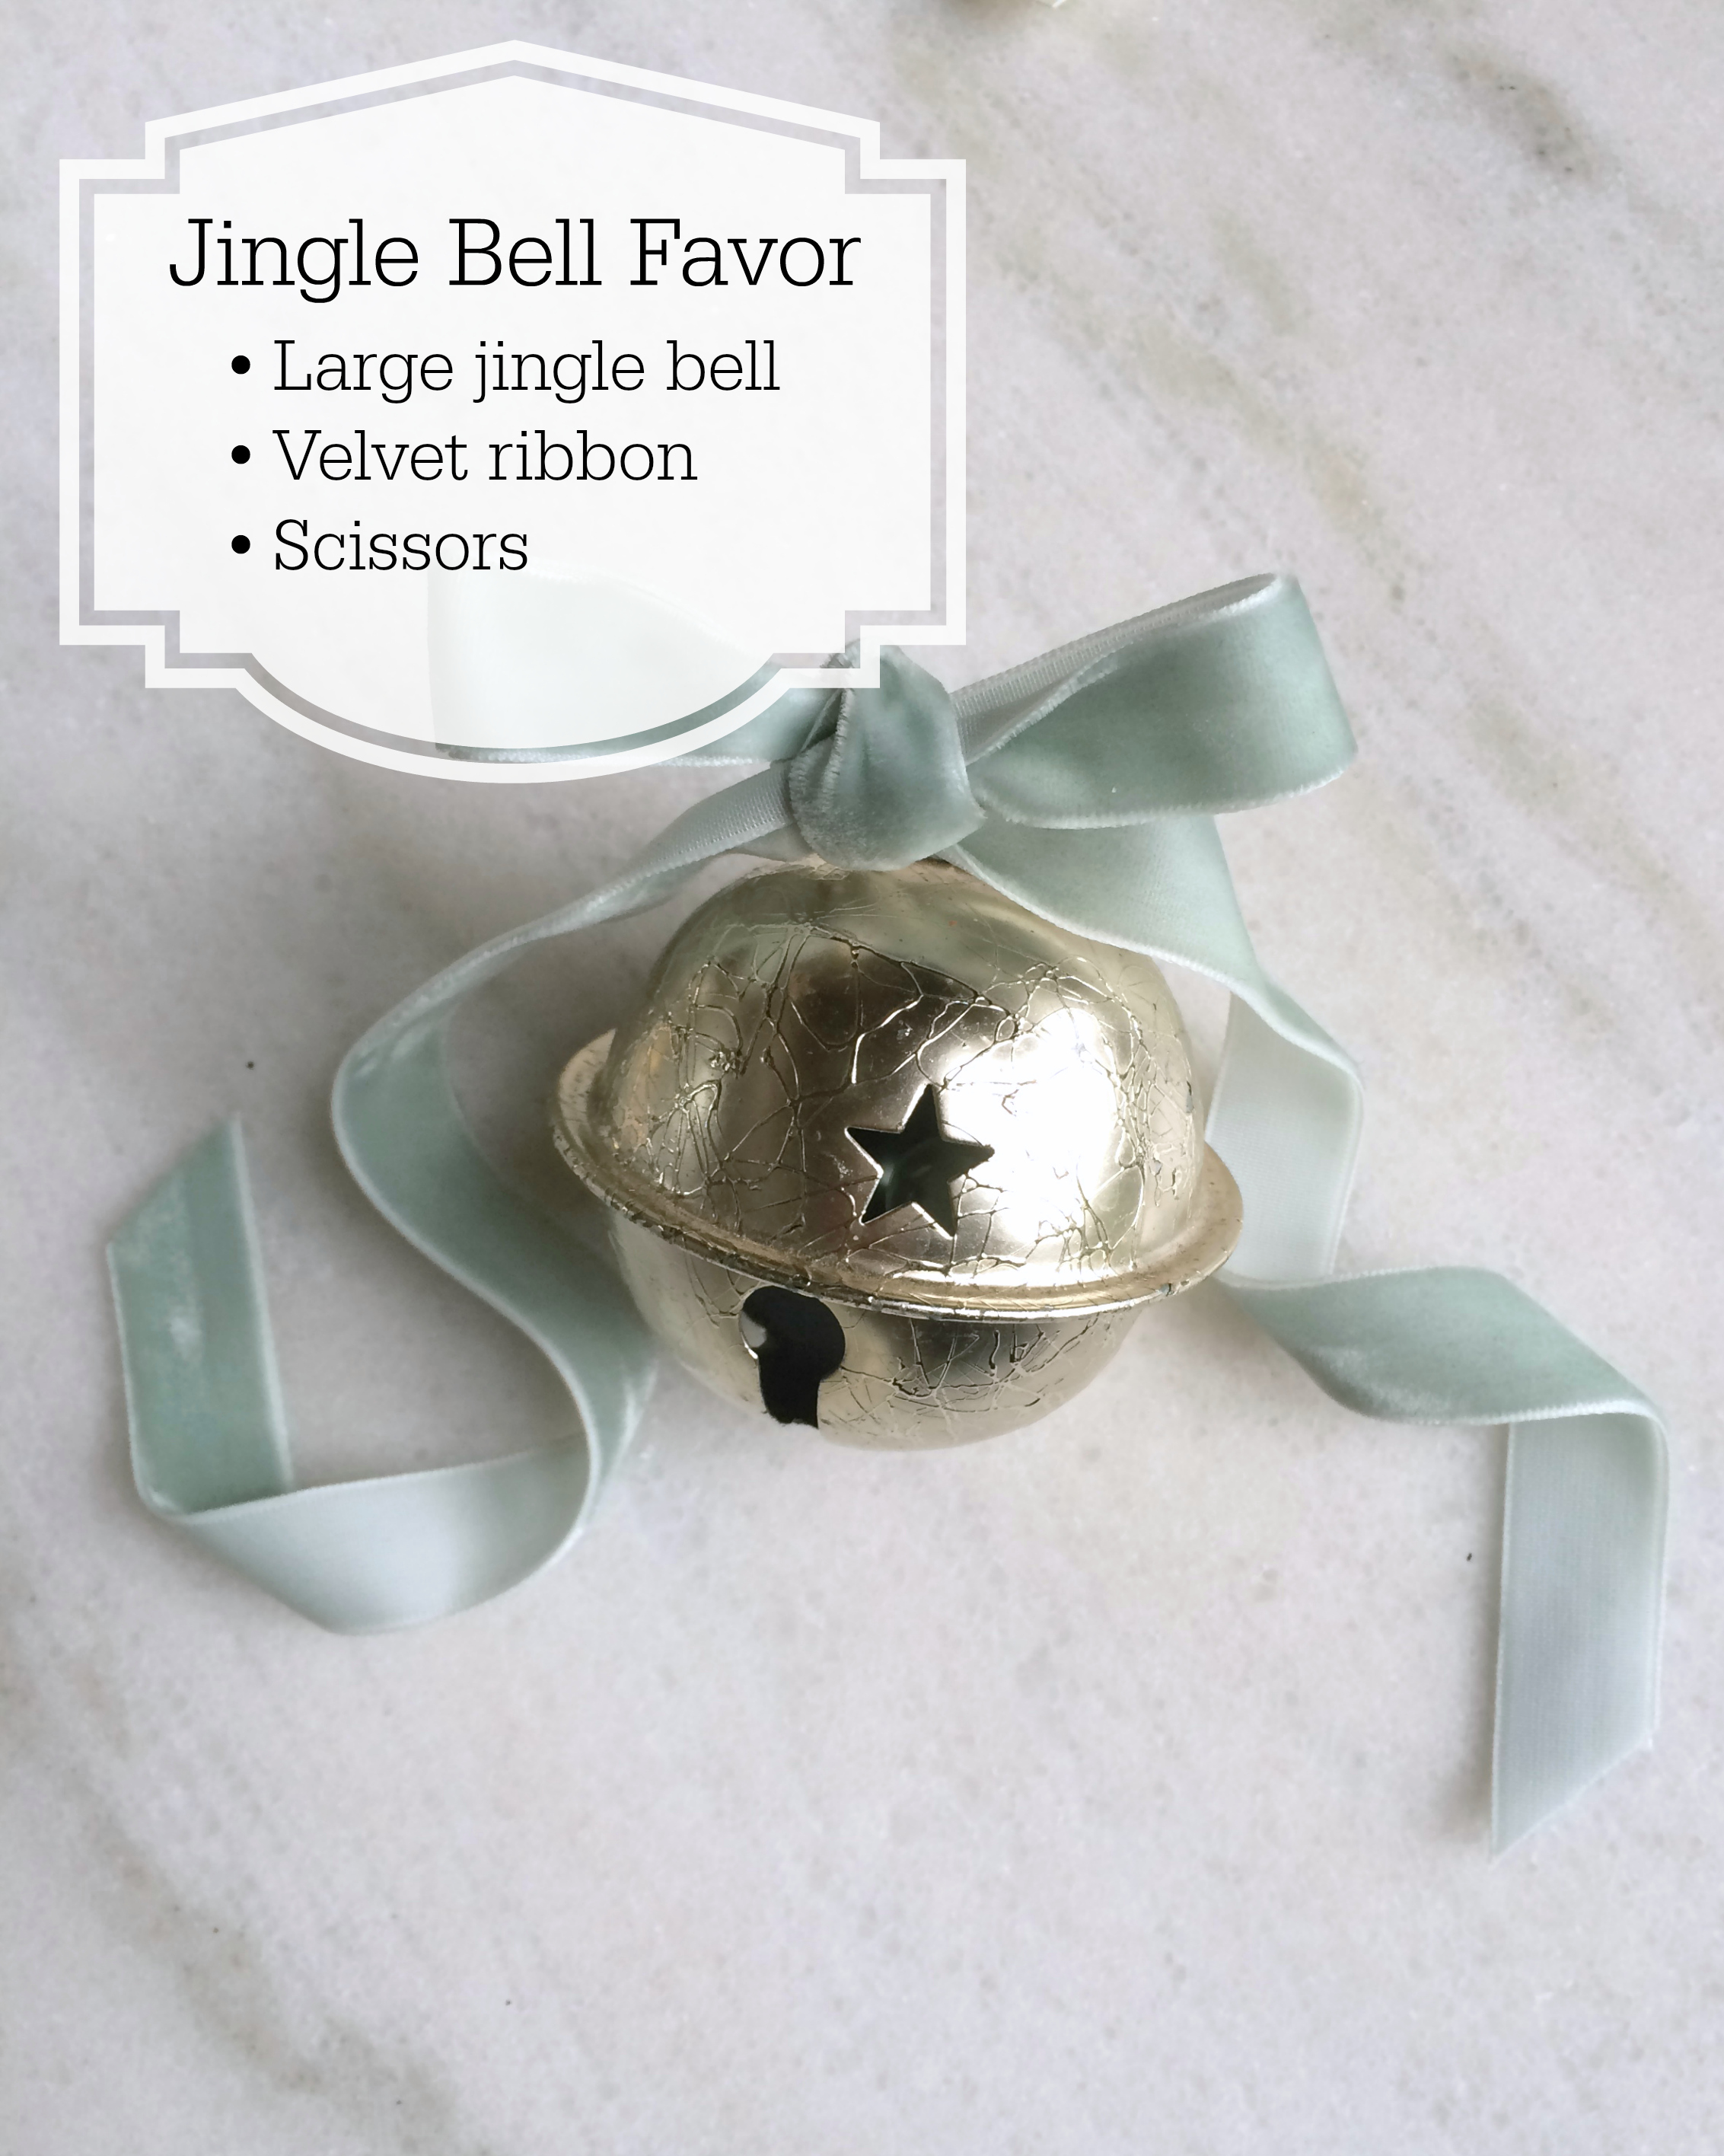
What you’ll need:
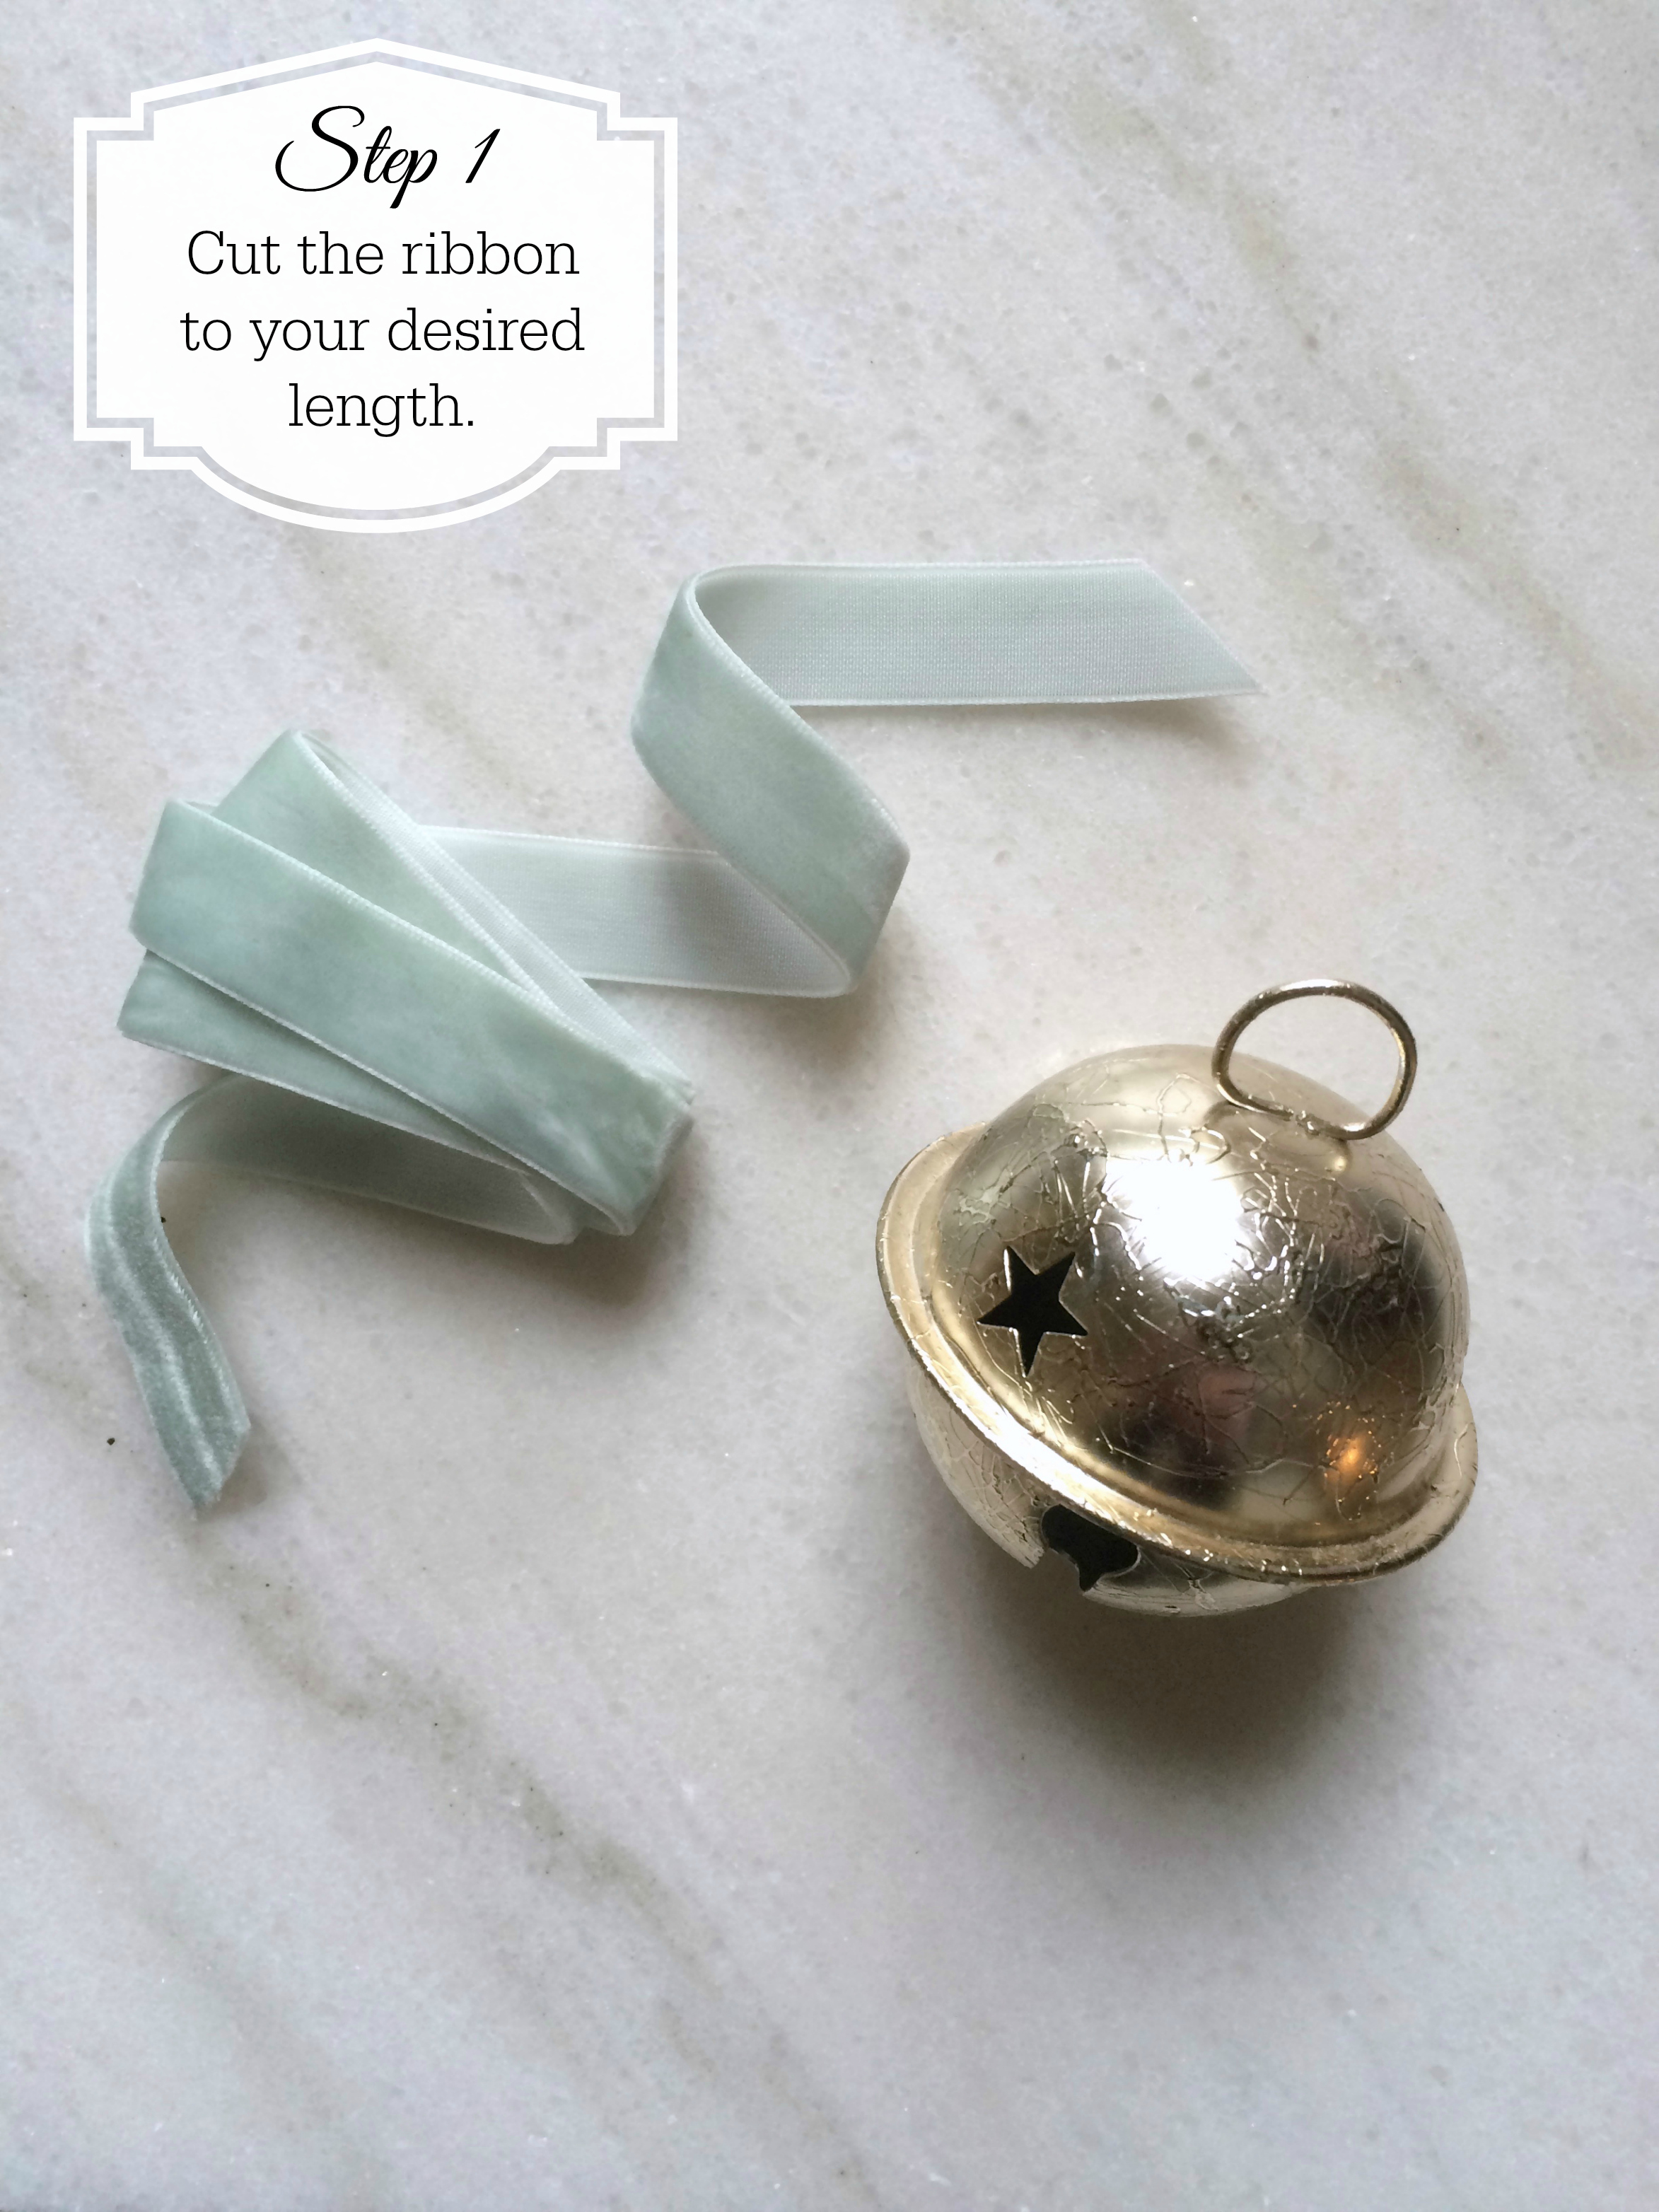
• Large jingle bell
• Velvet ribbon (⅝” wide)
• Scissors
“People are partying, songs are being sung, Sugarplums are dancing, all in holiday fun. Presents are under the tree, reindeer fly high above, peace on earth, goodwill to all, sending joy and love!” D.M. Dellinger
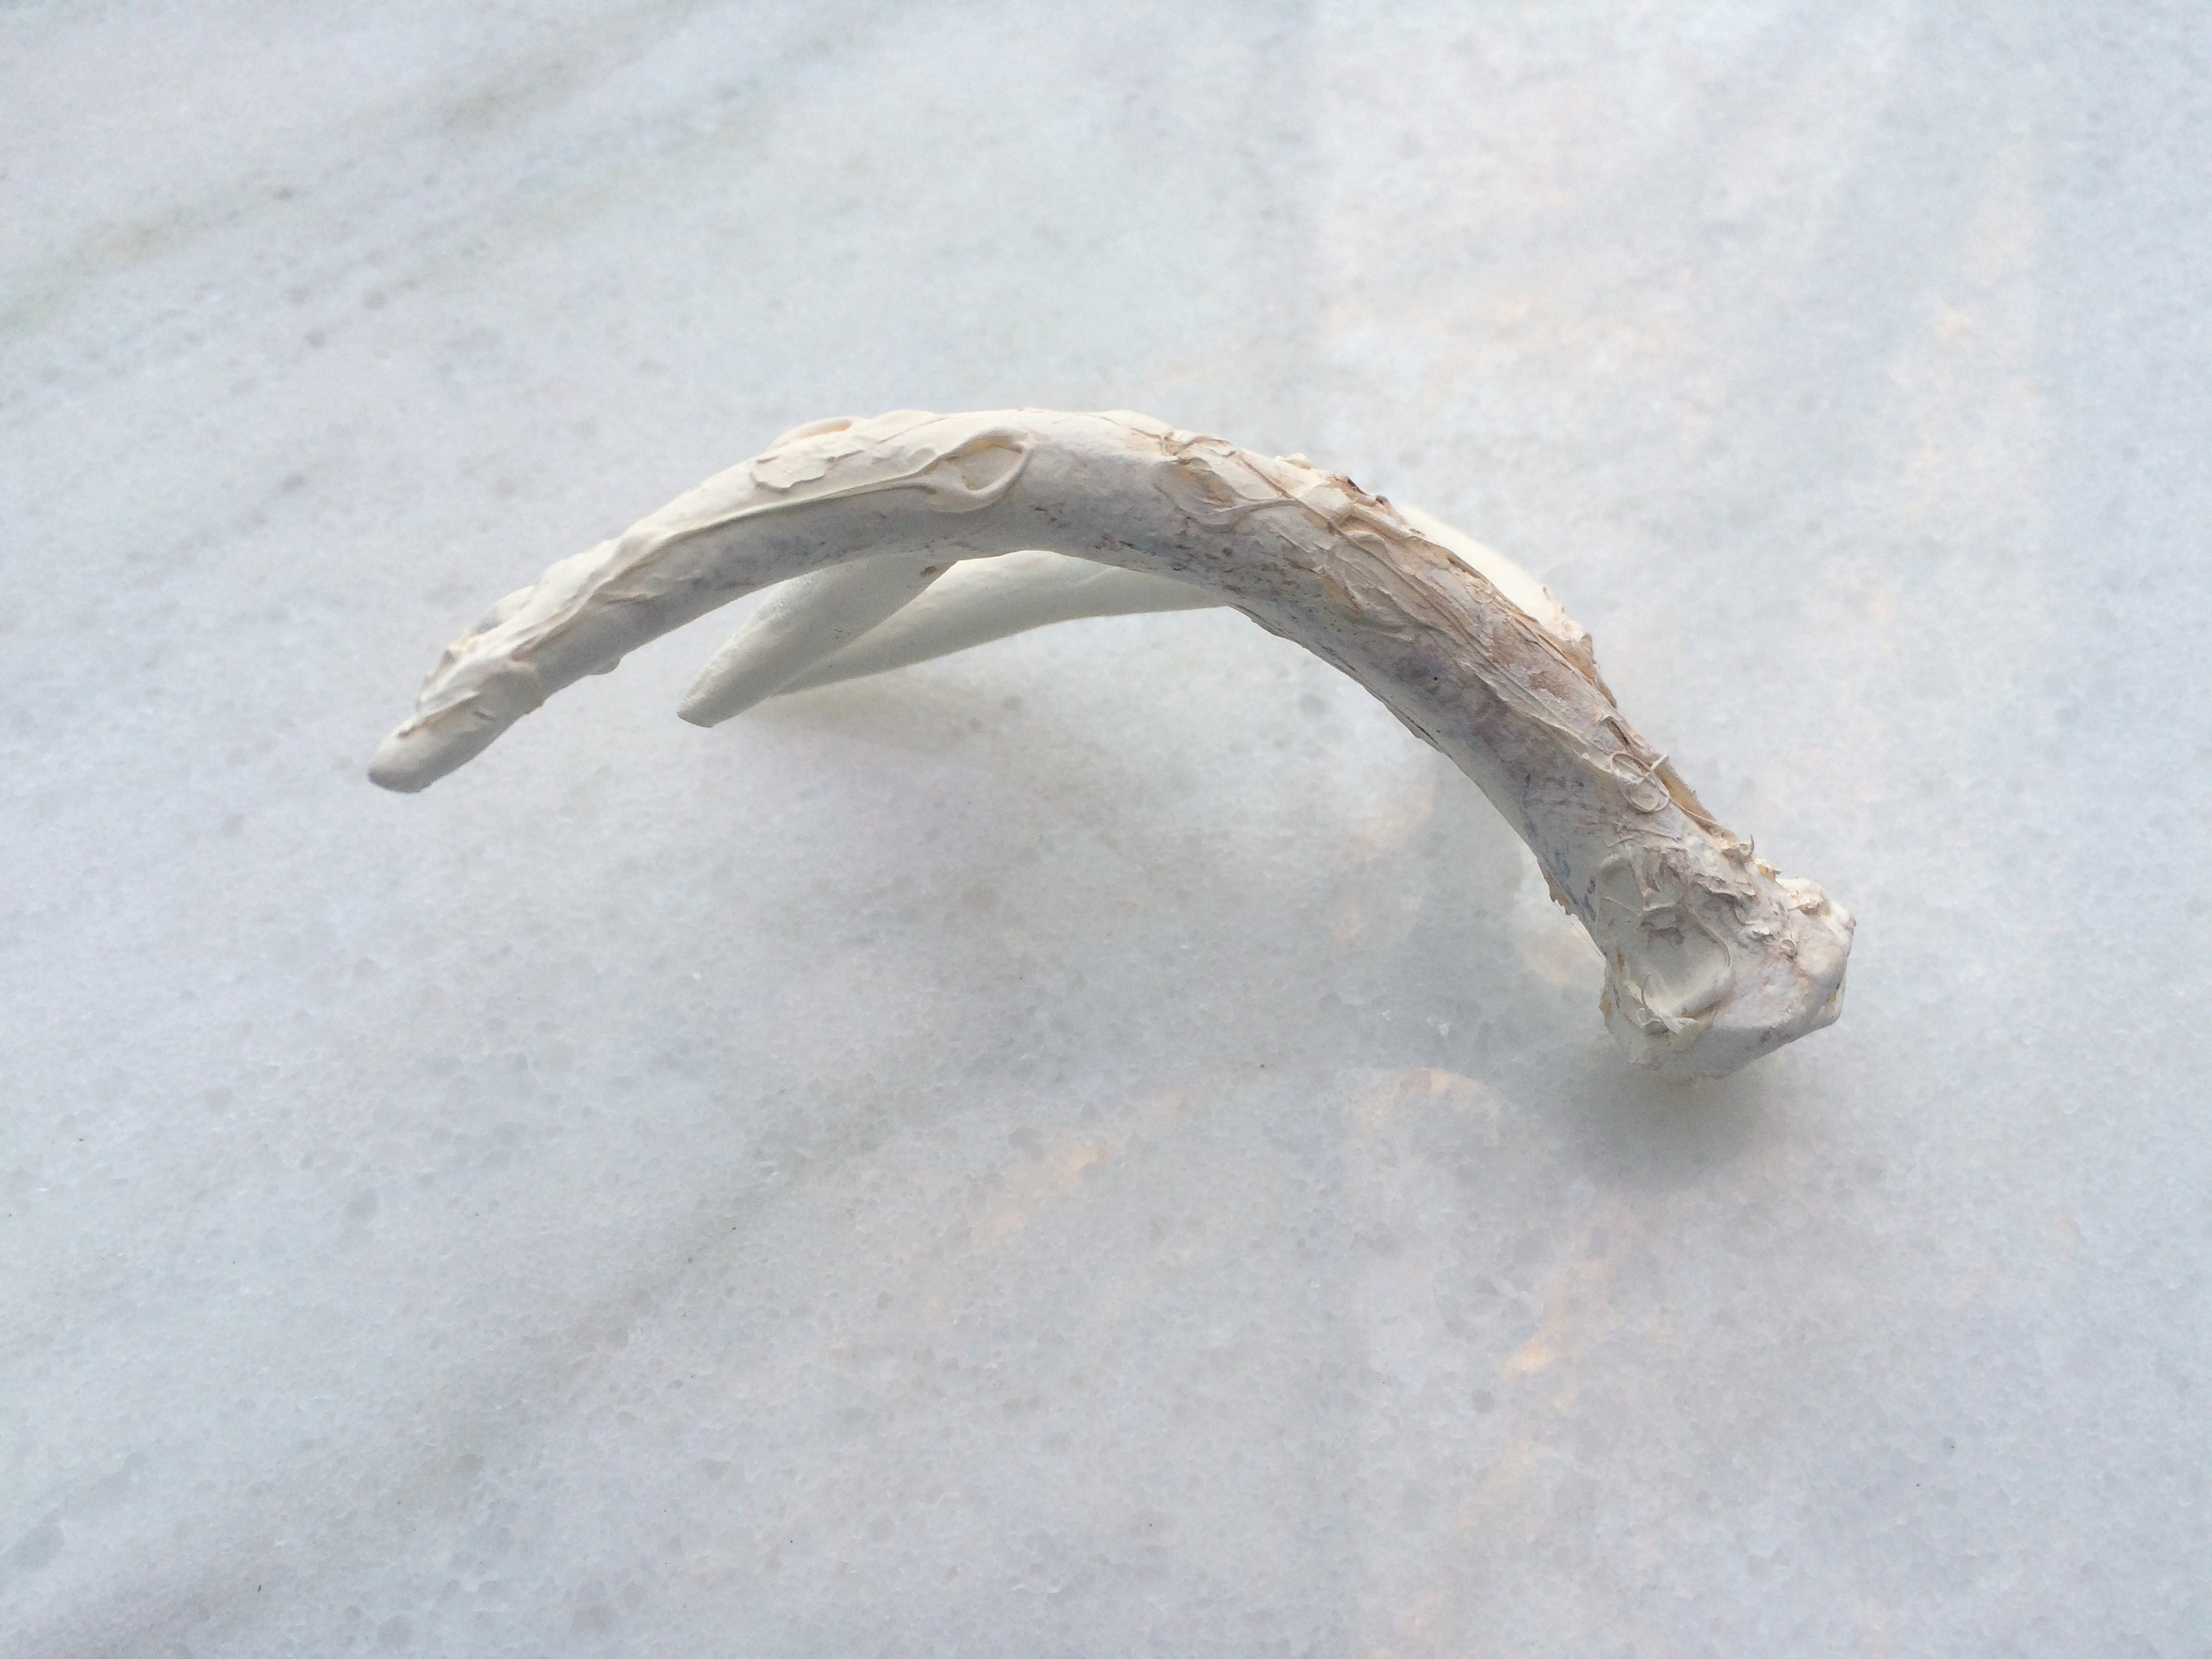
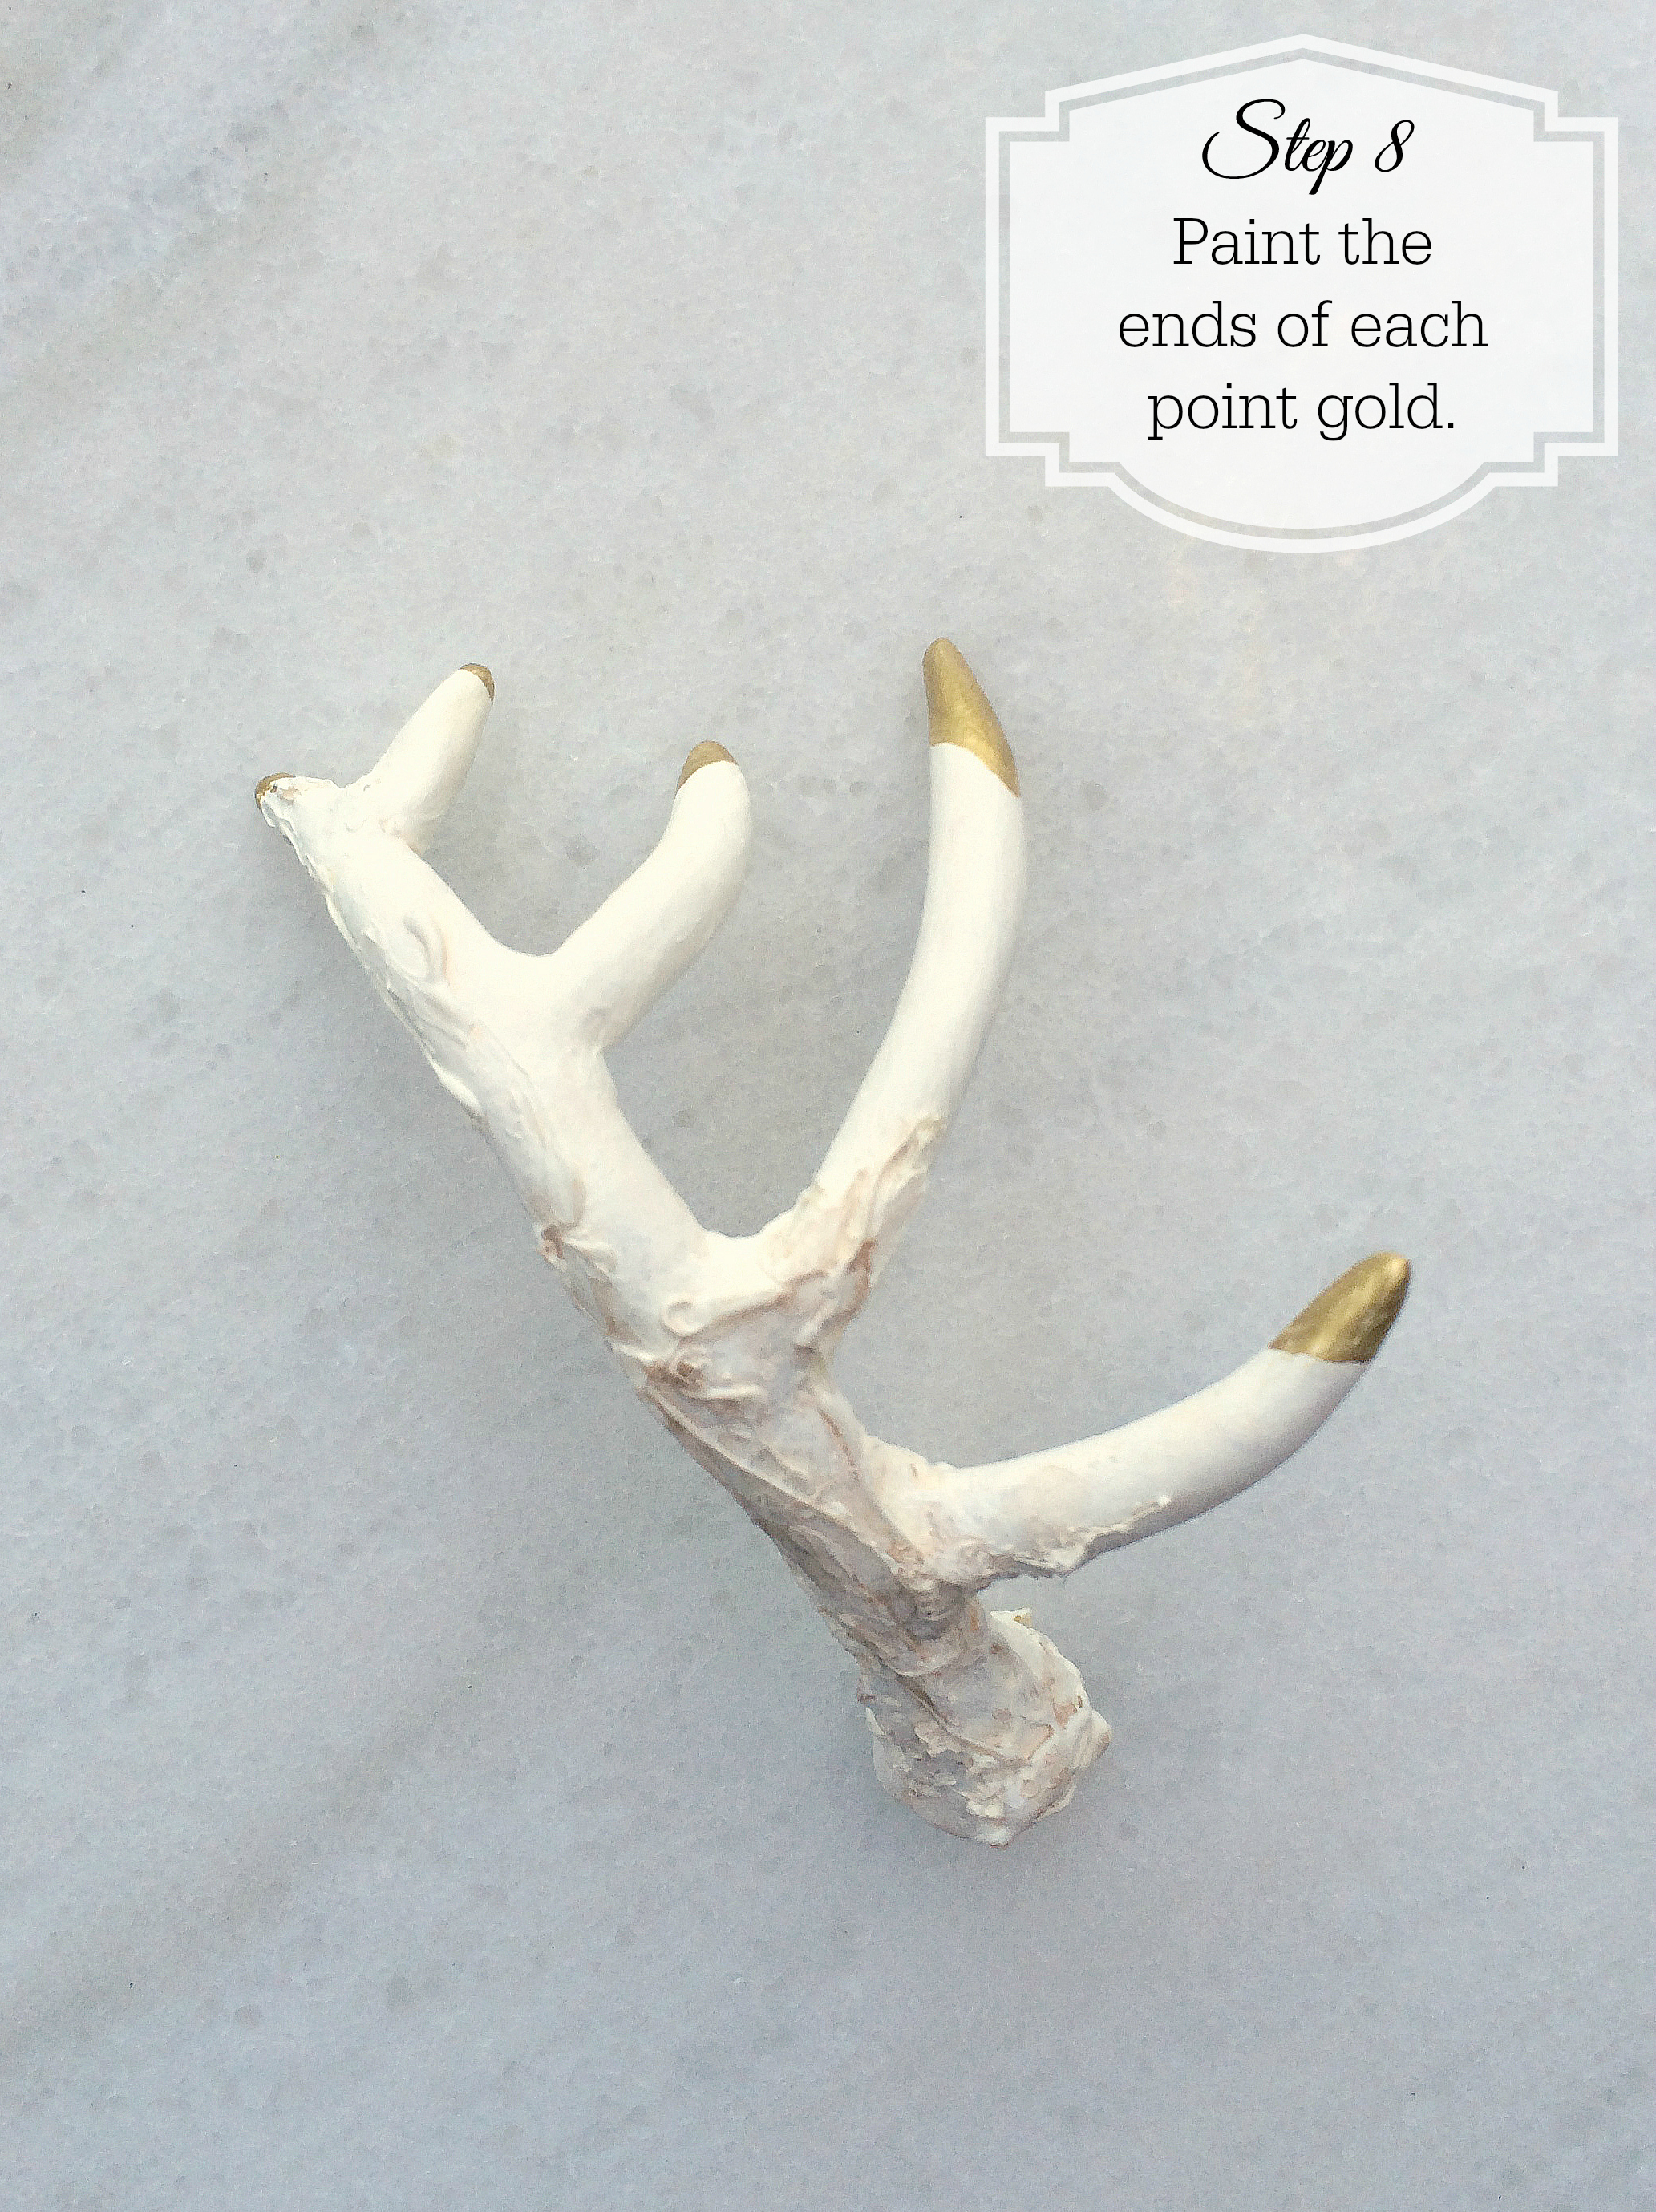
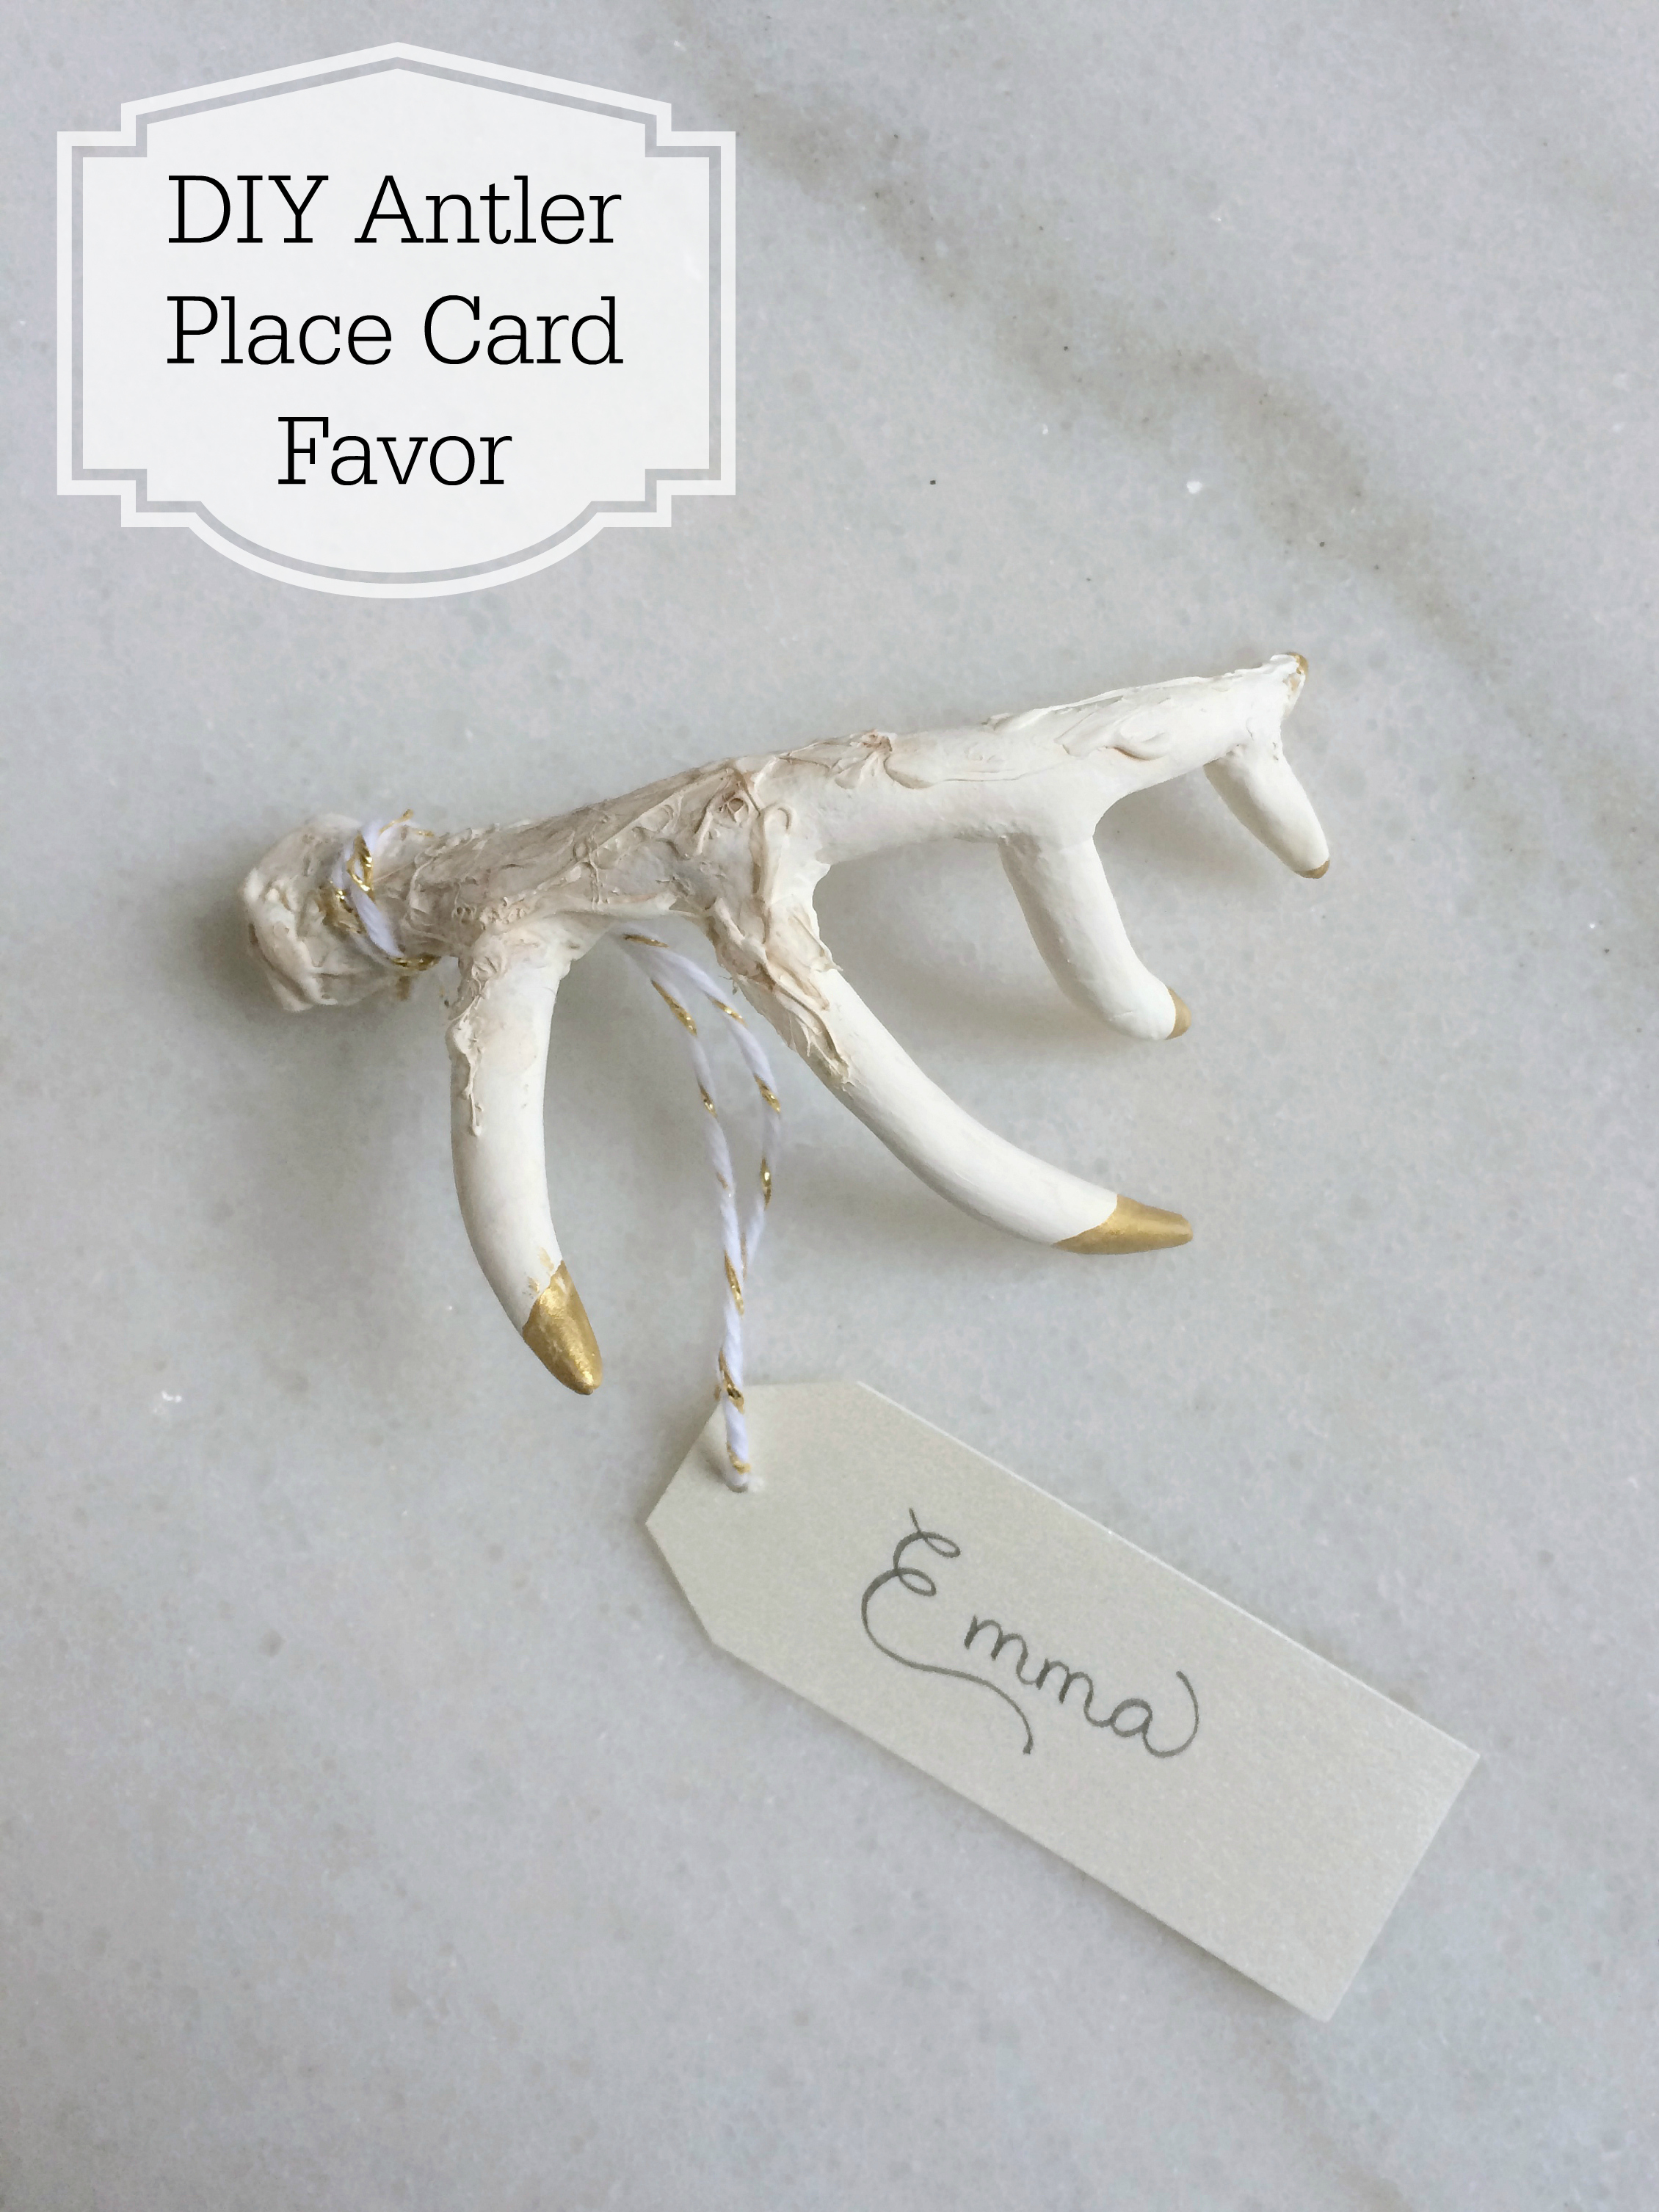
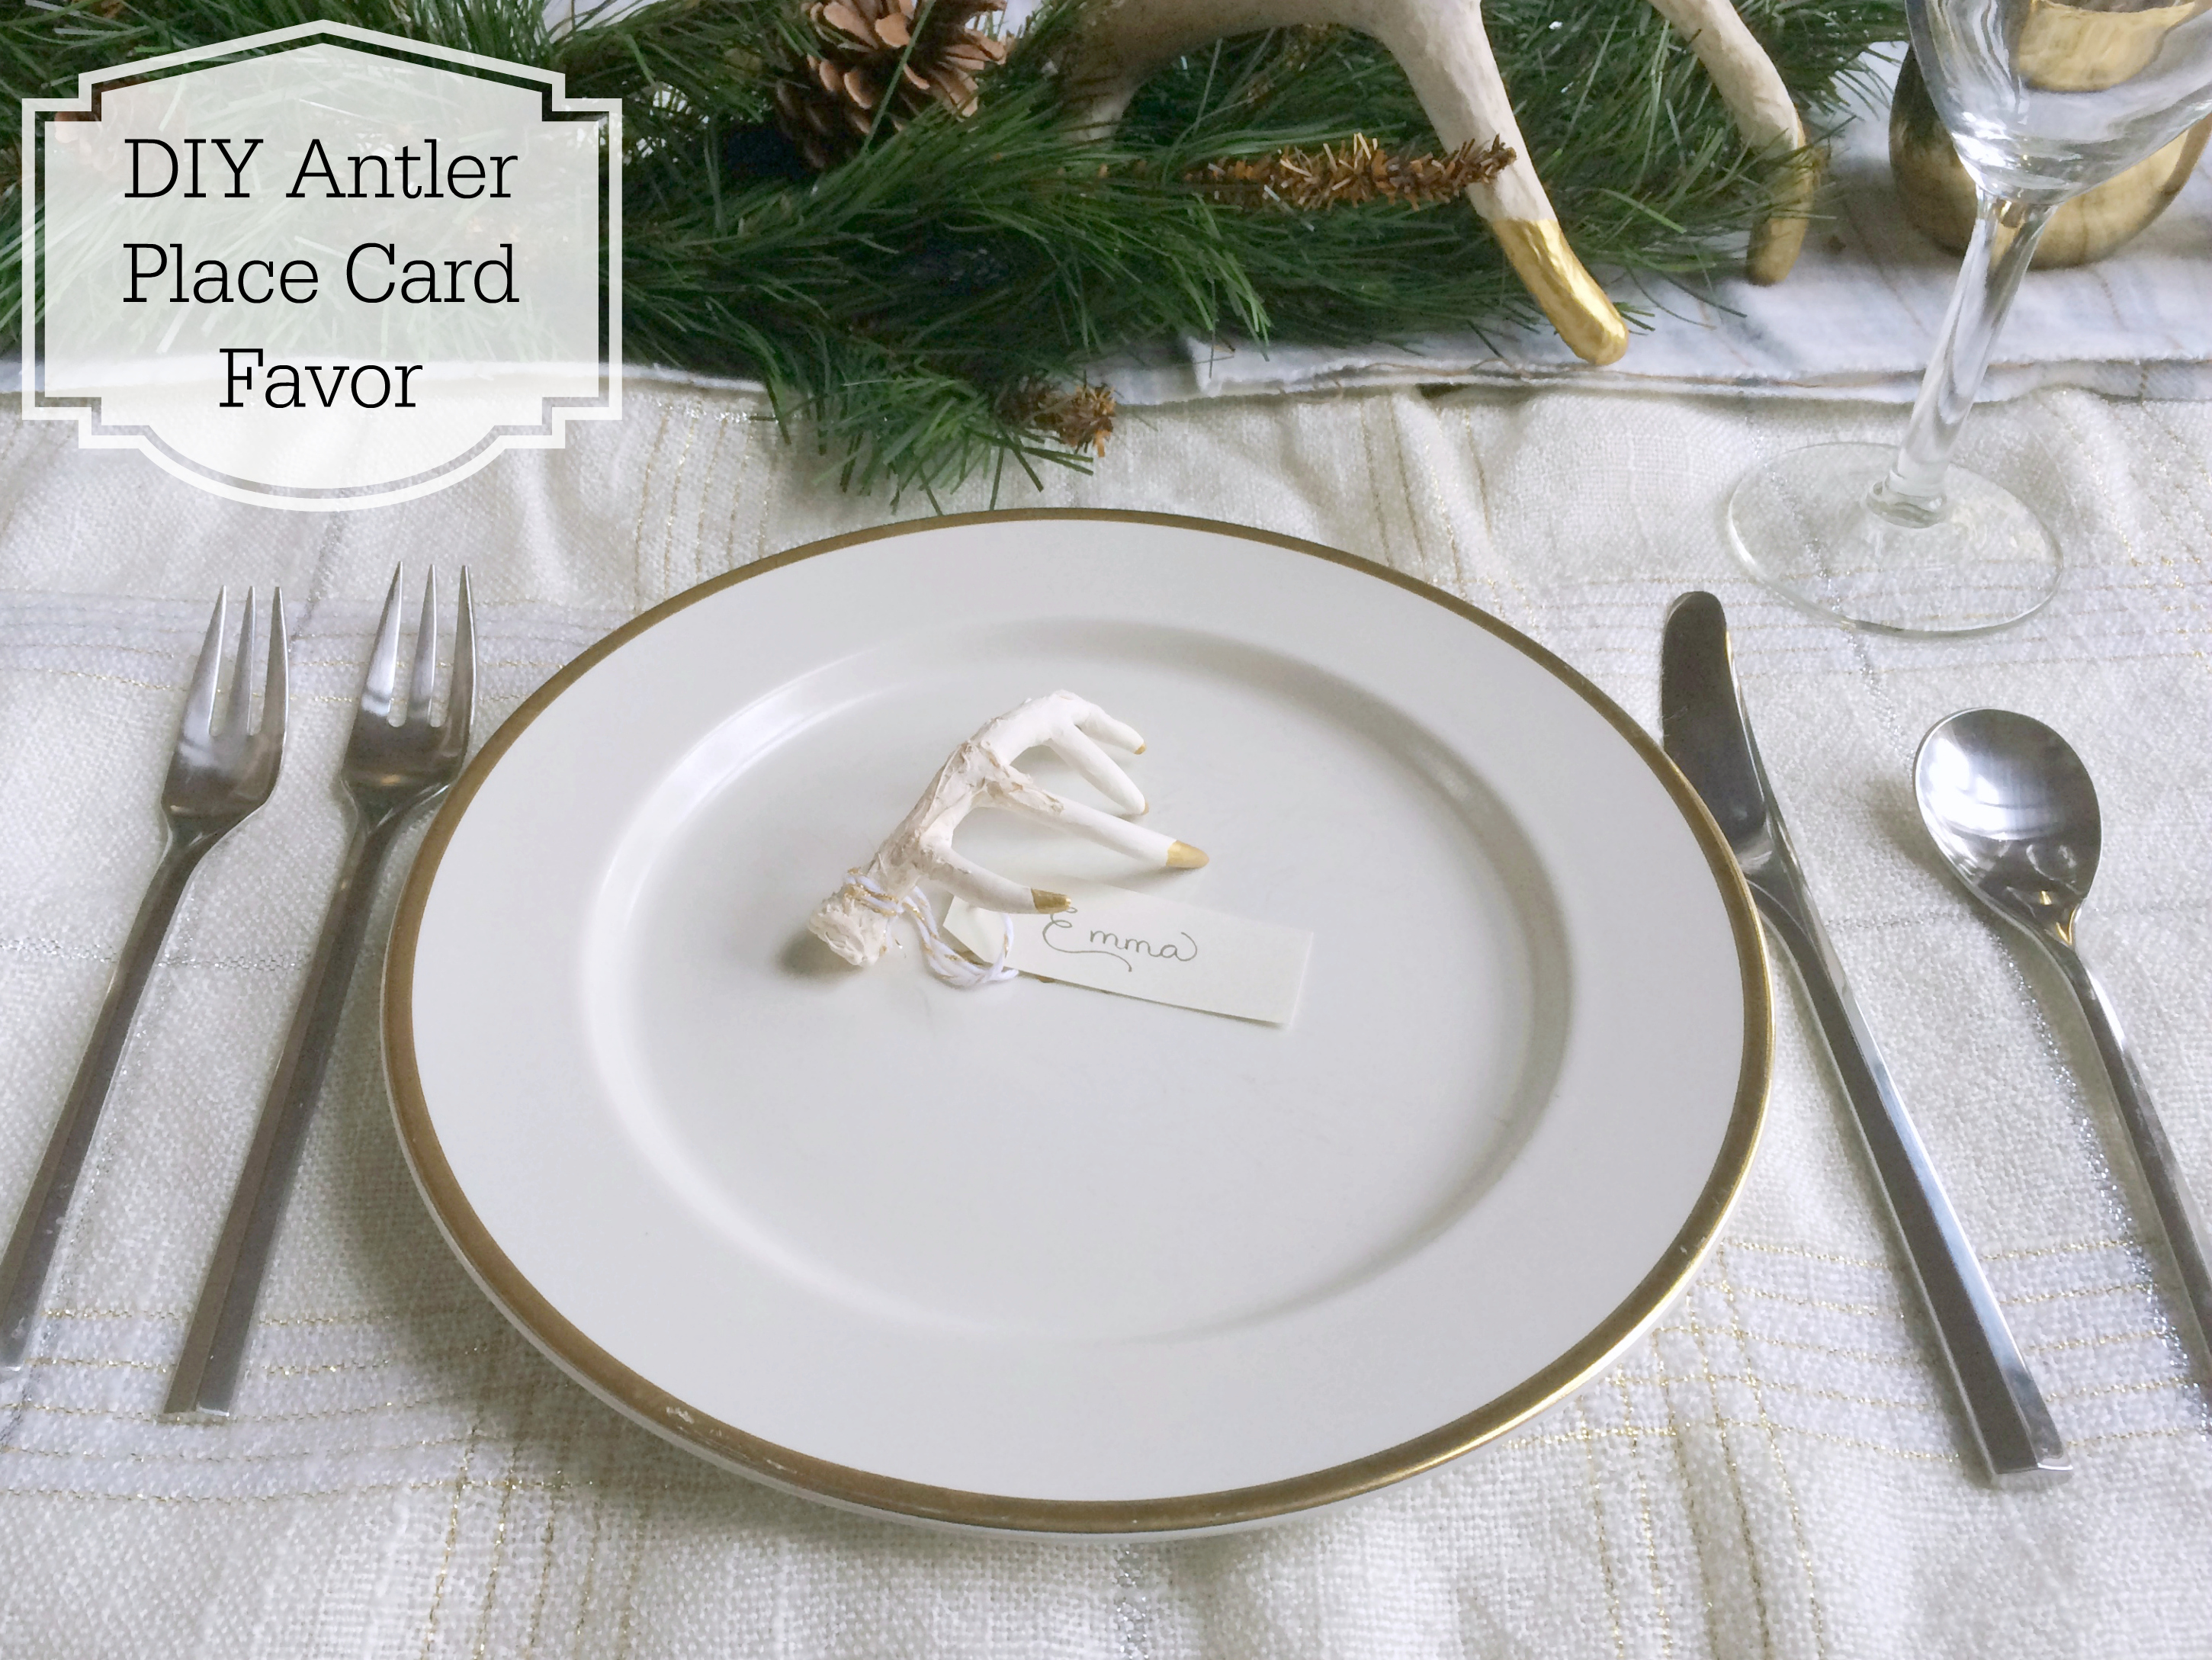
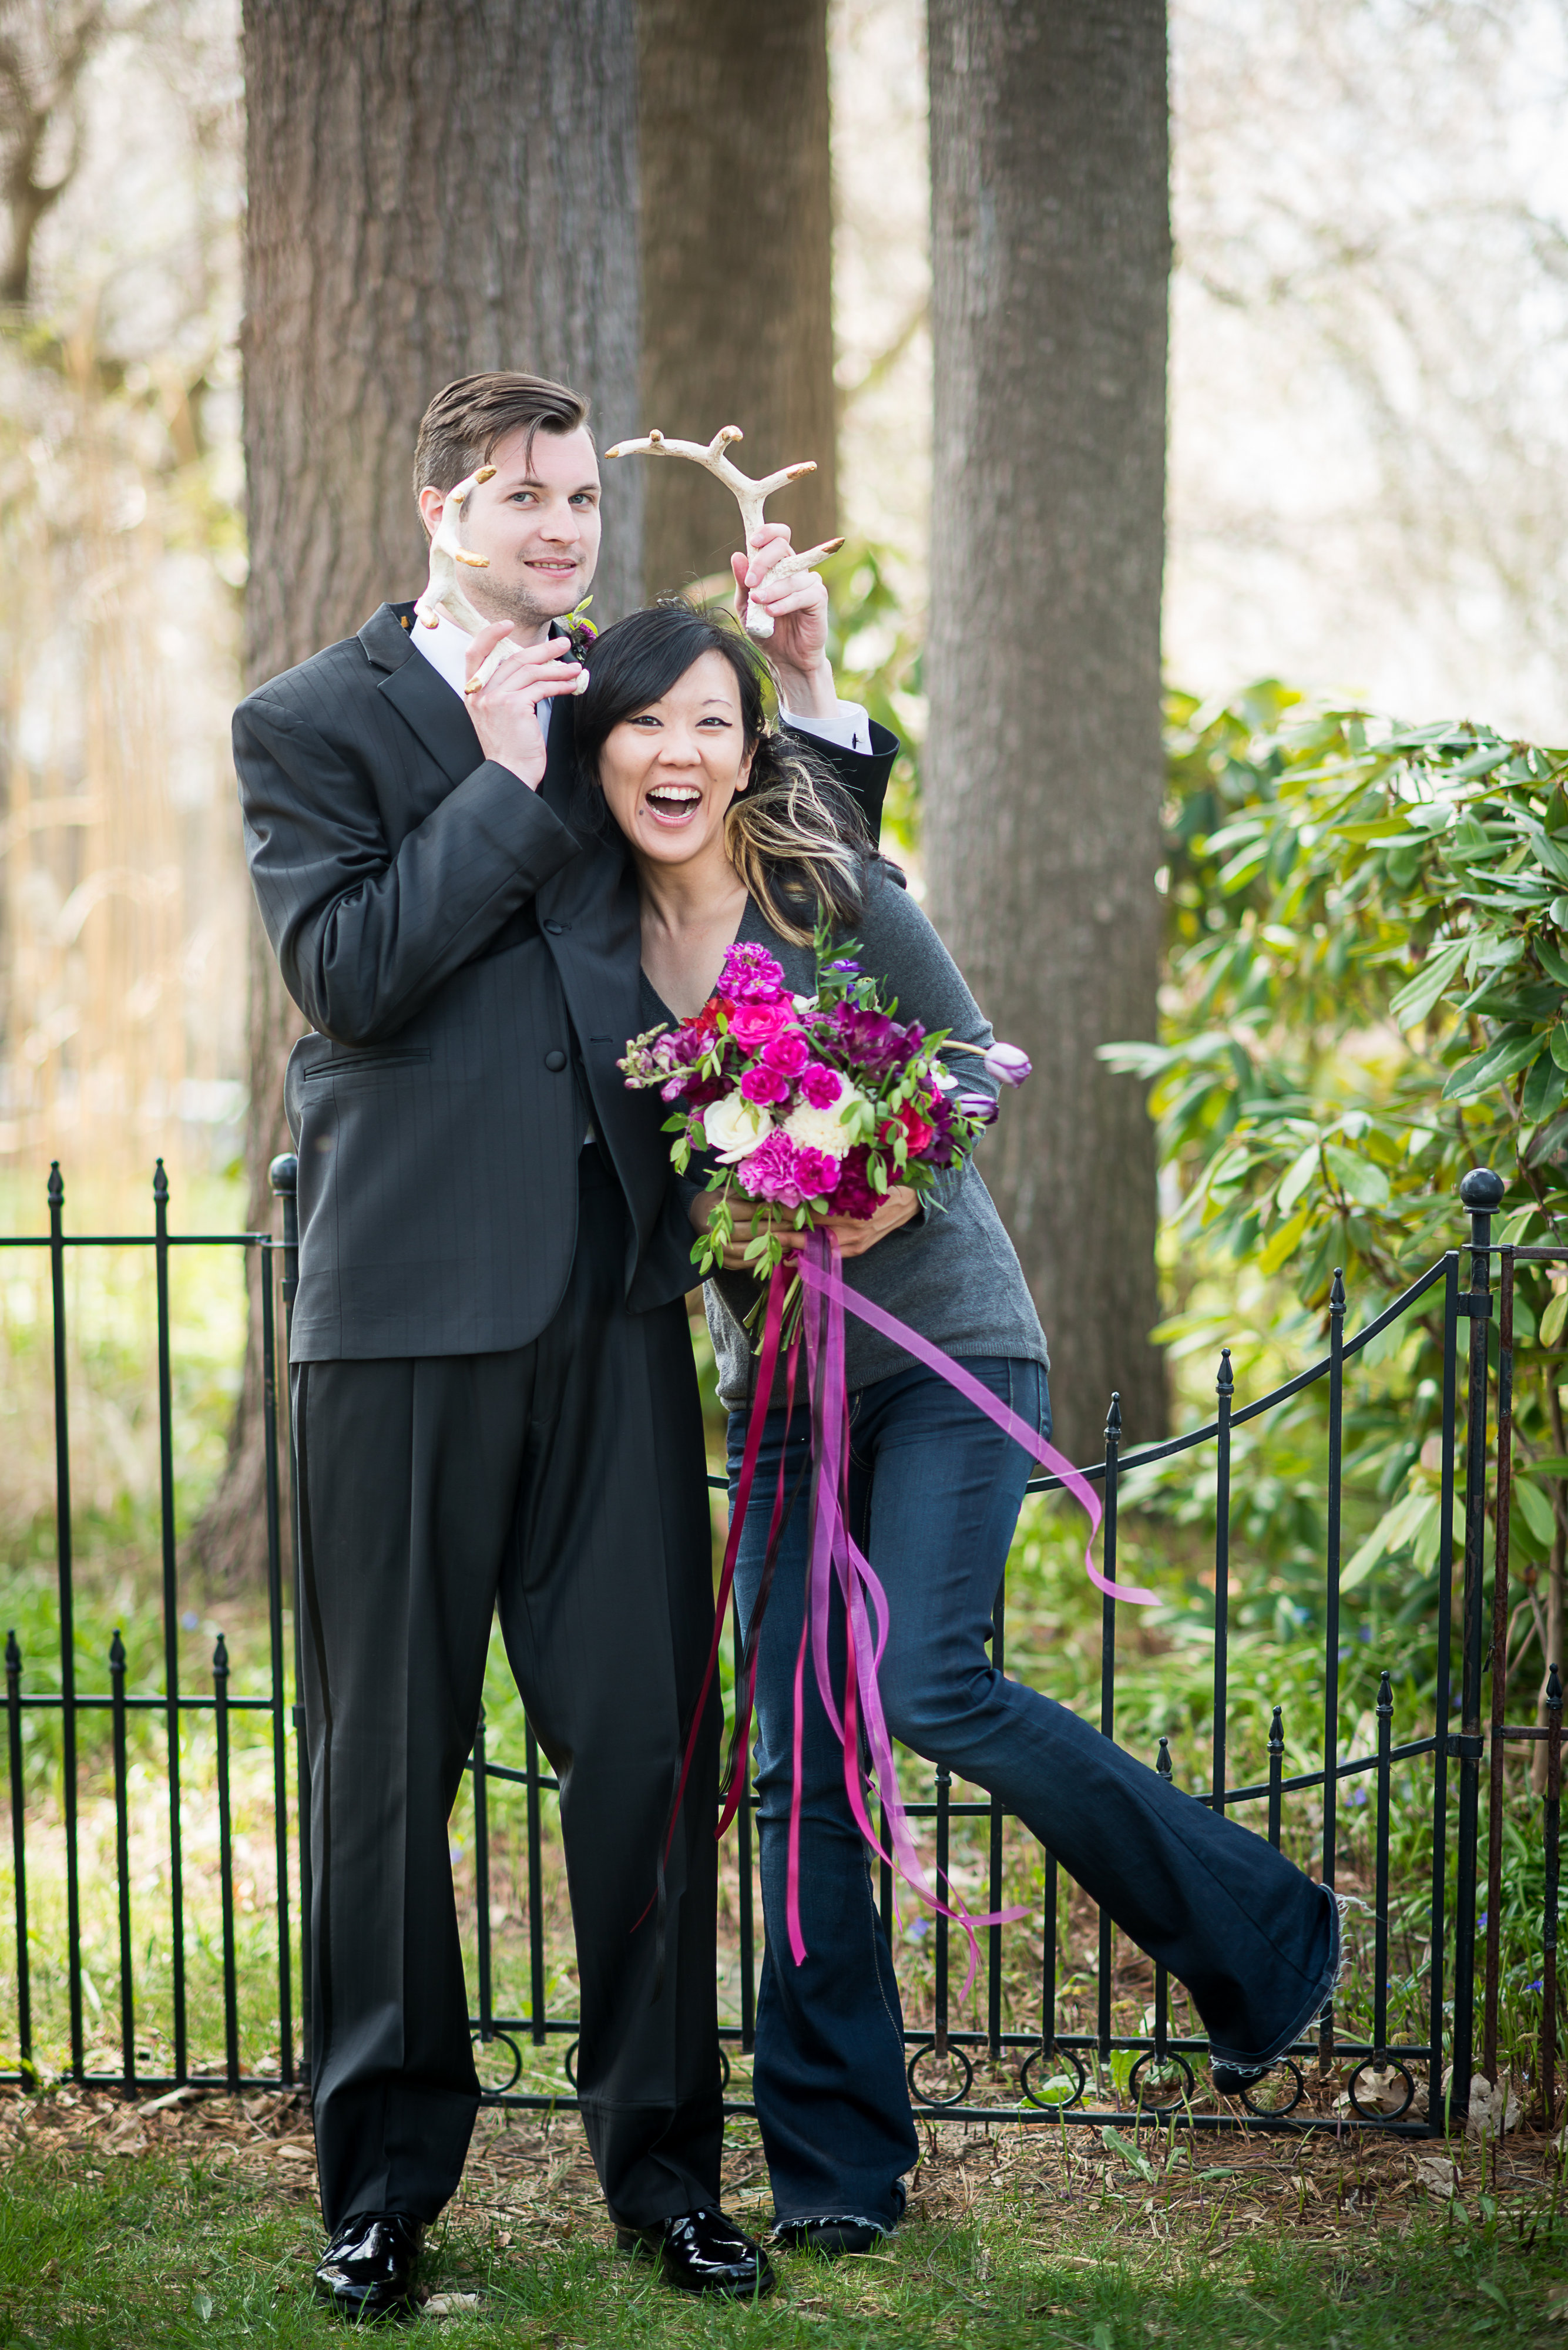
For Christmas, I am decorating with plaid and faux antlers. I made a bunch of large papier-mâché antlers for a style shoot, and I have been in love with (faux) antlers ever since. I figured since I have these antlers, why not use them again, but this time as decor for the holidays. I then decided antler place card favors would be a nice addition to the holiday dining room tablescape.
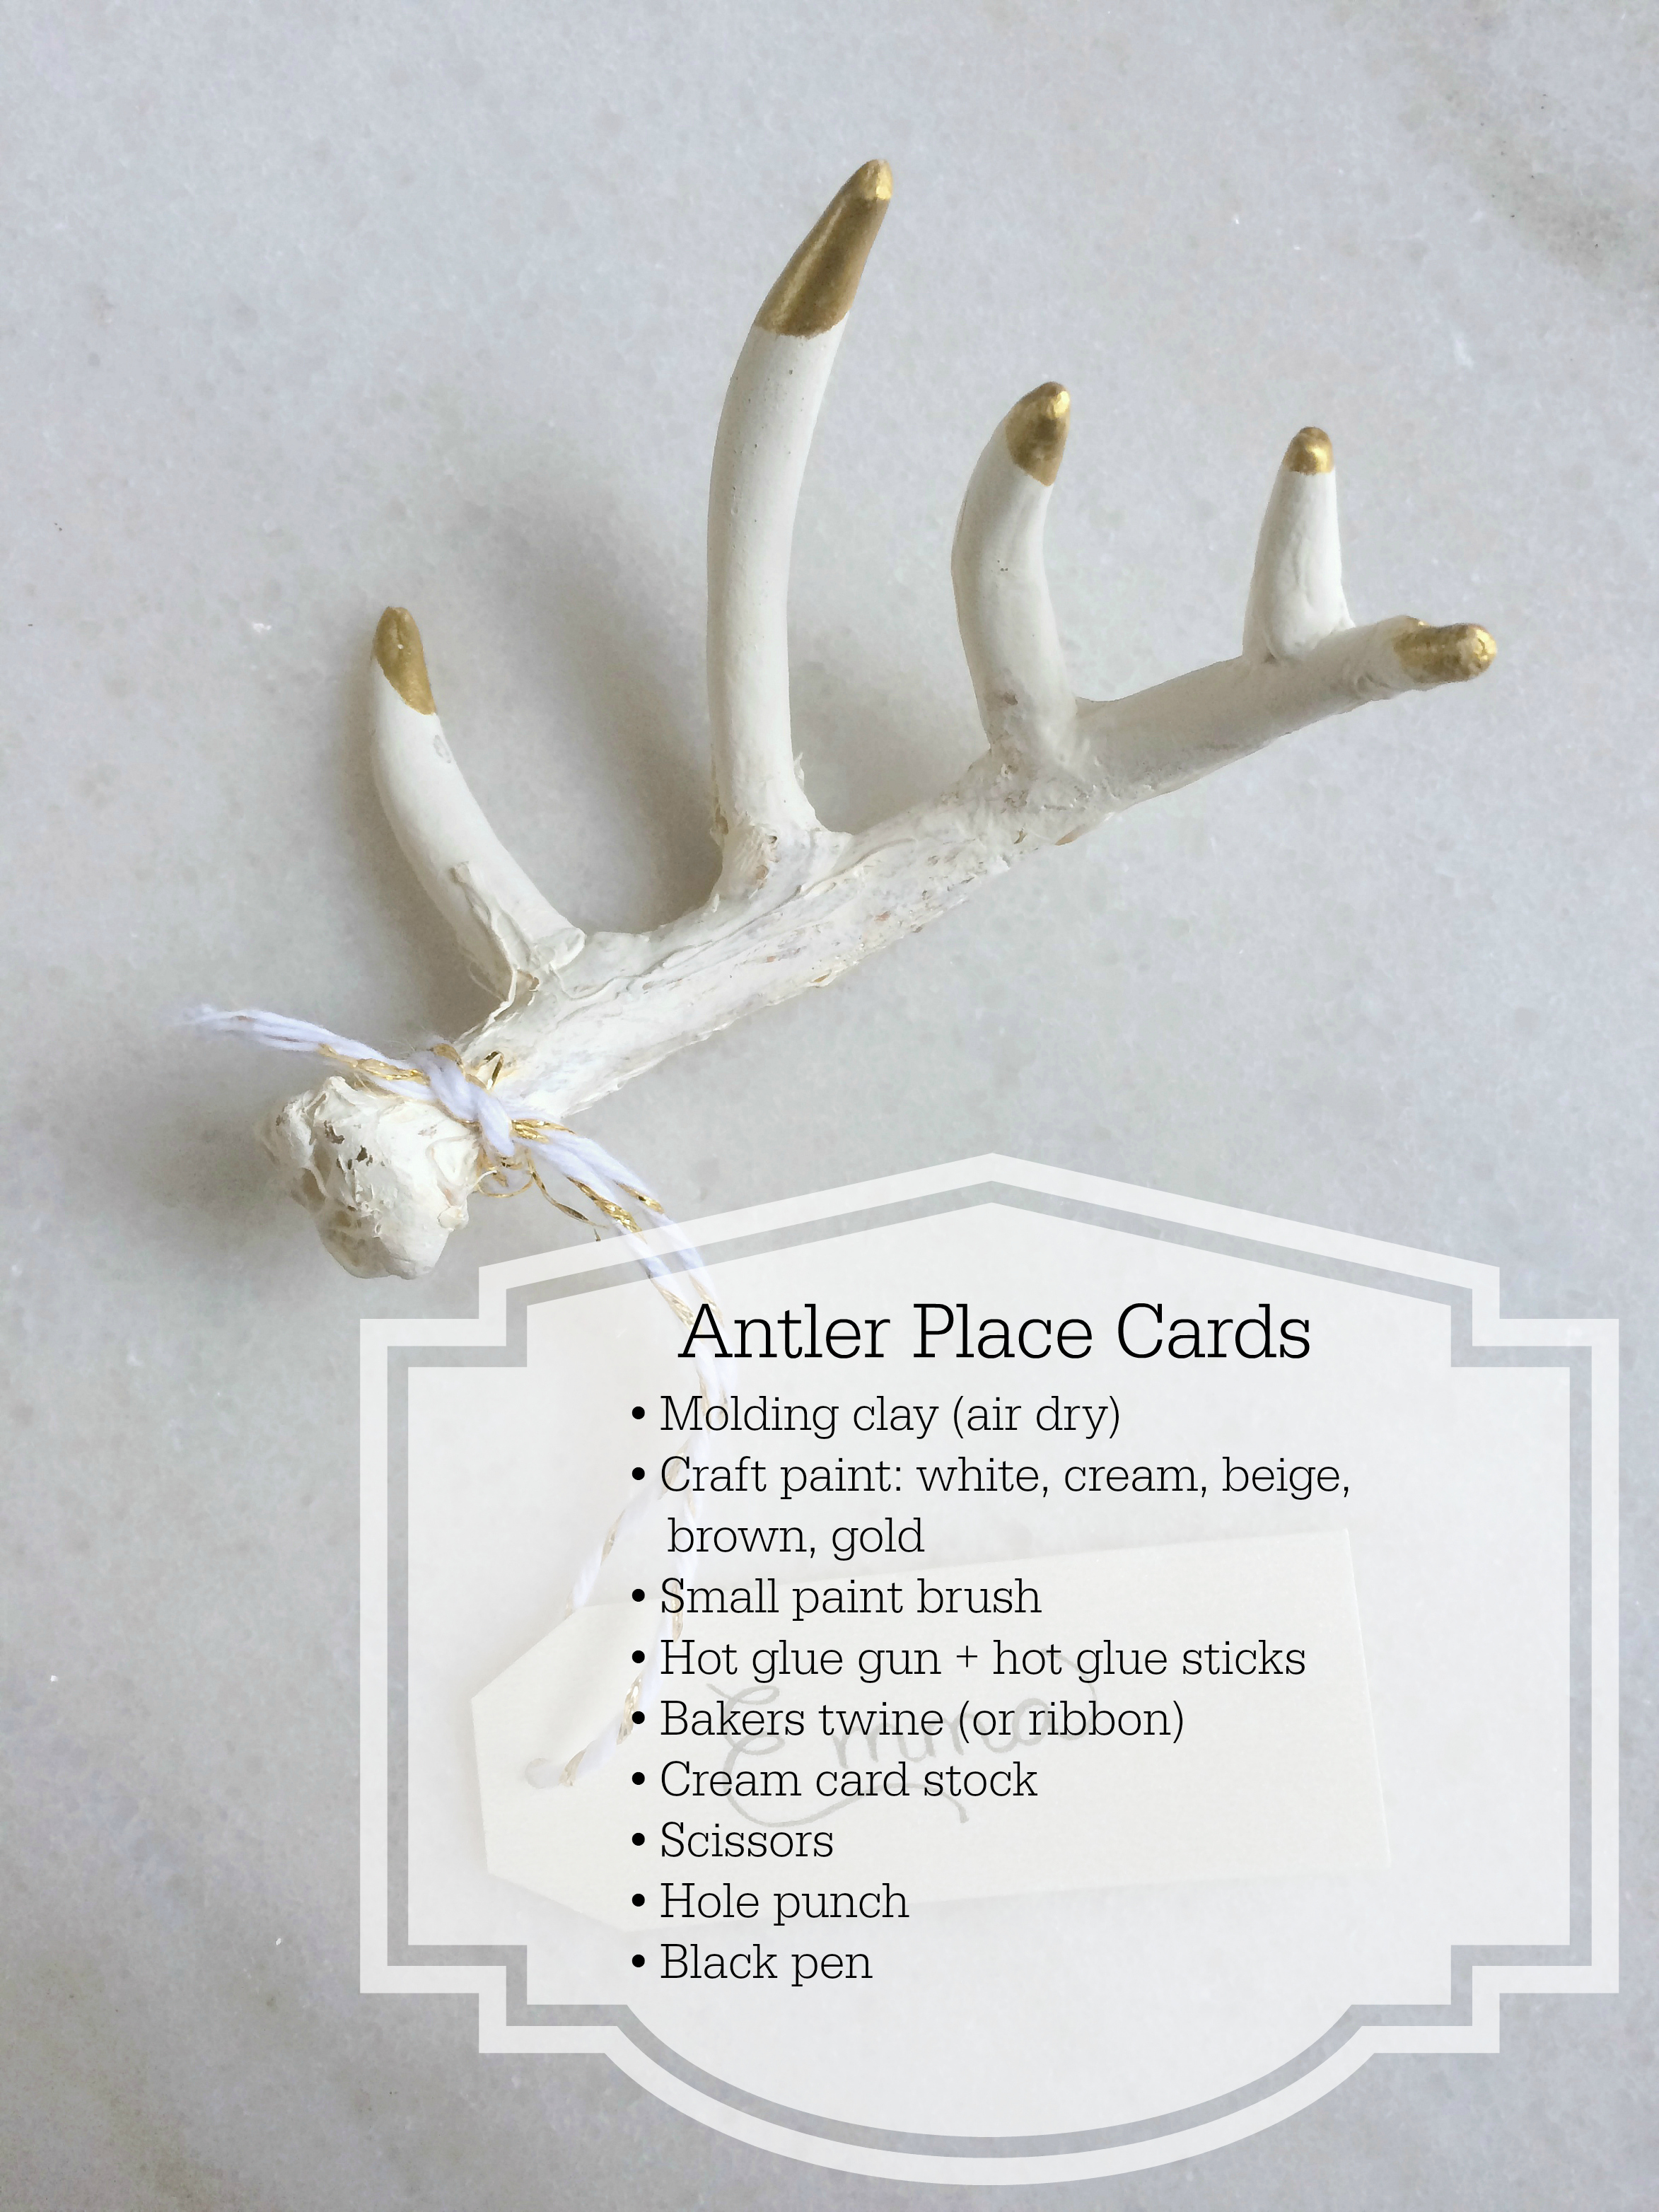
What you’ll need:
• Molding clay (air dry)
• Craft paint: white, cream, beige, brown, gold
• Small paint brush
• Hot glue gun + hot glue sticks
• Bakers twine (or ribbon)
• Cream card stock
• Scissors
• Hole punch
• Black pen
Instructions:
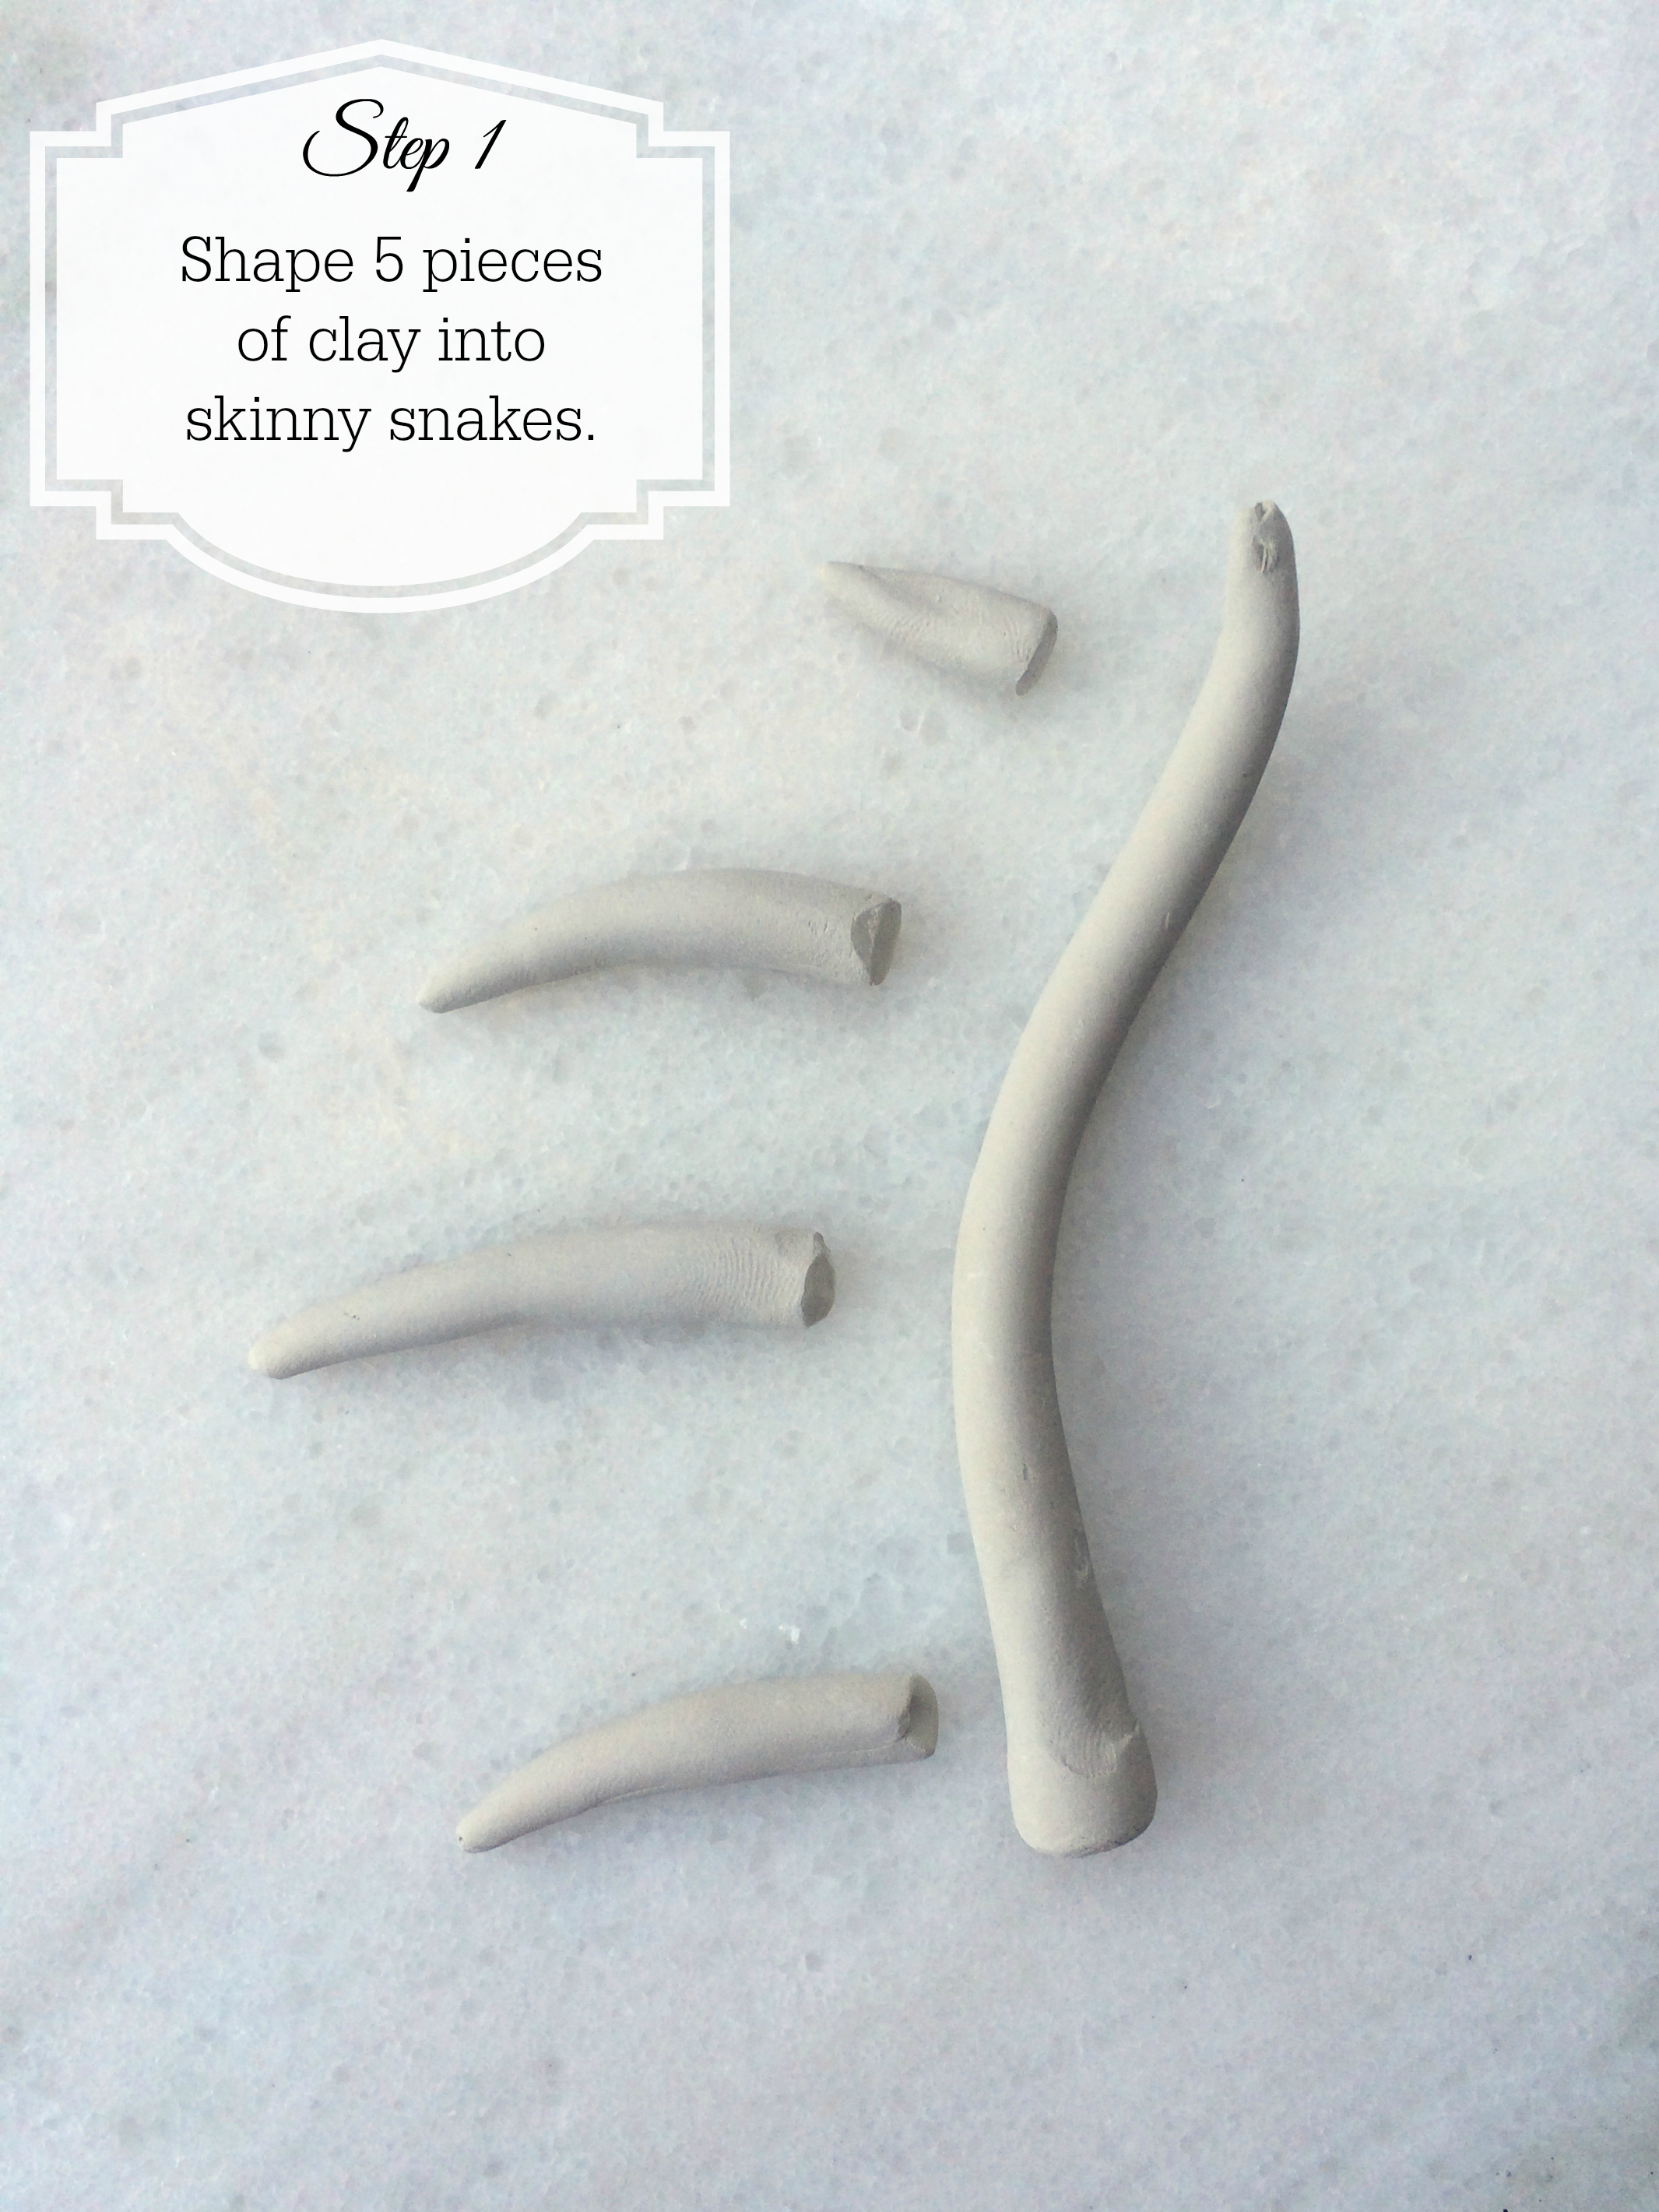
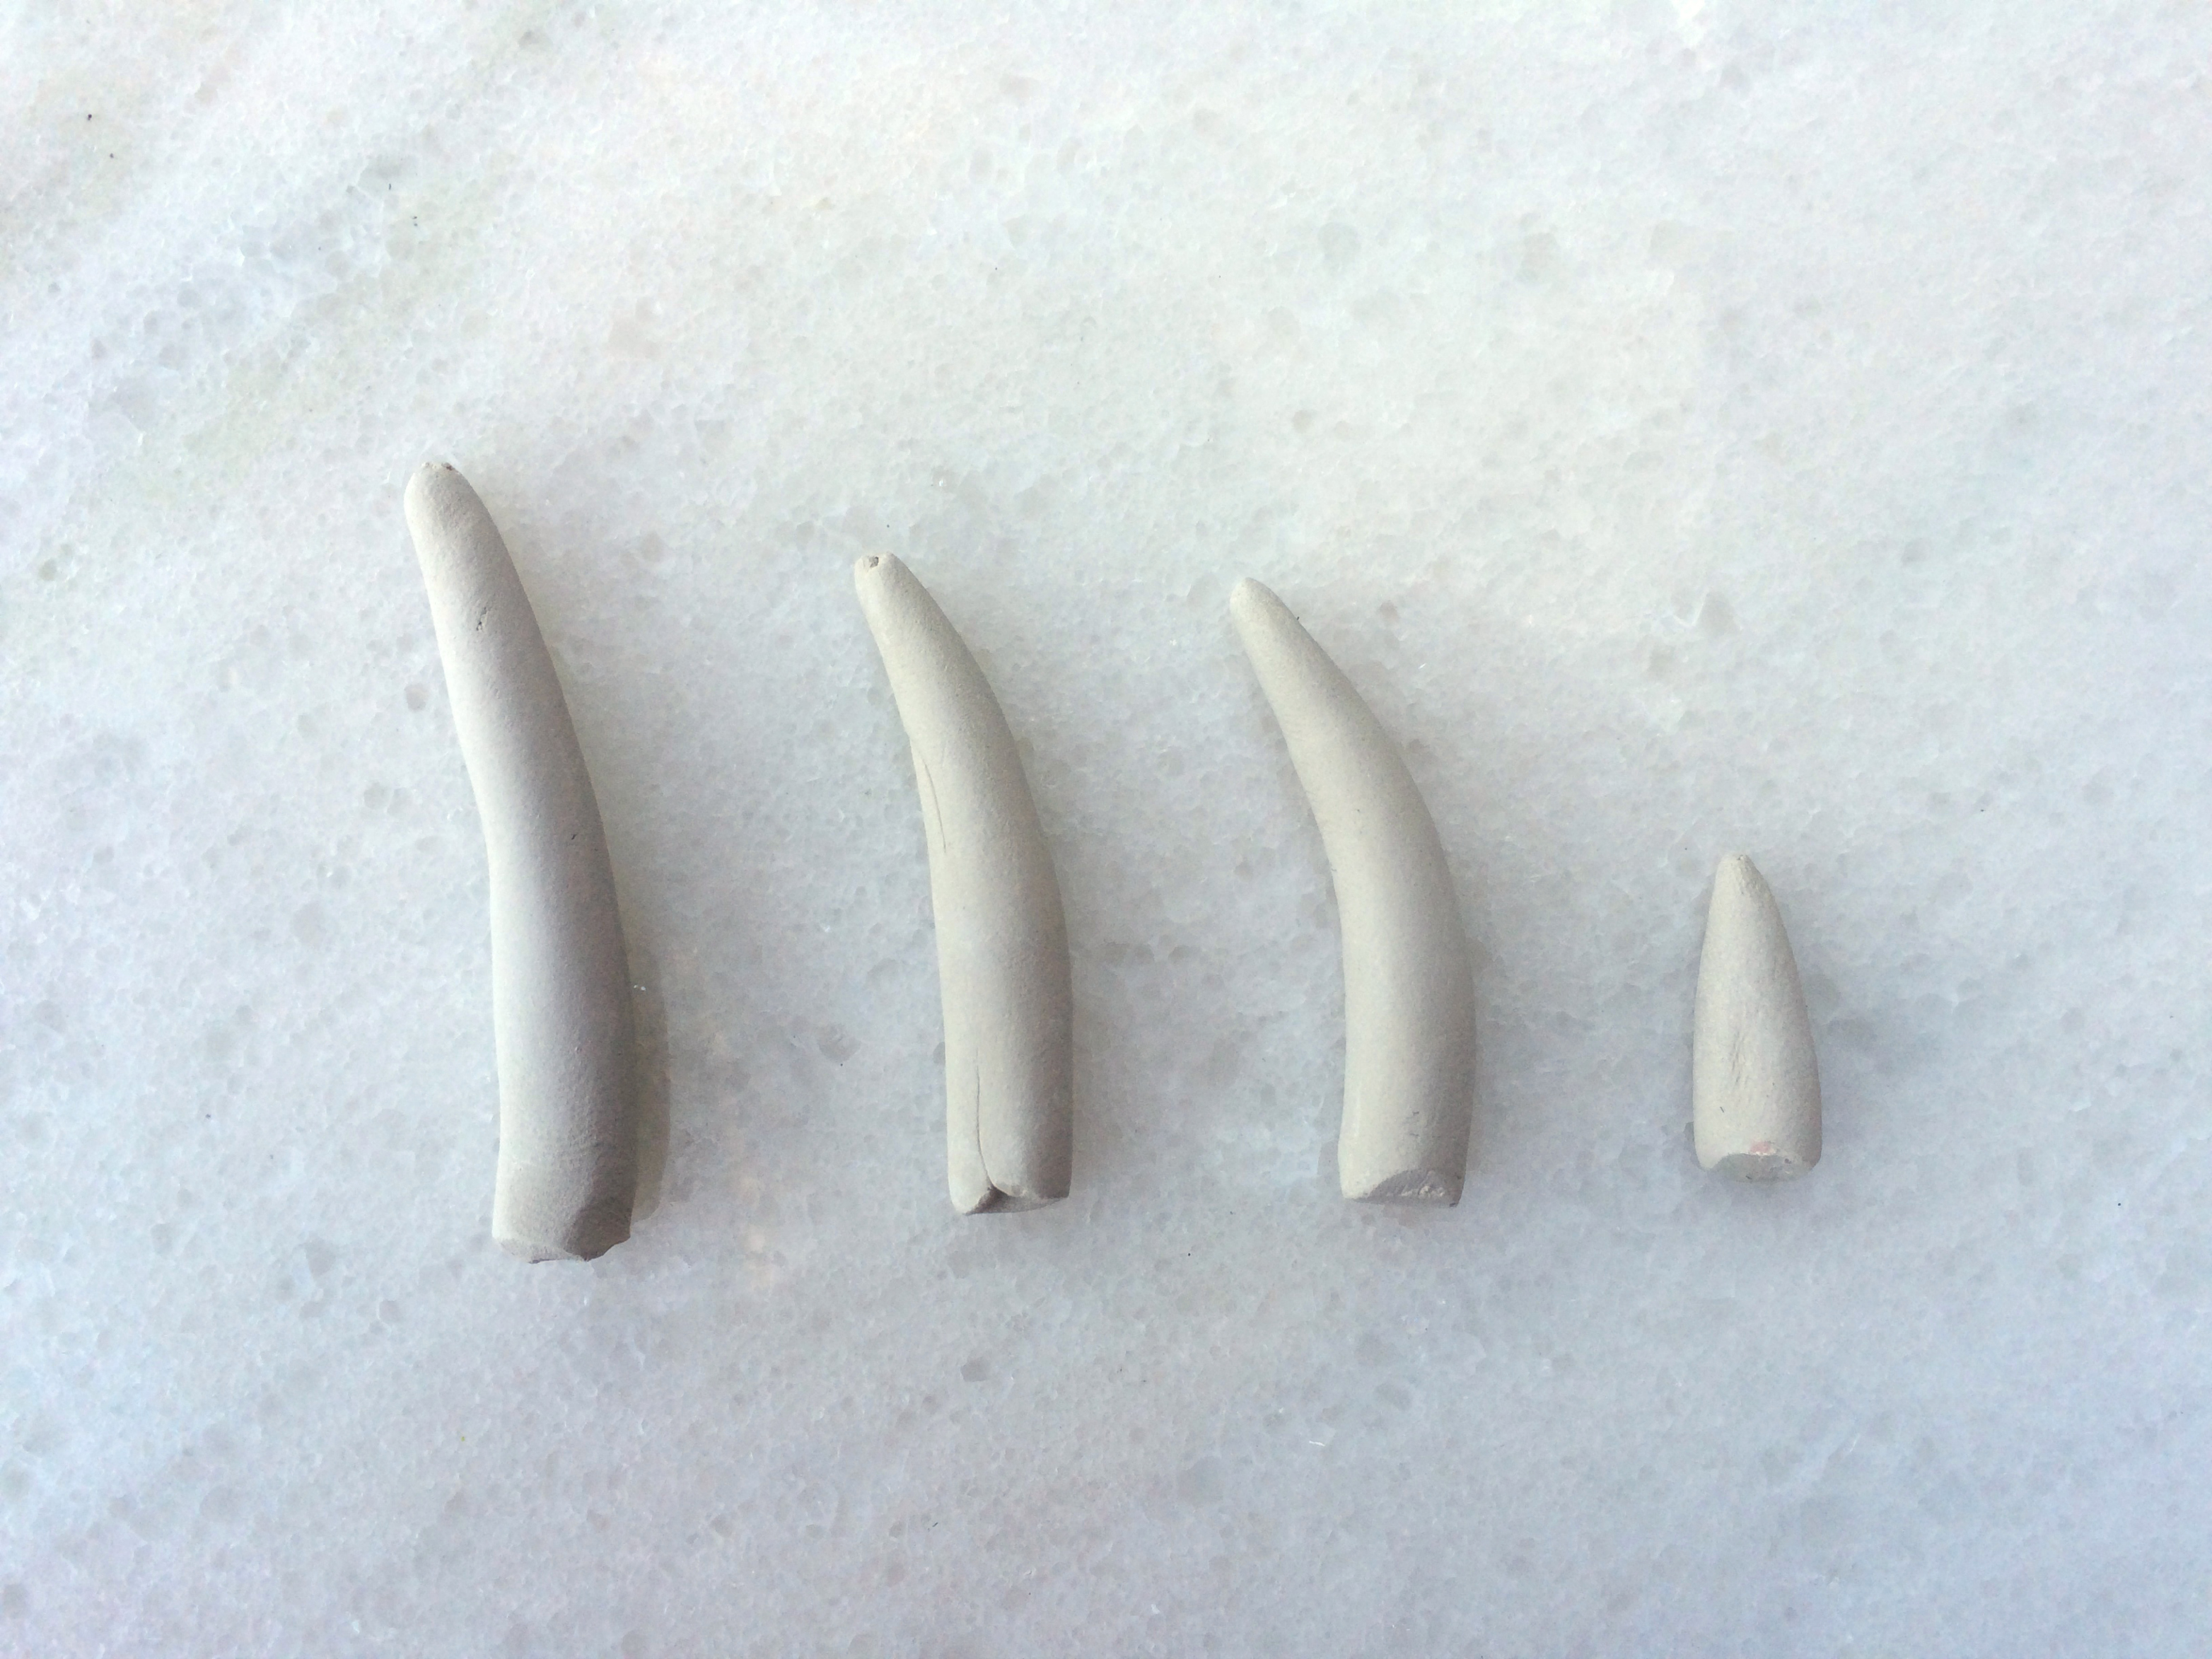
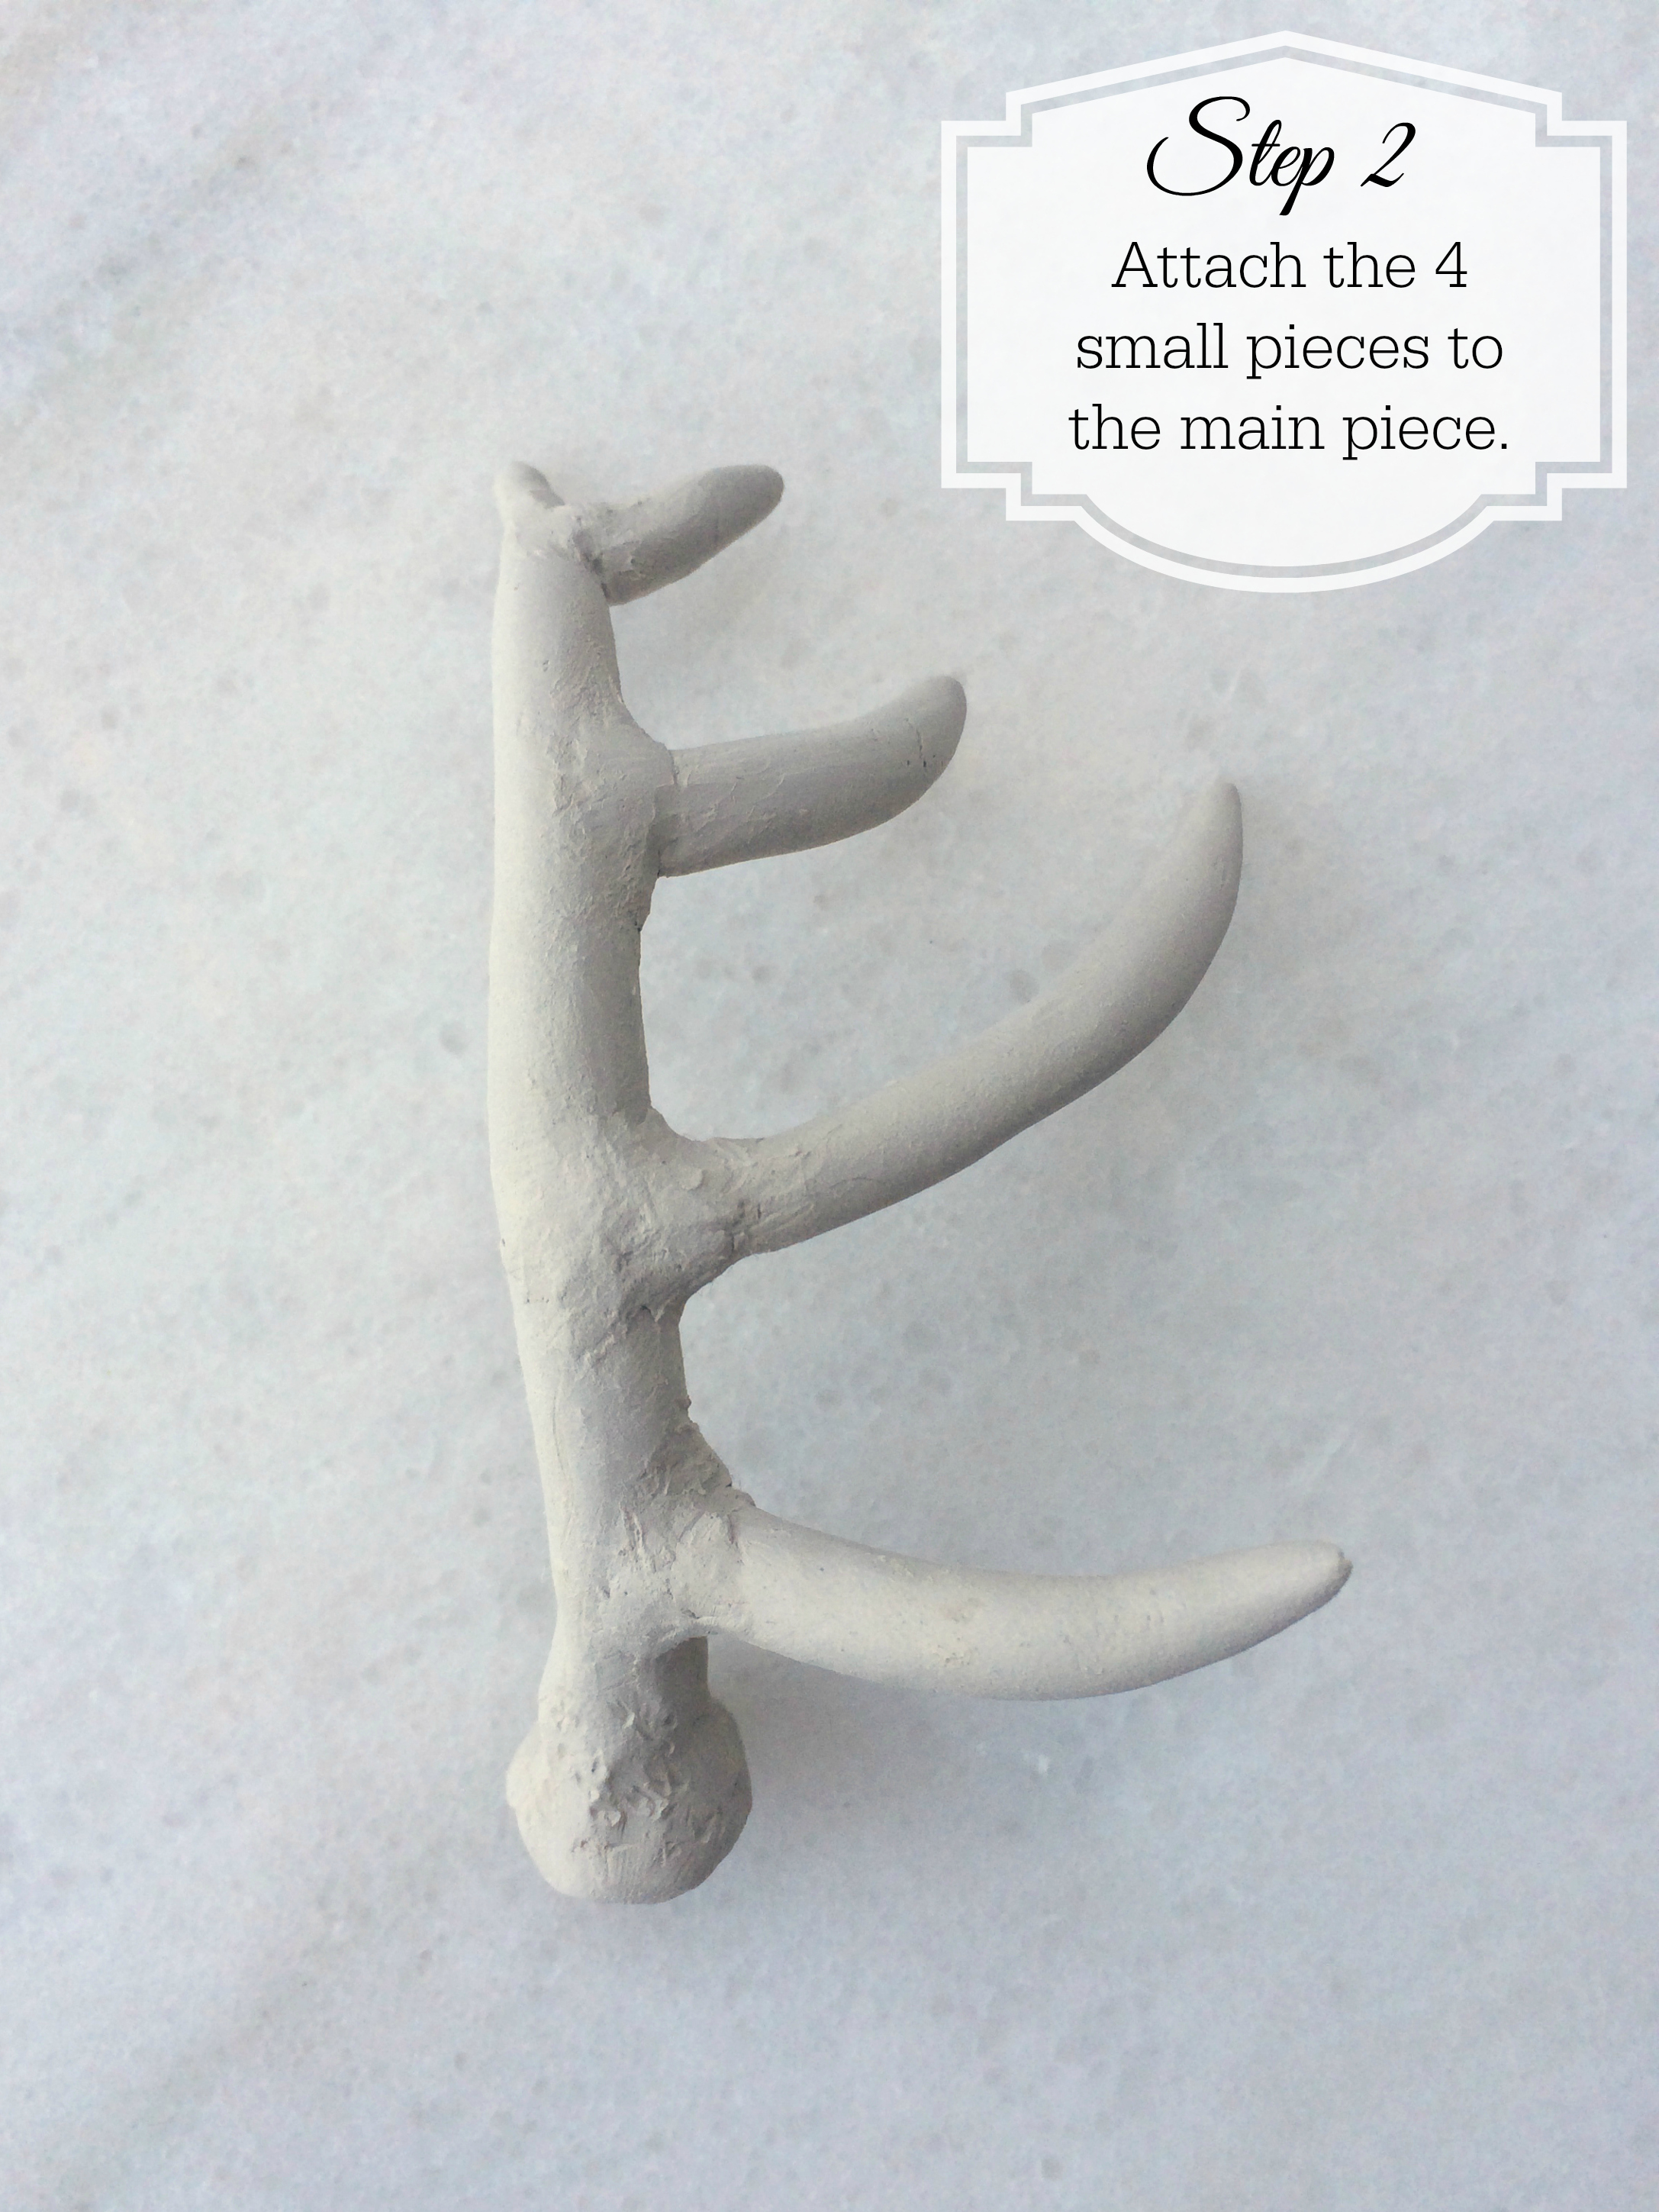
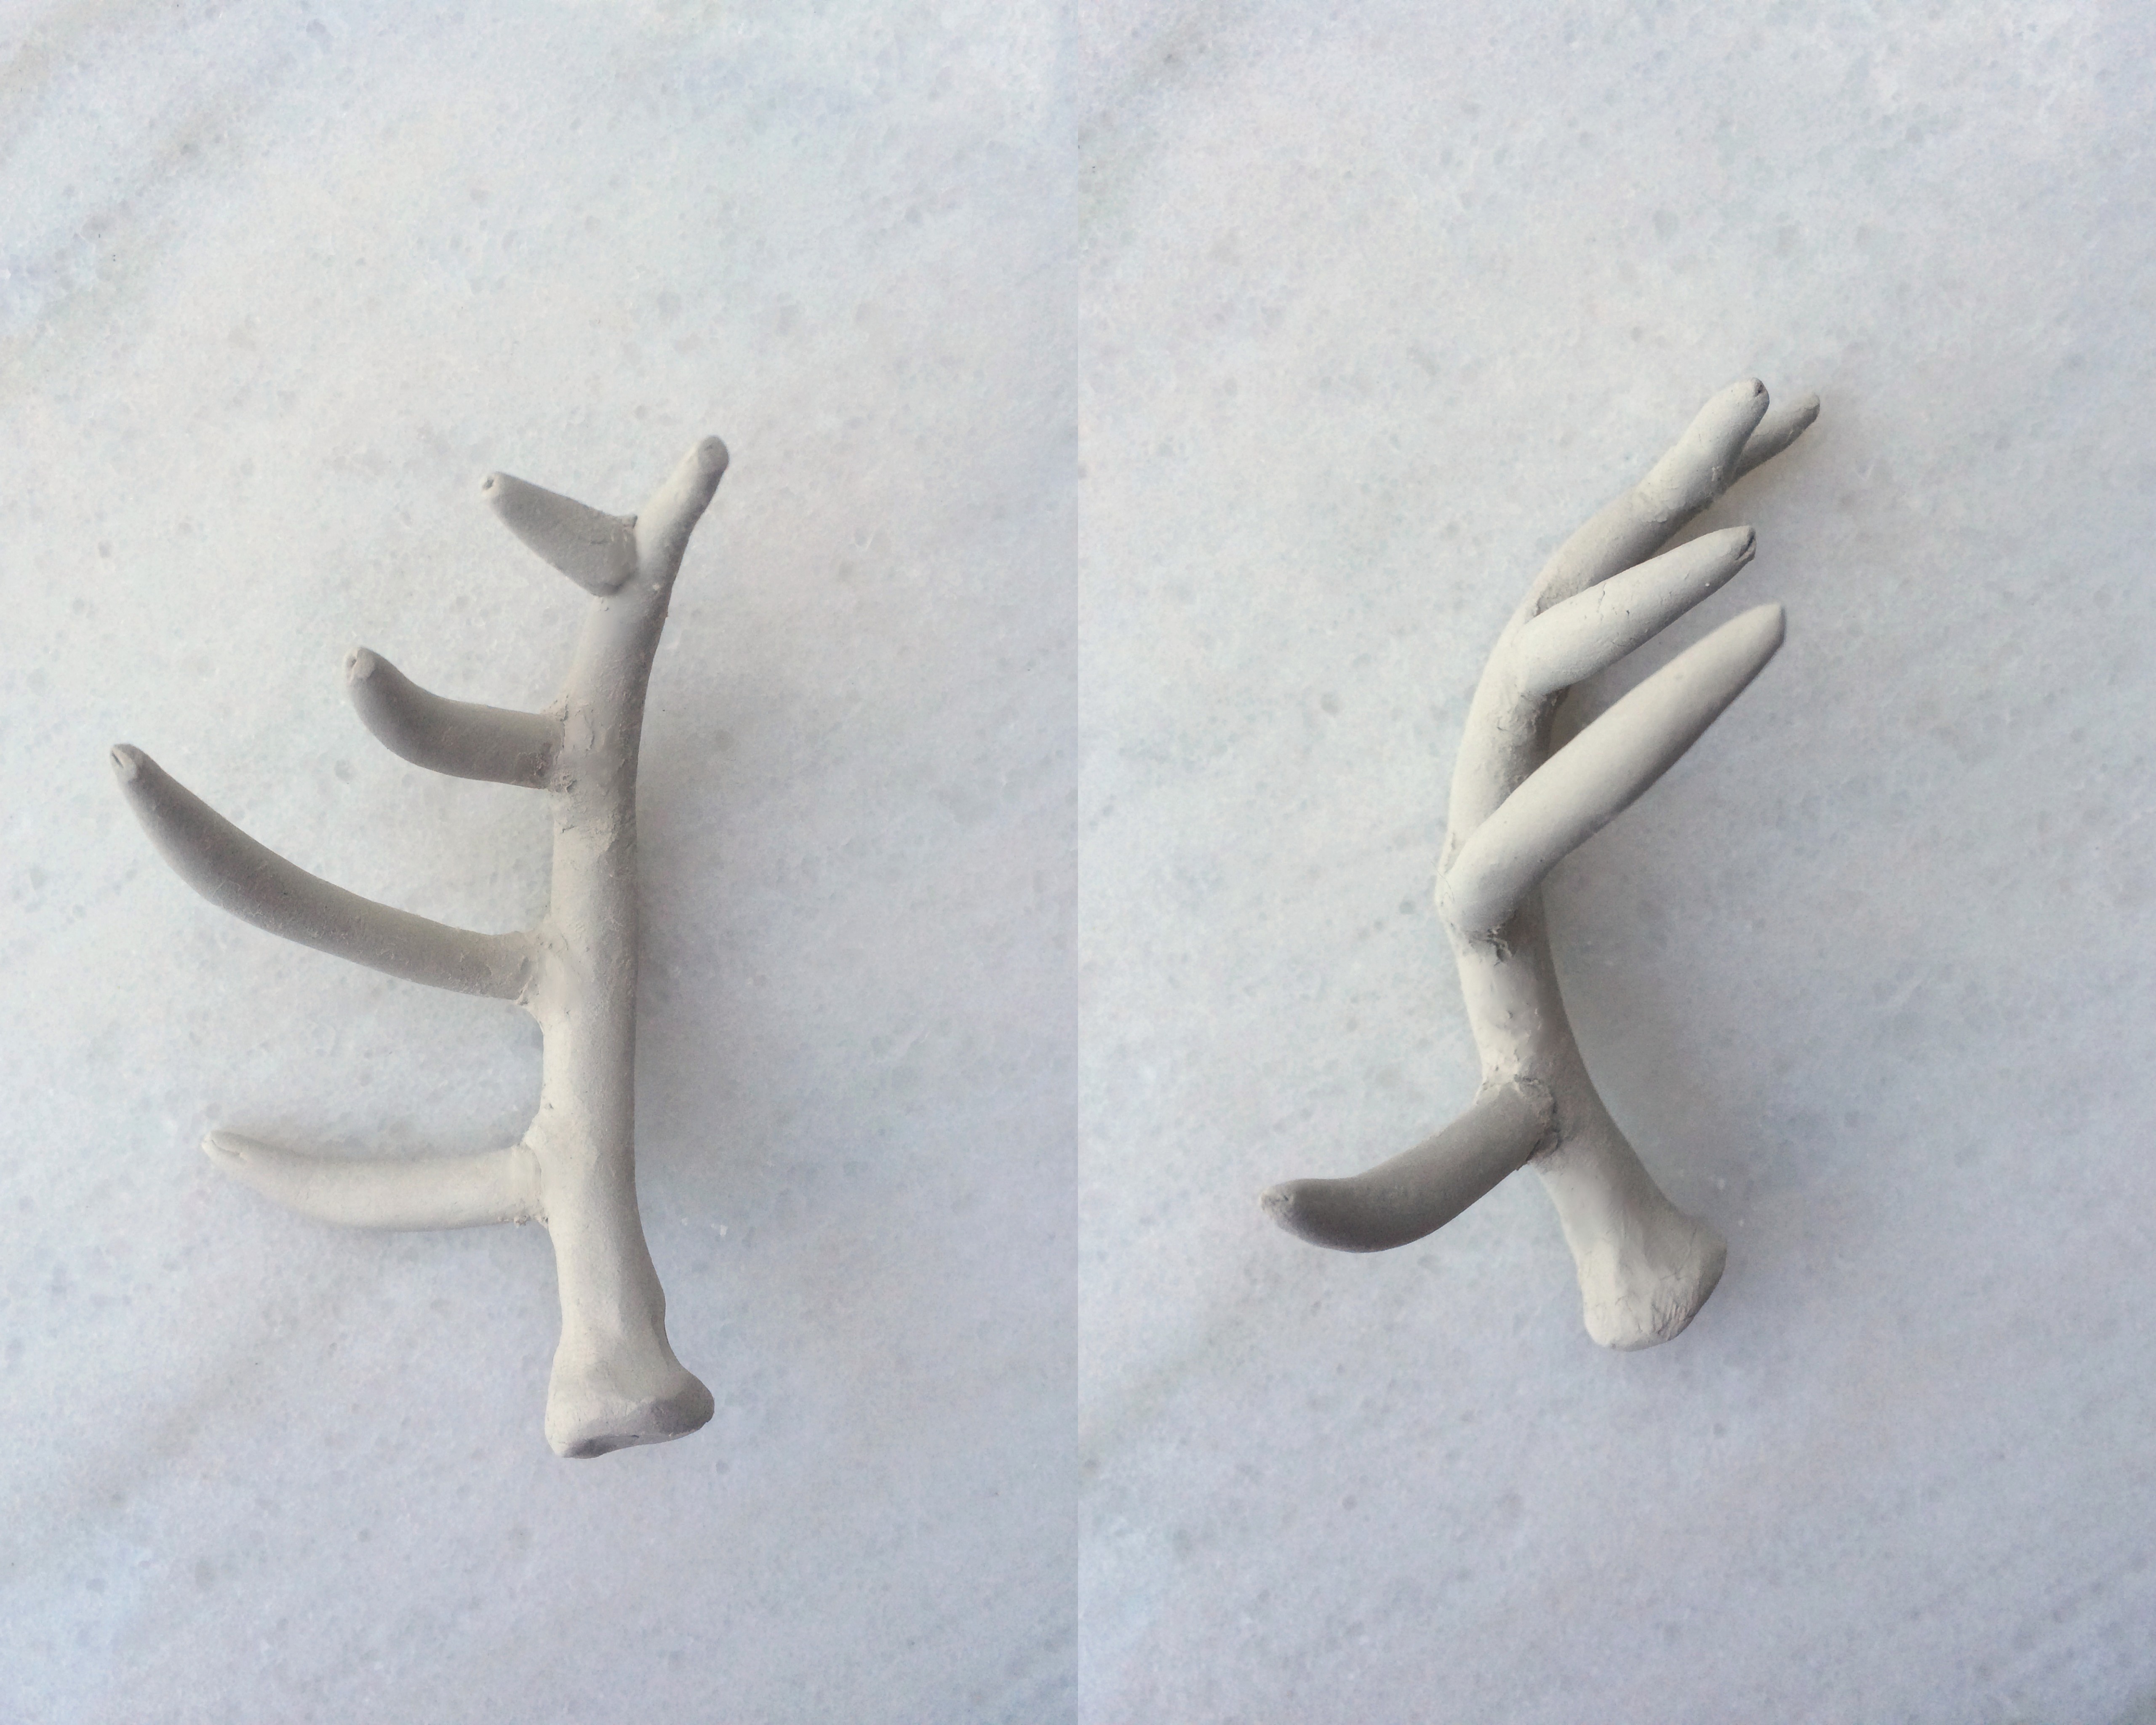
1. Take a small clump of clay and roll it into a skinny snake shape, approx. 3″ long (this will be the main beam of the antler). Take 4 small clumps of clay and mold them into the 4 small skinny snake shapes of different lengths (these will be the points on the antler).
2. Attach the 4 small pieces to the large piece by scoring the clay and wetting the clay water from your paintbrush. Smooth out any bumpy areas out with your fingers and paintbrush.
While the clay is still soft, shape the antler into the appropriate shape.
If you need to, prop up the antler so that the points + beam dry properly and don’t bend over from their weight.
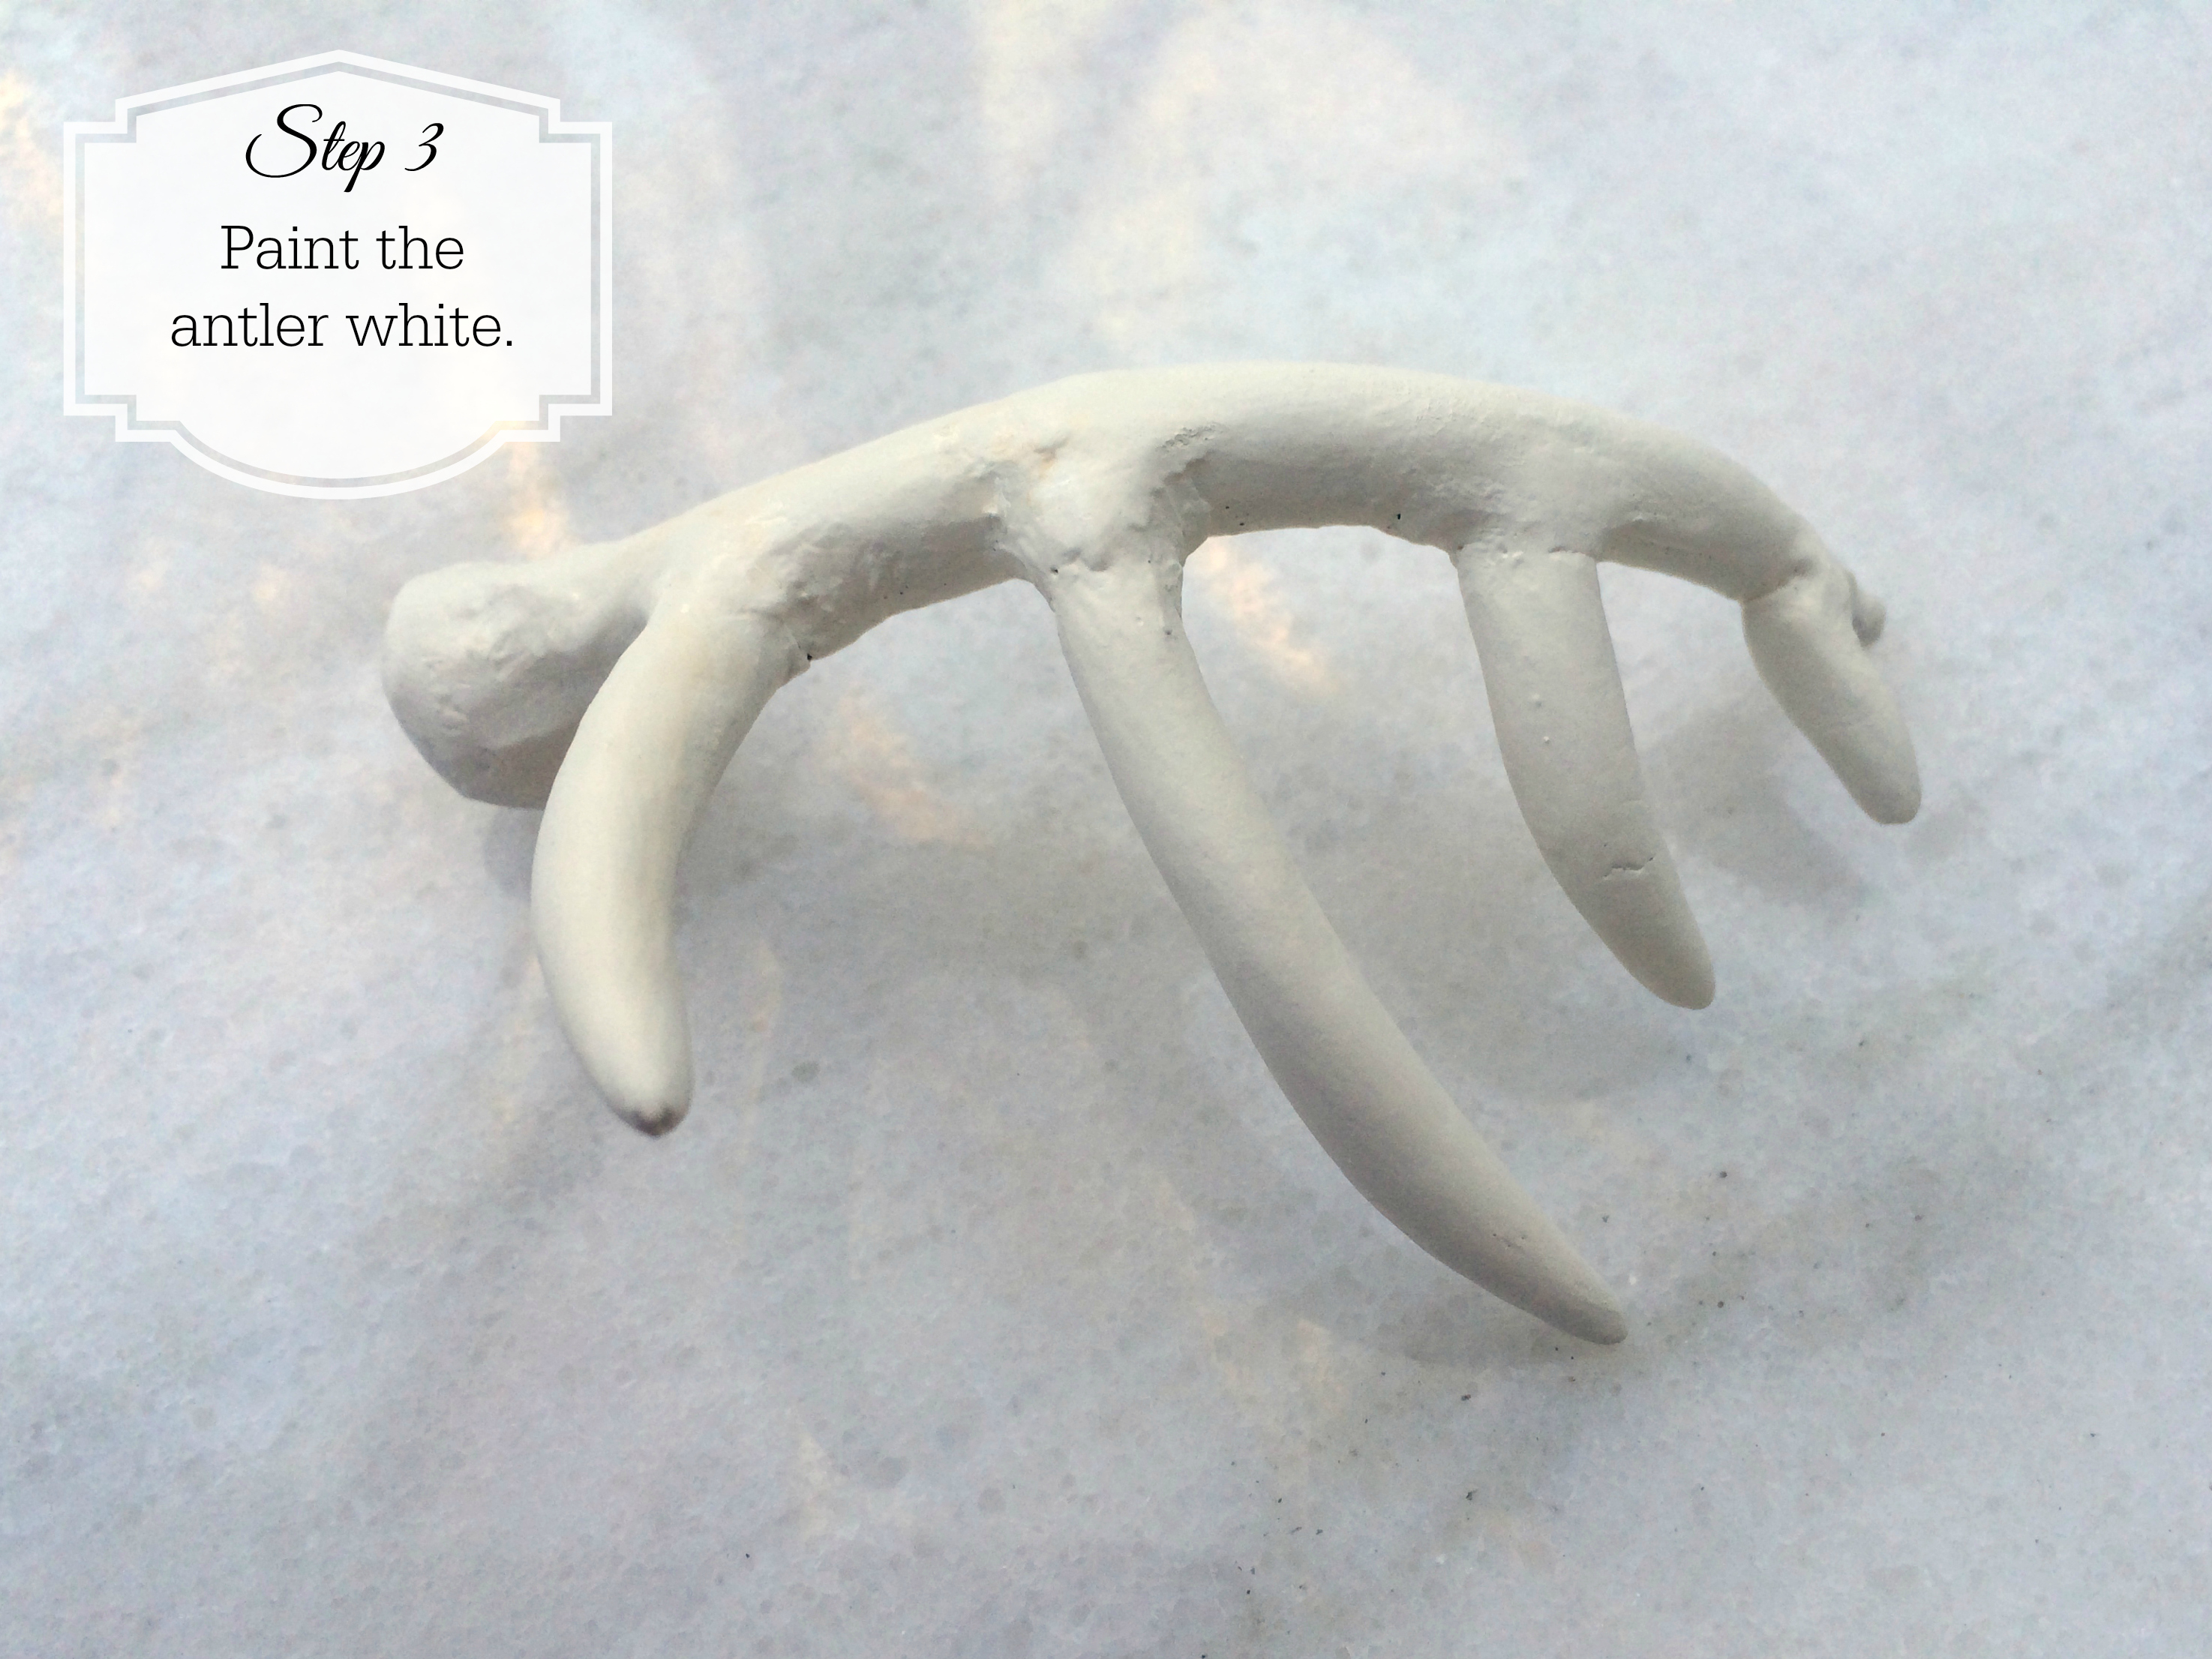
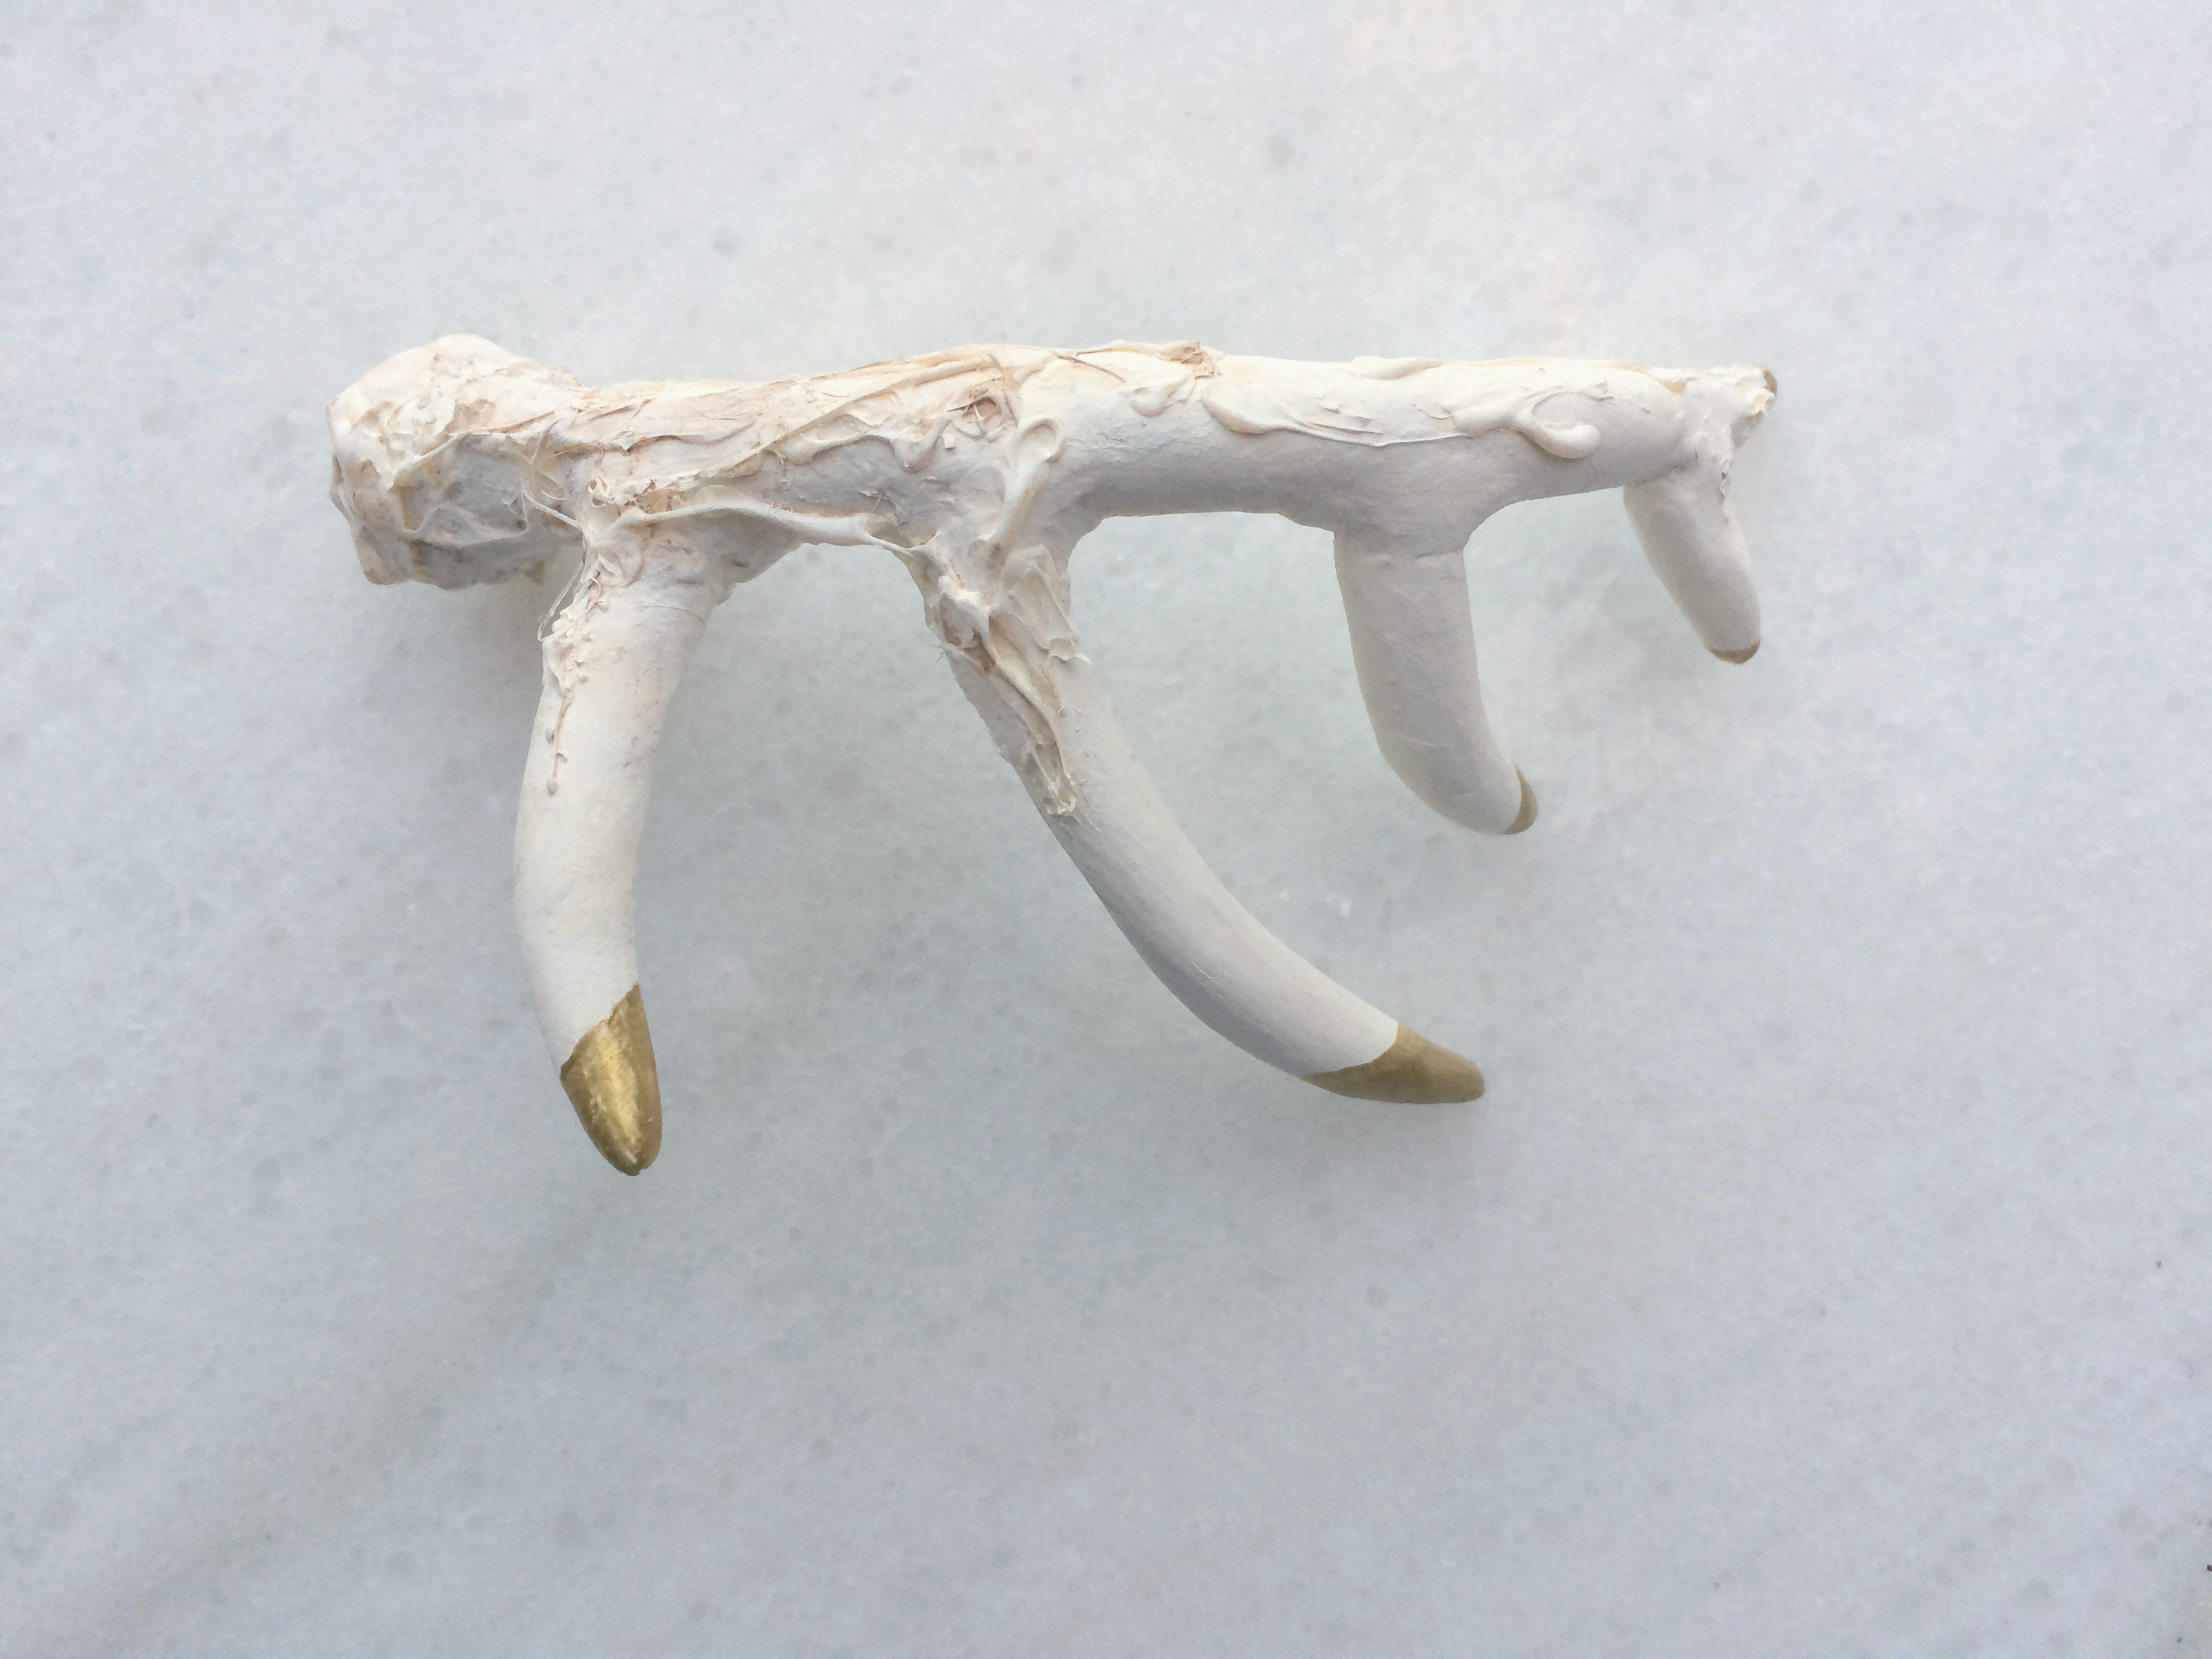
3. Paint the antler white. Let dry.
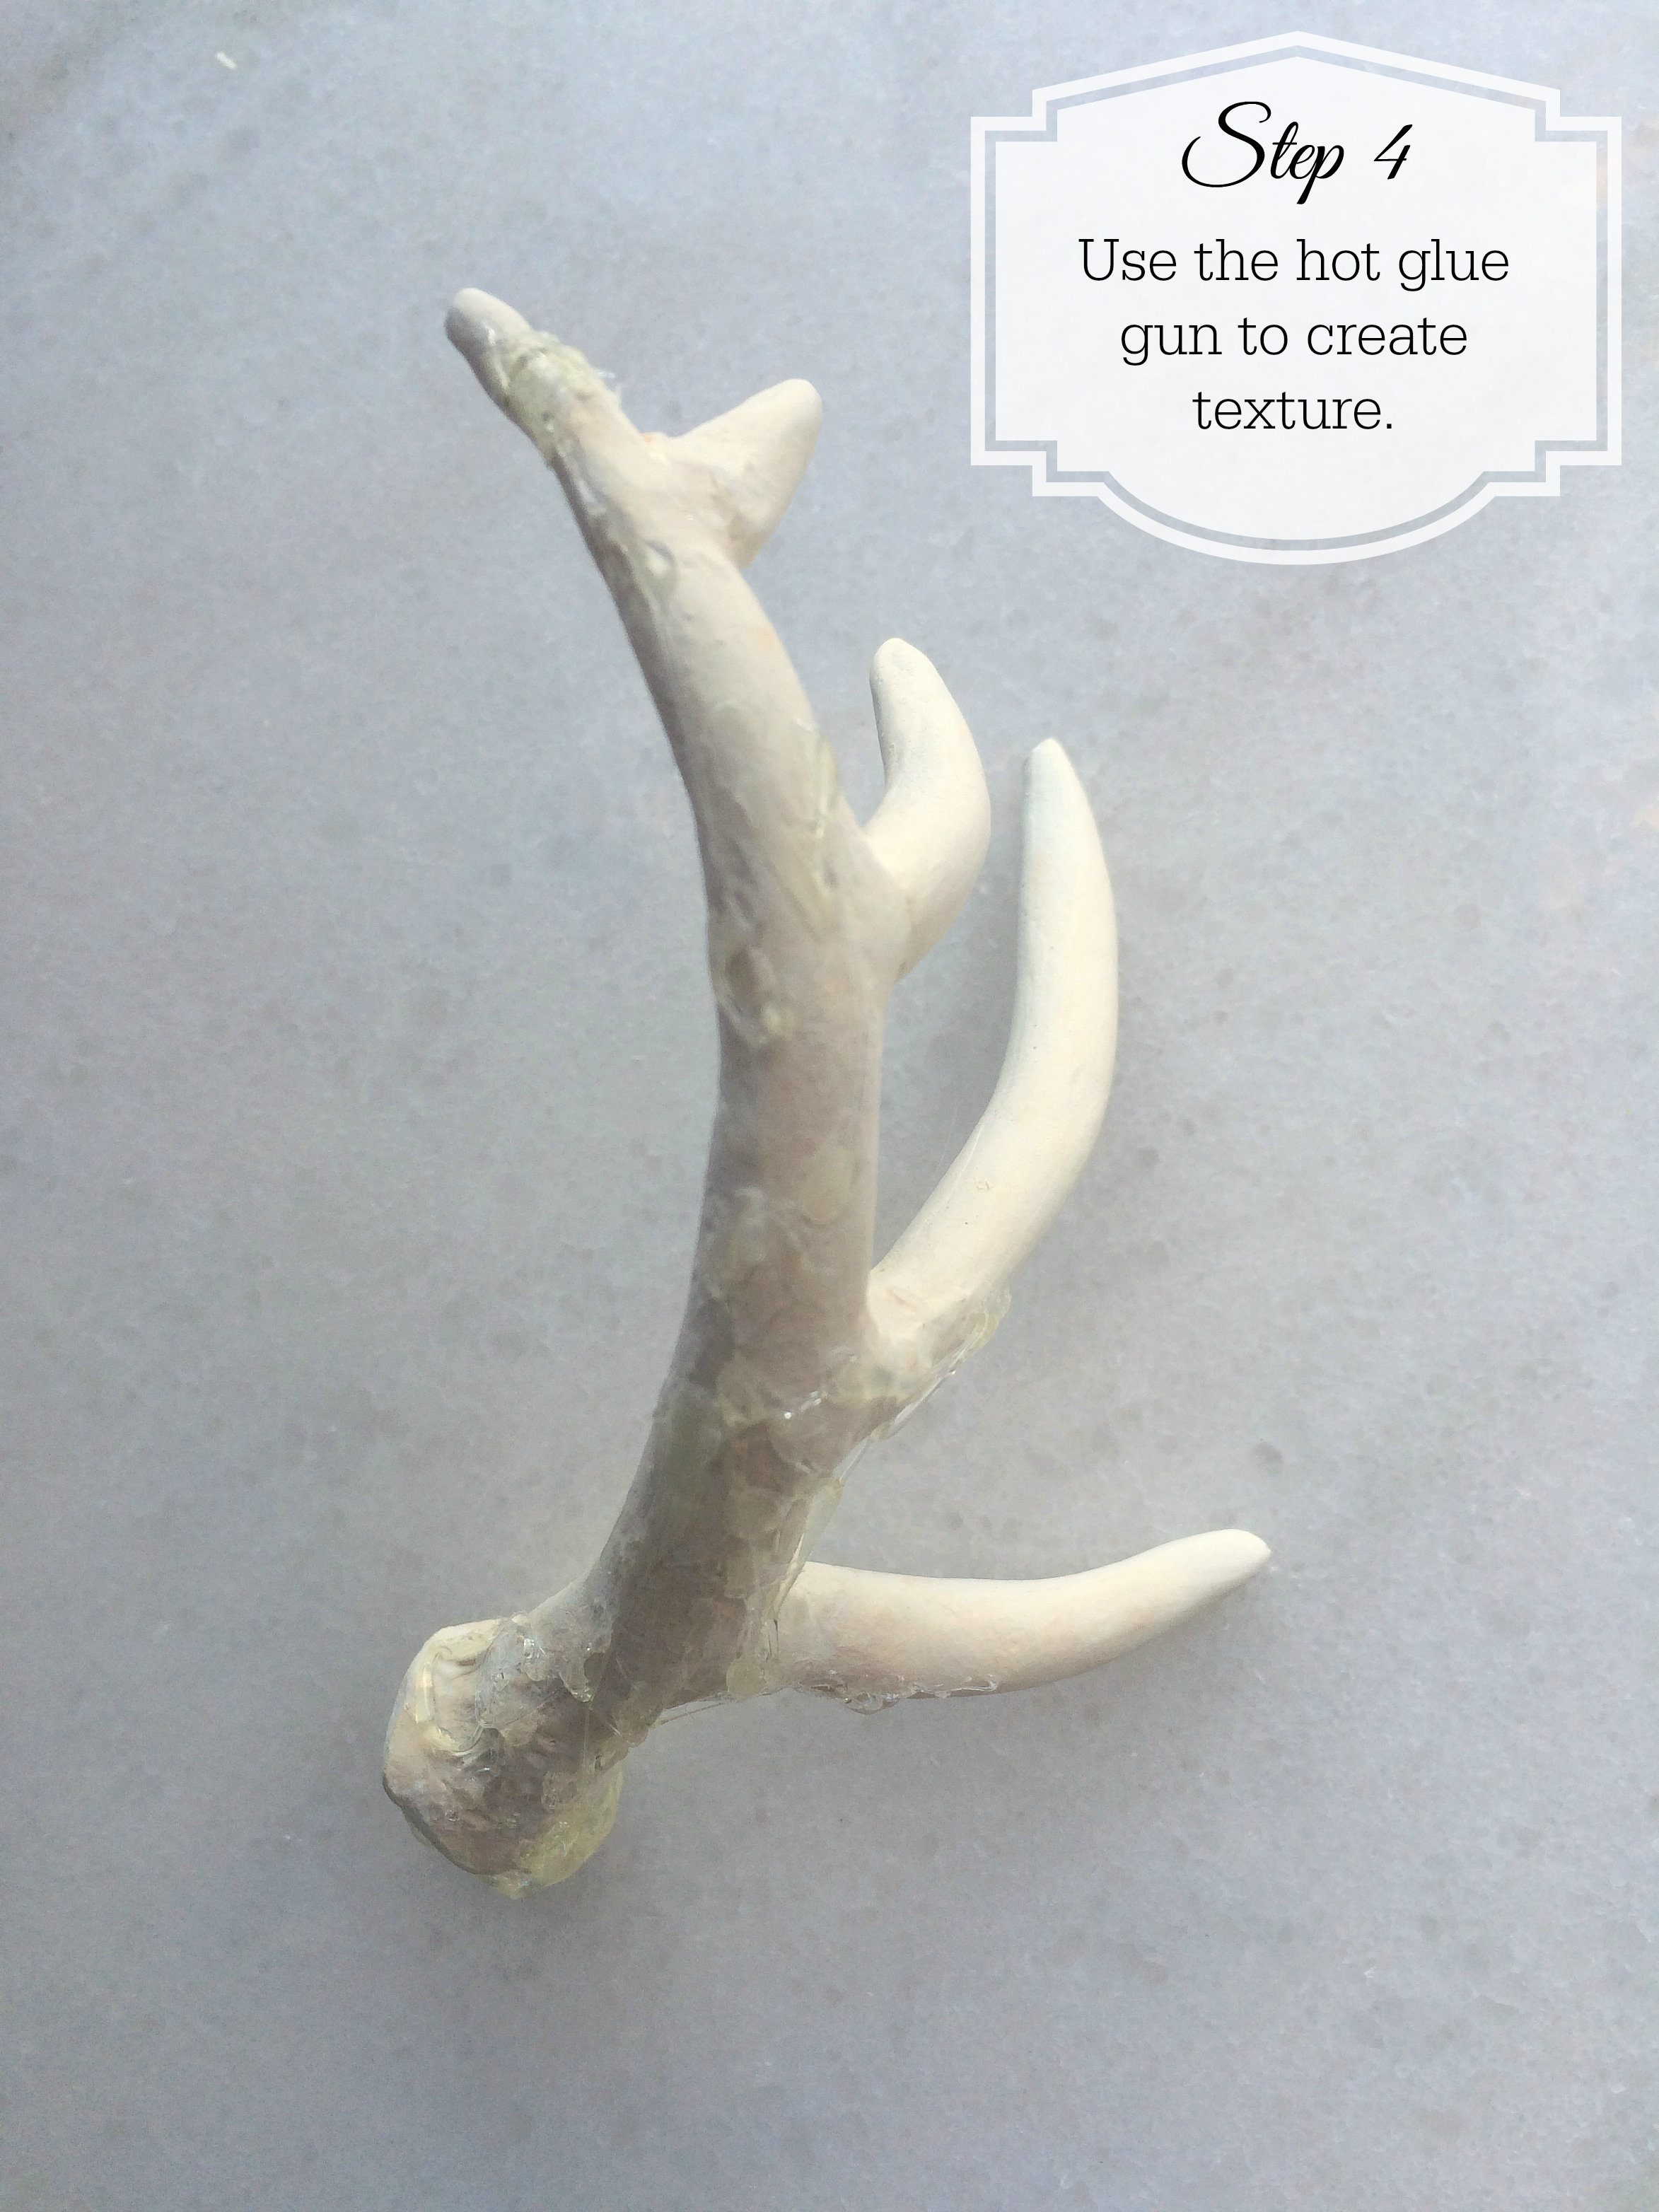
4. Take your glue gun and create a large base for the main beam. Then create small bumps + lines along the main beam.
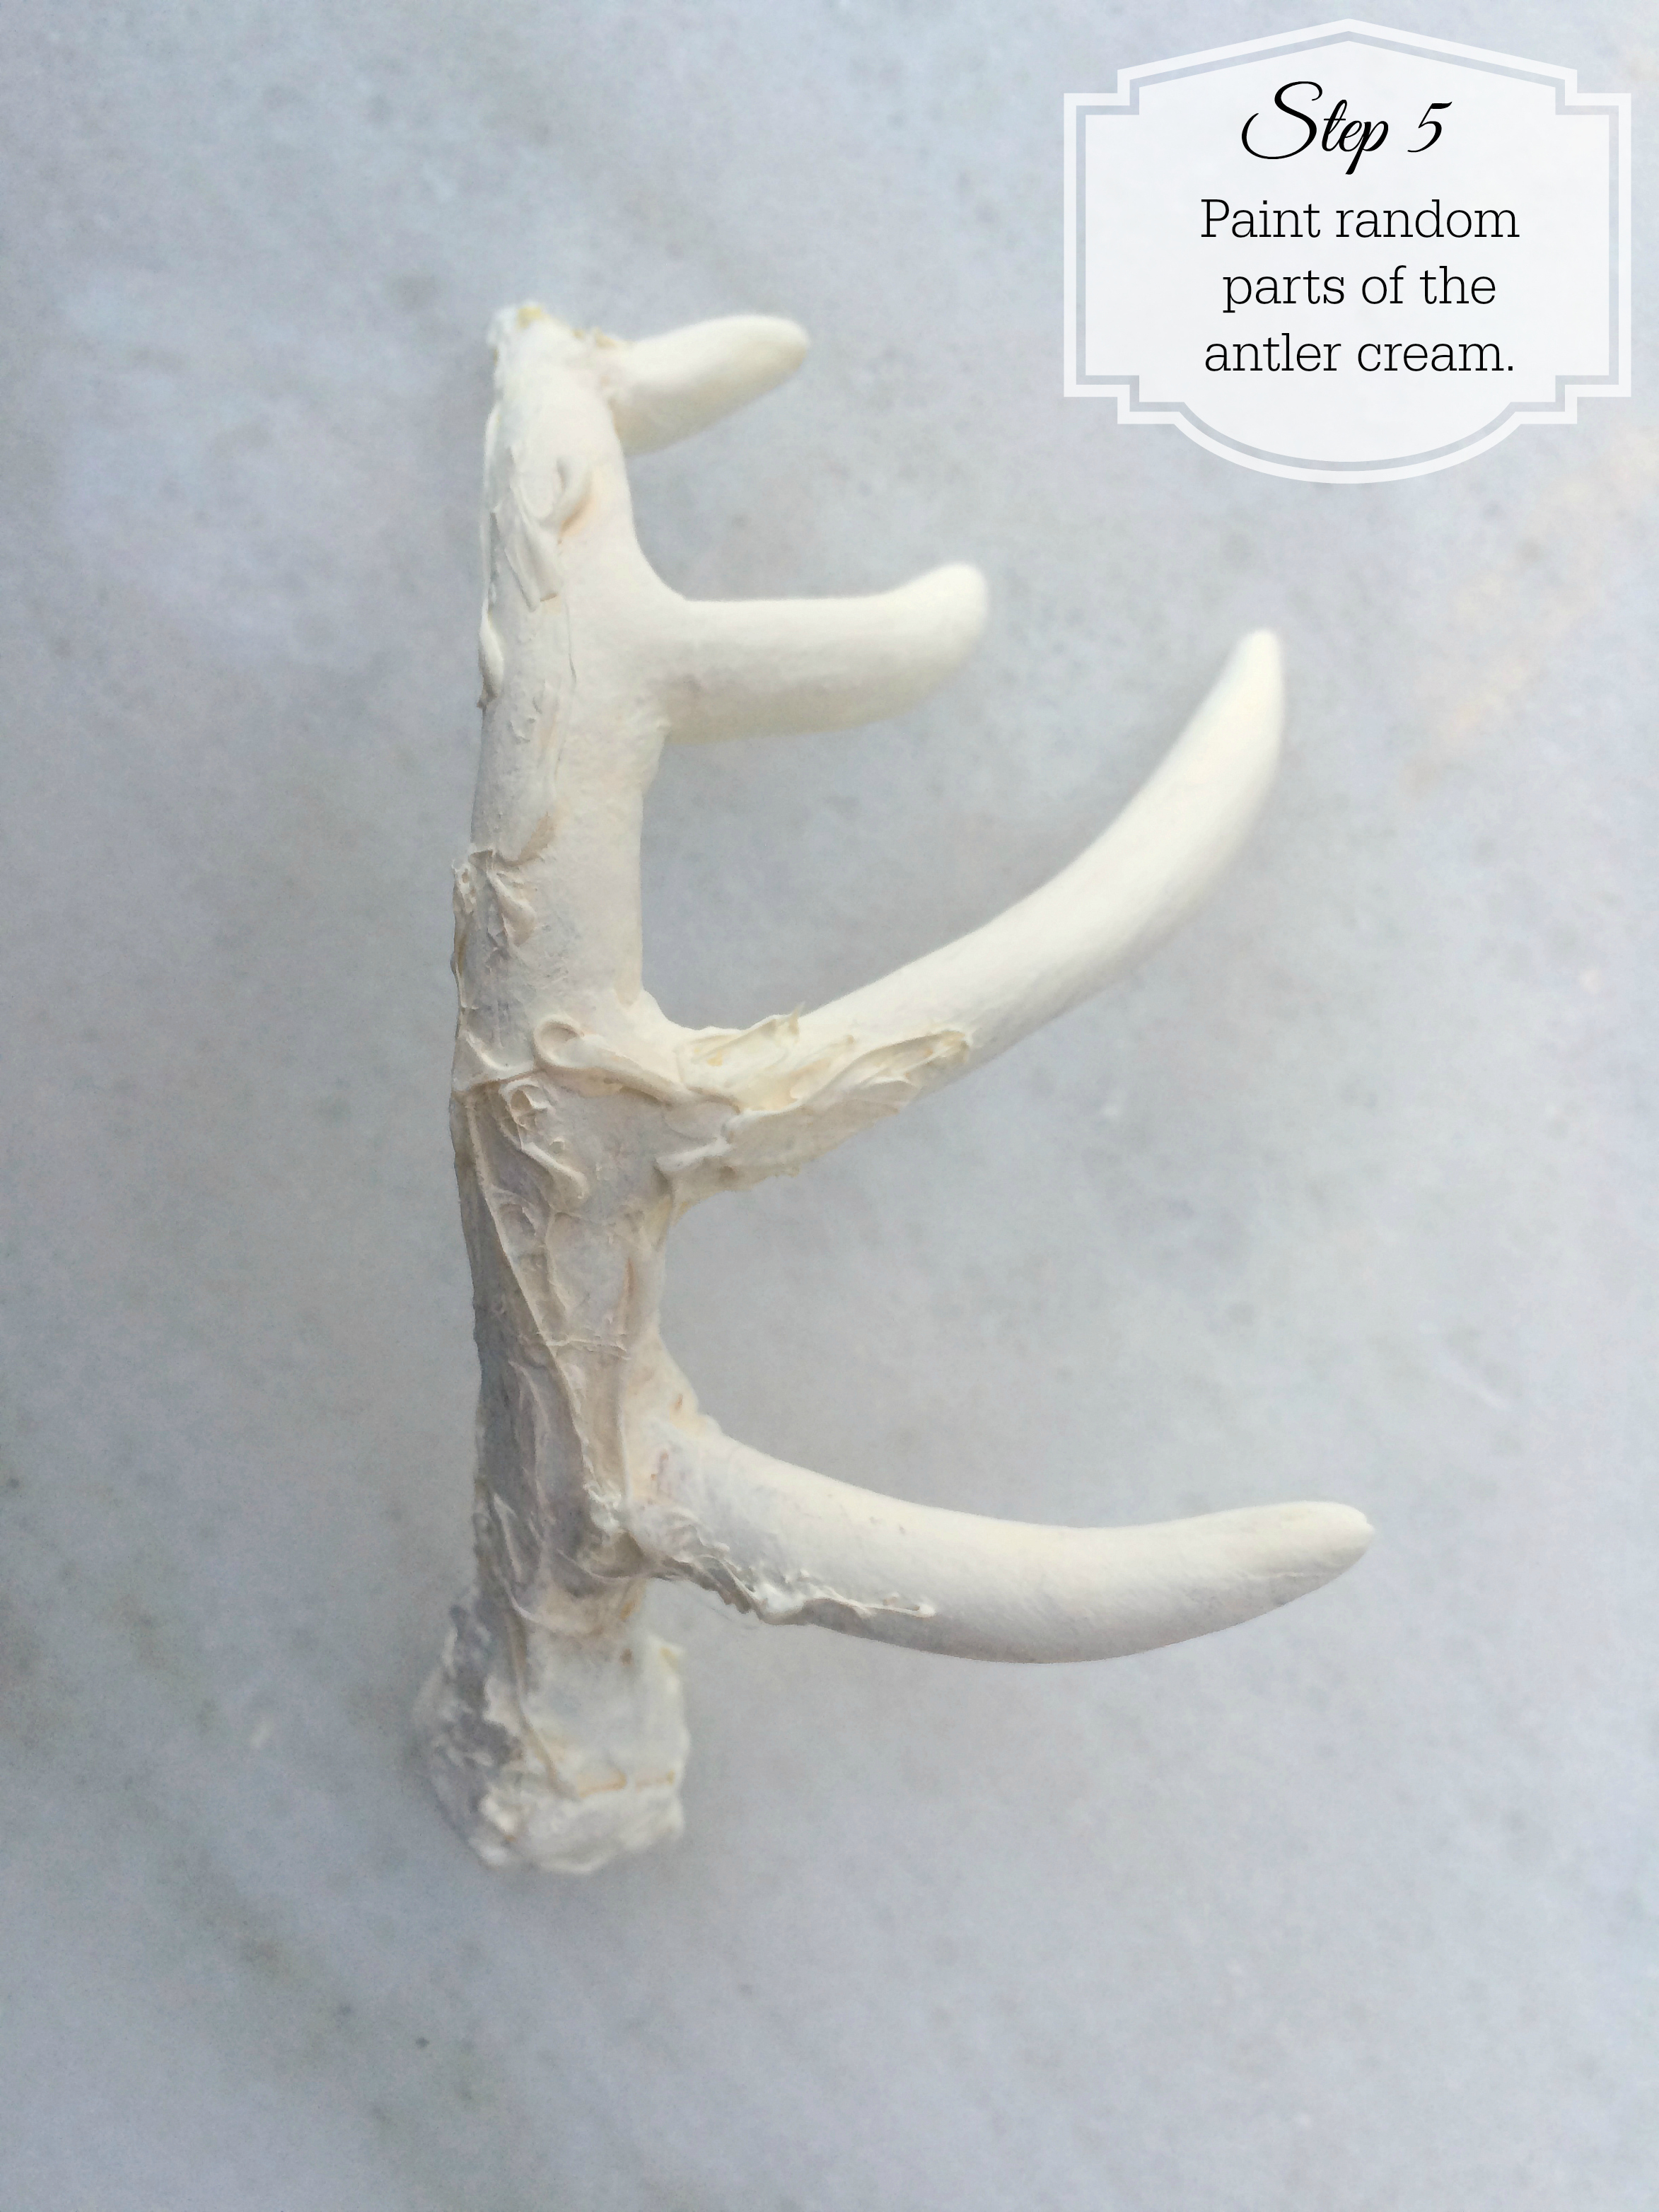
5. Paint random parts of the antler cream. Let dry.
6. Paint the areas around the small hot glue bumps + lines in beige. Let dry.
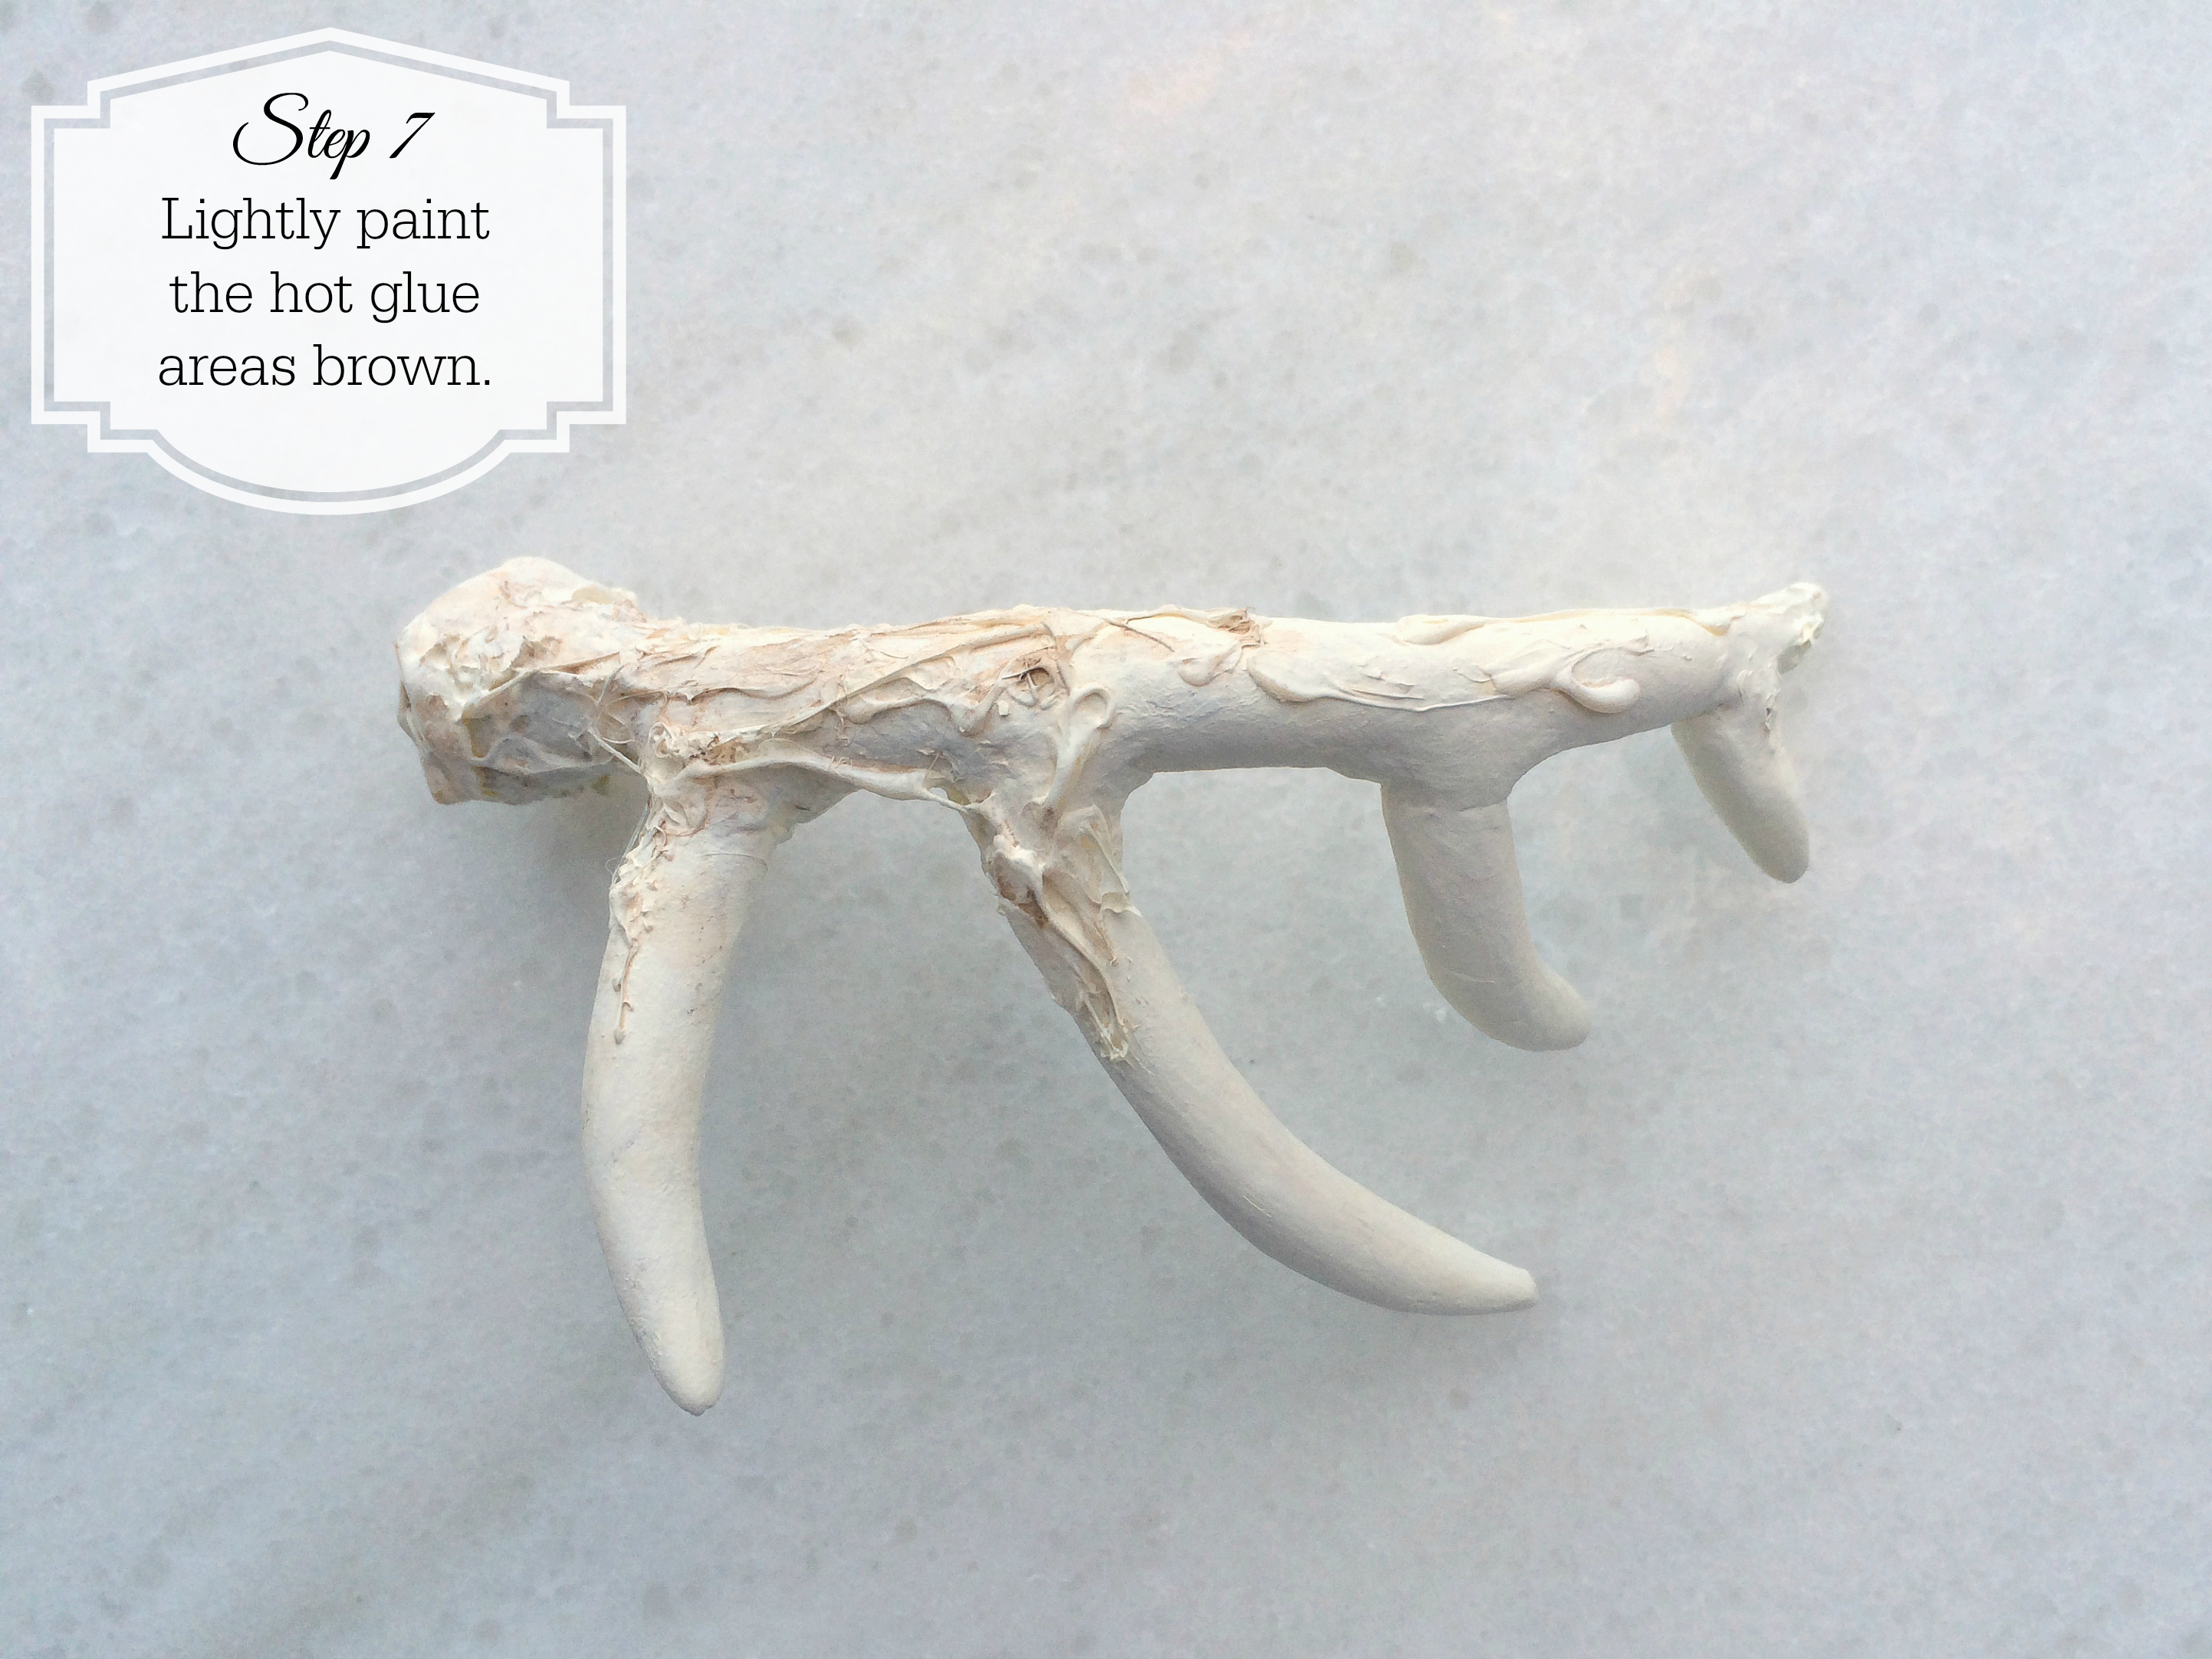
7. Paint the small hot glue bumps + lines that are located near the large hot glue base in brown.
8. Paint the ends of all the points gold. I like to paint them all at different angles.
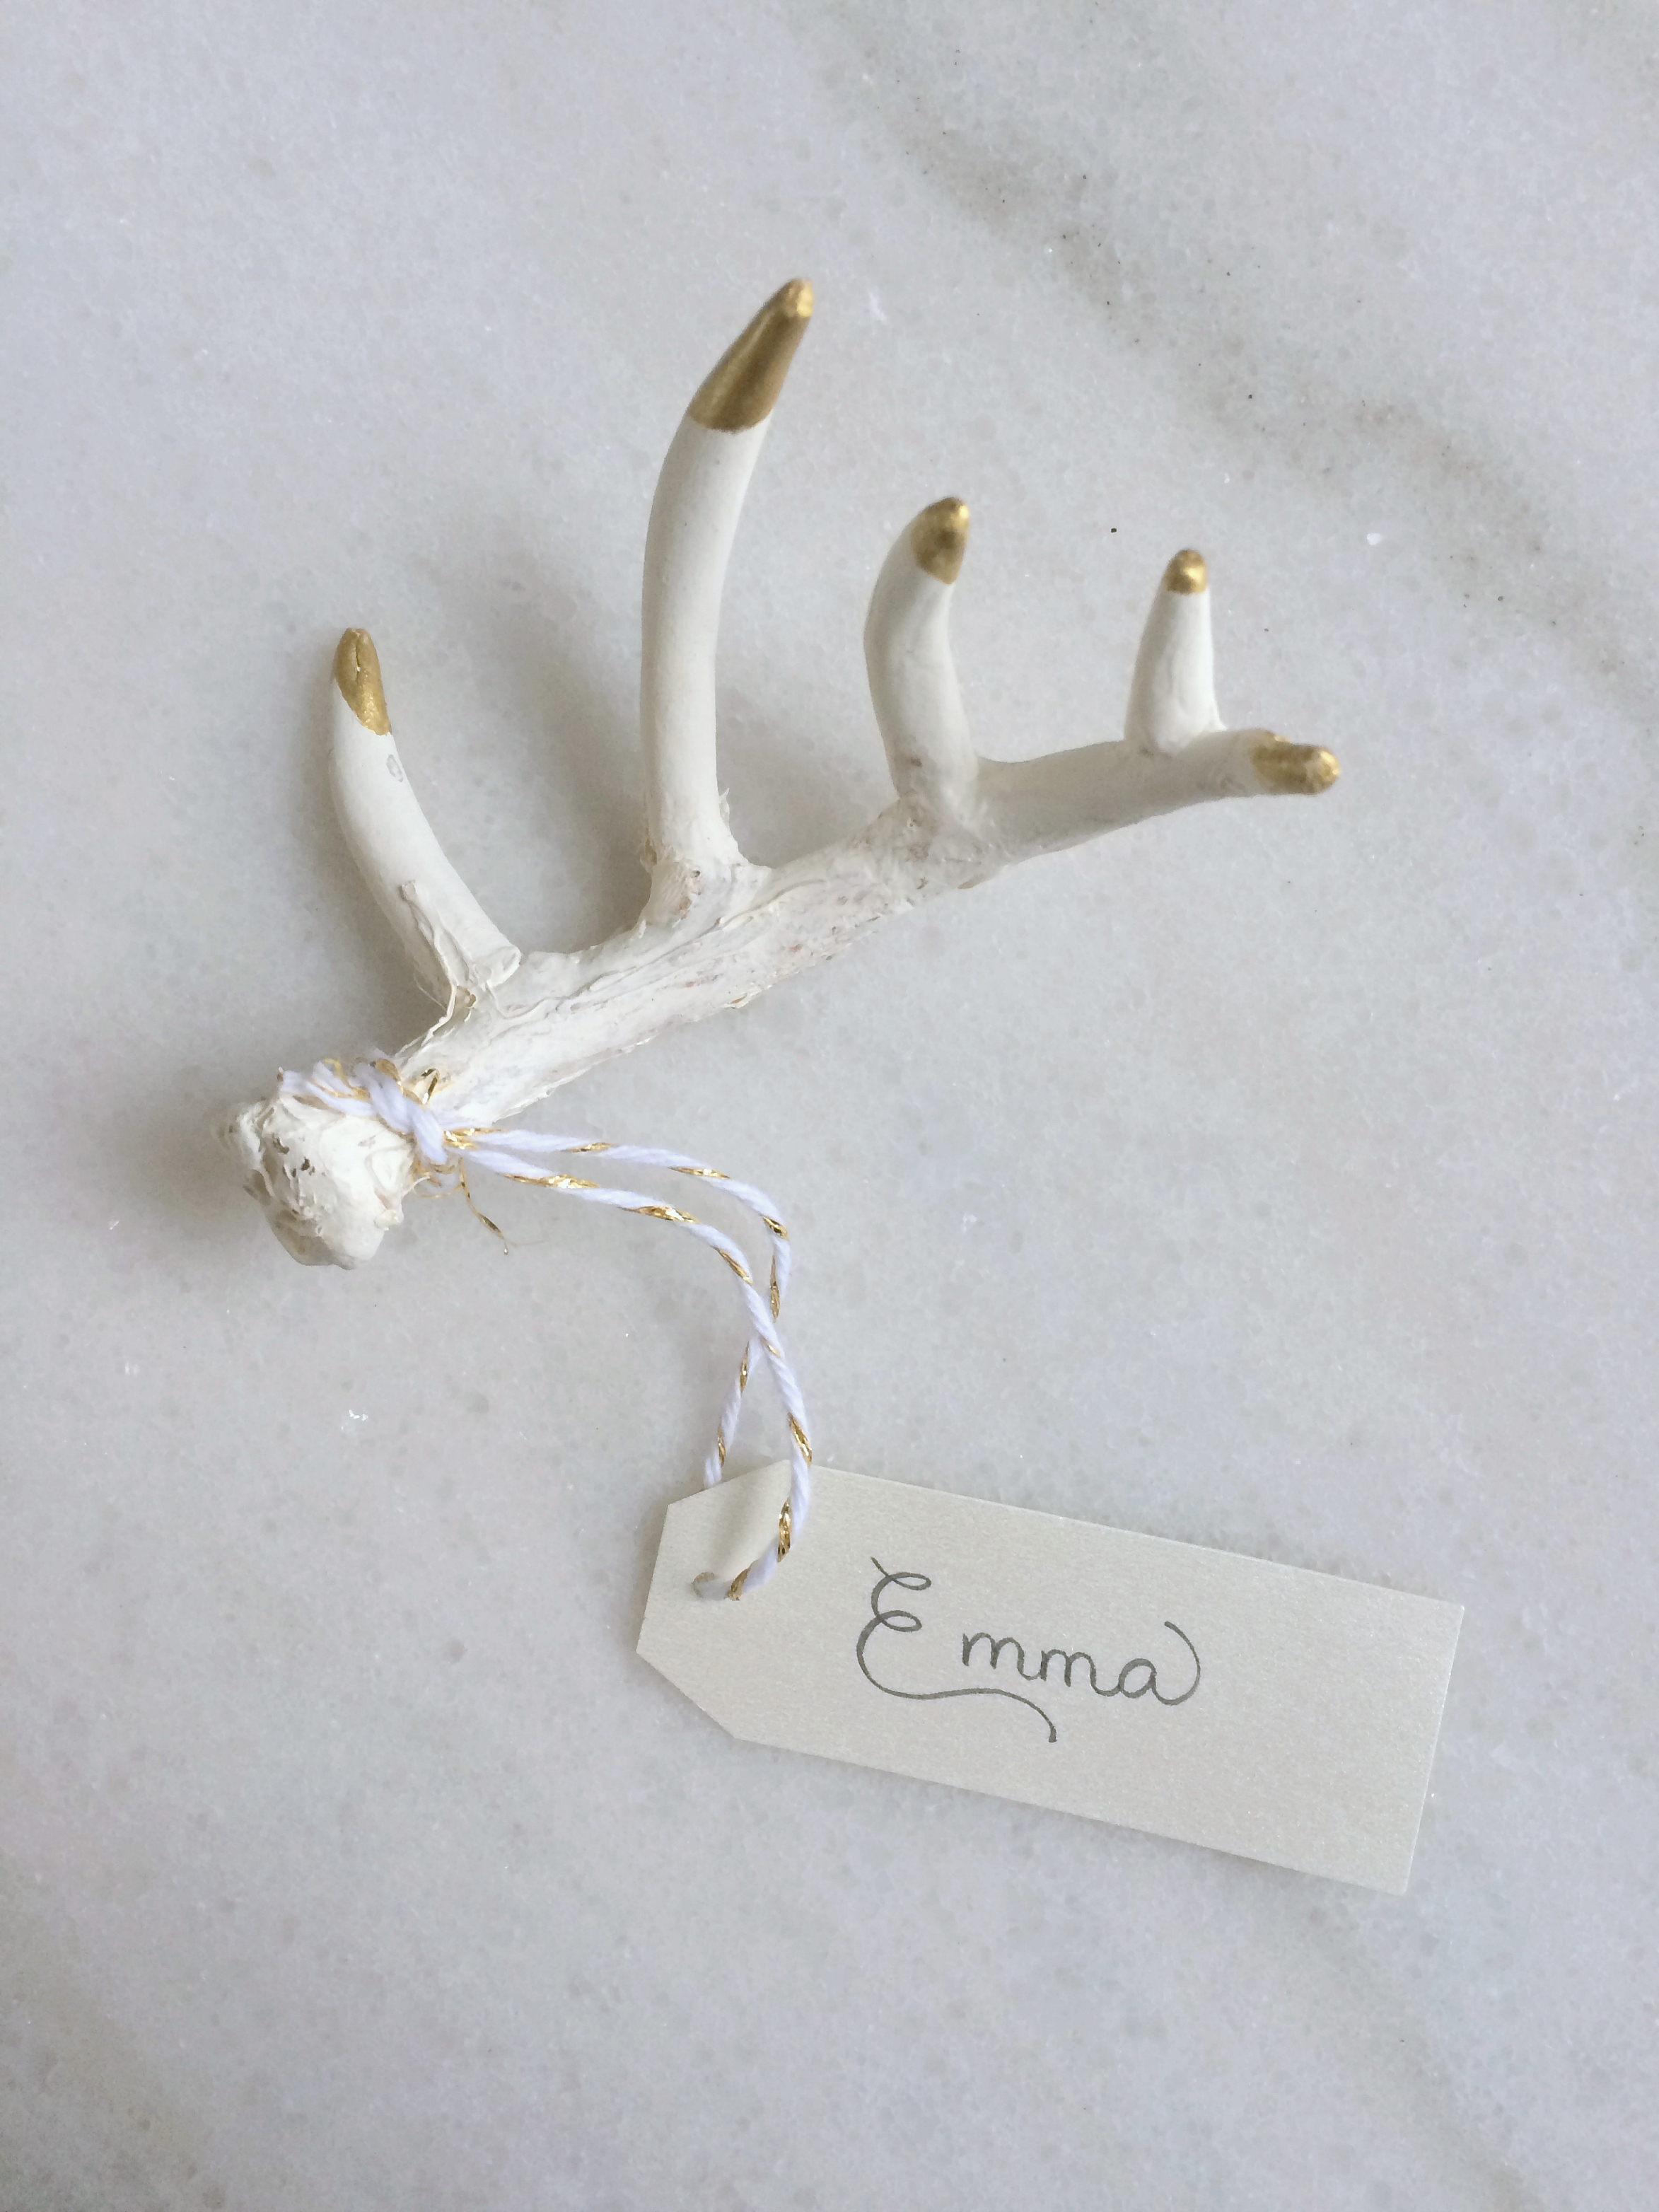
9. Take your card stock and cut it into a small rectangular tag and punch a hole on one end. Thread bakers twine through the hole and attach the twine to the base of the antler. Write your the name of your guest on the tag.
10. Place an antler on each plate or on the table for each guest.
https://jsevents.com/wp-content/uploads/2021/08/logo-pink-1030x925.png00Jessica Swagmanhttps://jsevents.com/wp-content/uploads/2021/08/logo-pink-1030x925.pngJessica Swagman2015-12-10 20:00:402015-12-14 21:33:14DIY Antler Place Card
“A rising tide lifts all the boats.” The New England Council
For those of you that don’t know (like all my friends who think I just go to all these fun get-togethers), The Rising Tide Society is an educational community for creative entrepreneurs, focusing on community over competition. I am part of the West Michigan chapter and have met some seriously talented and kindred individuals.
Below is a picture from our most recent meeting (our philanthropy month) where we collected nonperishable items for HQ and colored lunch bags for kids food basket. Yes, I drew raindrops on the bag I am holding. Yes, the other bags I colored were just as simple/pathetic. I panicked and drew shapes.
Well, tonight was the first evening of The Rising Tide Society Summit Series. We listened to three wonderful speakers and learned some powerful things about branding, building and blogging your business.
Jeff Goins (writer/author) challenged us to own what you do. He asked, “When does a writer become a writer? When he tells people he is one.”
Oh. Well, ok then. That was a lot easier than I thought. Go figure.
I am a: wedding planner + floral designer.
Ok, I’m also a fashion designer. Have you tried juggling two businesses? It’s hard work. Sometimes my head spins at the idea of having two blogs, two separate social media accounts, and I loose track of which business I’m working on or talking about.
One of the exercises for today was also introducing ourselves with 5 fun facts. I did this for both businesses. See? There goes my head spinning off…
Here are my fun facts + picture (for this business). If you want to read my fun facts for my fashion business, here’s that post.
1. I am a wedding planner + floral designer.
2. I also share my time with designing fashion for my clothing company.
3. I love to travel but there is really no place like home. When I find time to travel, often it’s to visit my family, who all live out West or in Asia.
4. I am an introvert + shy and I tend to be extremely private.
5. I have a deep love of flowers. When I need a break from life, I head outside and garden.
This image is from a style shoot I put together from this spring. I like it because it shows I can let loose and have fun while working. I think I let my serious side show most of the time, so people forget that I do laugh. The male model is also one of my friends. He, like the rest of my friends, family, and team, somehow put up with me. And my businesses.
https://jsevents.com/wp-content/uploads/2021/08/logo-pink-1030x925.png00Jessica Swagmanhttps://jsevents.com/wp-content/uploads/2021/08/logo-pink-1030x925.pngJessica Swagman2015-12-08 23:30:532015-12-09 16:01:26The Rising Tide: Day 1
“City sidewalks, busy sidewalks. Dressed in holiday style.”
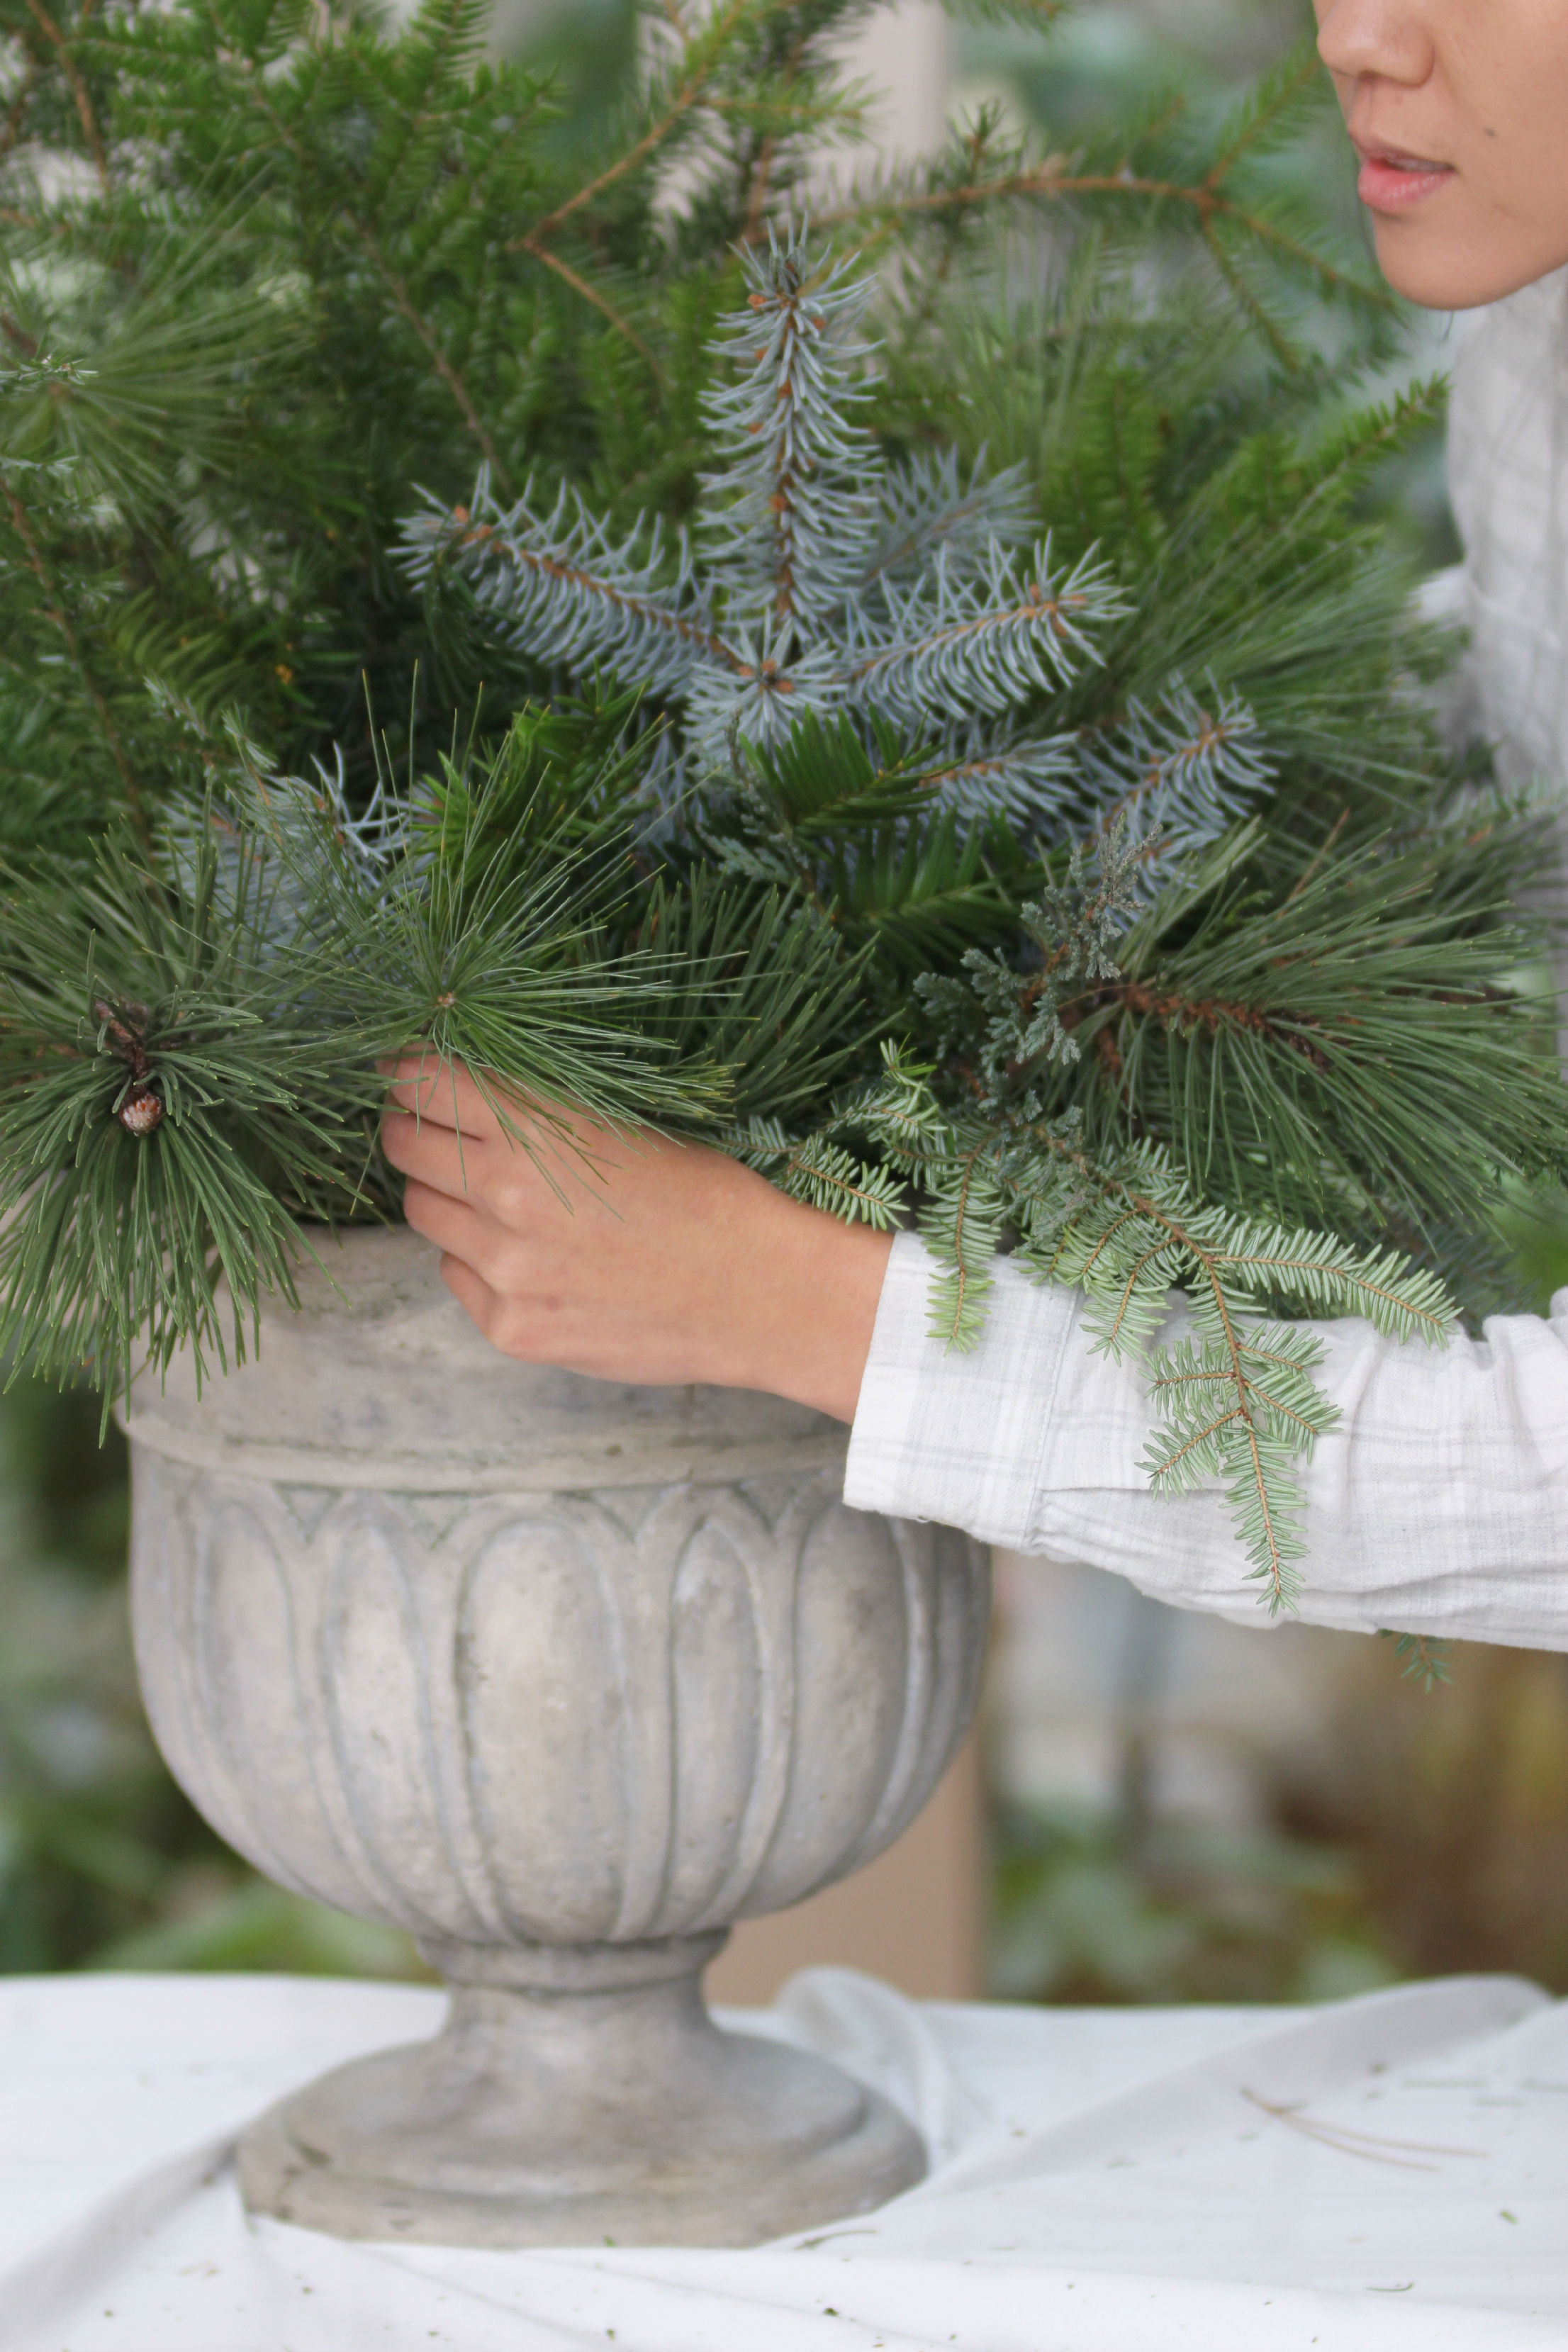
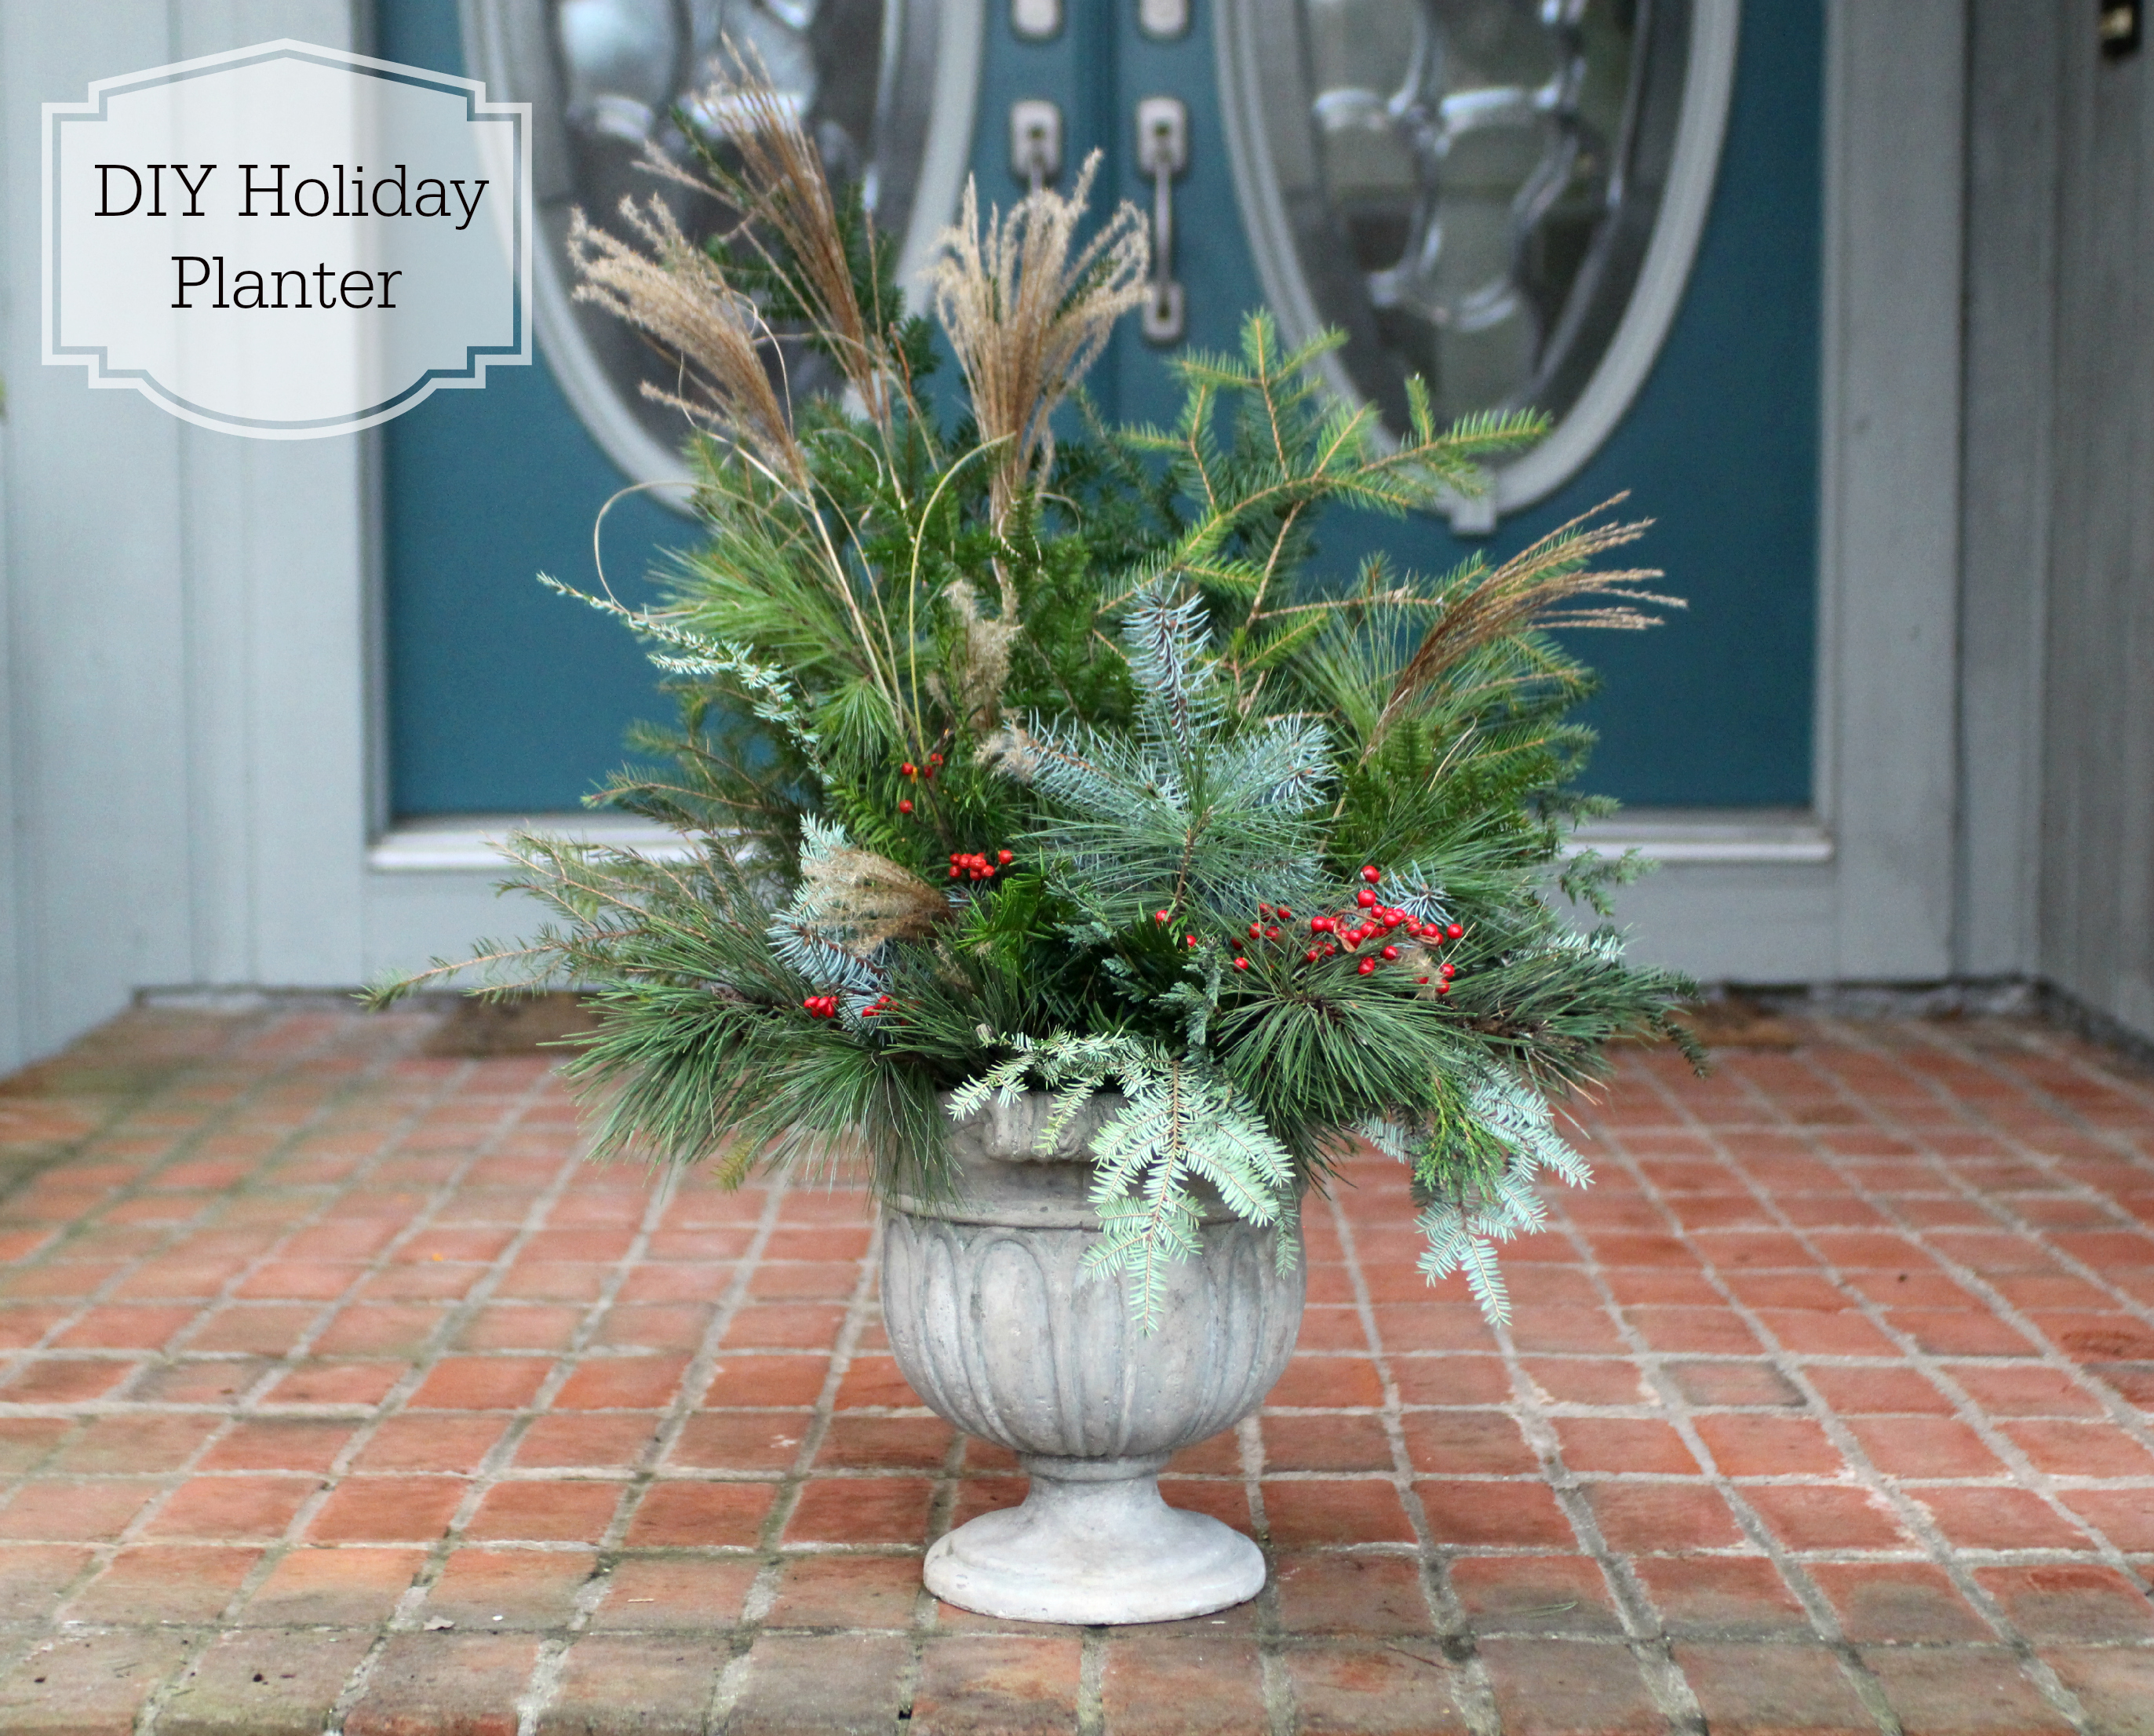
The holidays really are my favorite time of the year. On any given day, from late November through Christmas, I can be seen dancing (and loudly singing) to Christmas music, drinking copious amounts of hot chocolate, and watching every holiday movie I can get my hands on. I happily hang every ornament, decorate the dining room table to the nines, and wrap presents for hours on end. I am one of those people who wander the streets of Grand Rapids, in search for the prettiest decorations. Yes, the holidays and I are the best of friends. Being a florist means that I’m even more eager to decorate the house with garlands of evergreens, wreaths on every door, and flowers on every surface. So with that said, let’s start with a little outside decorating.
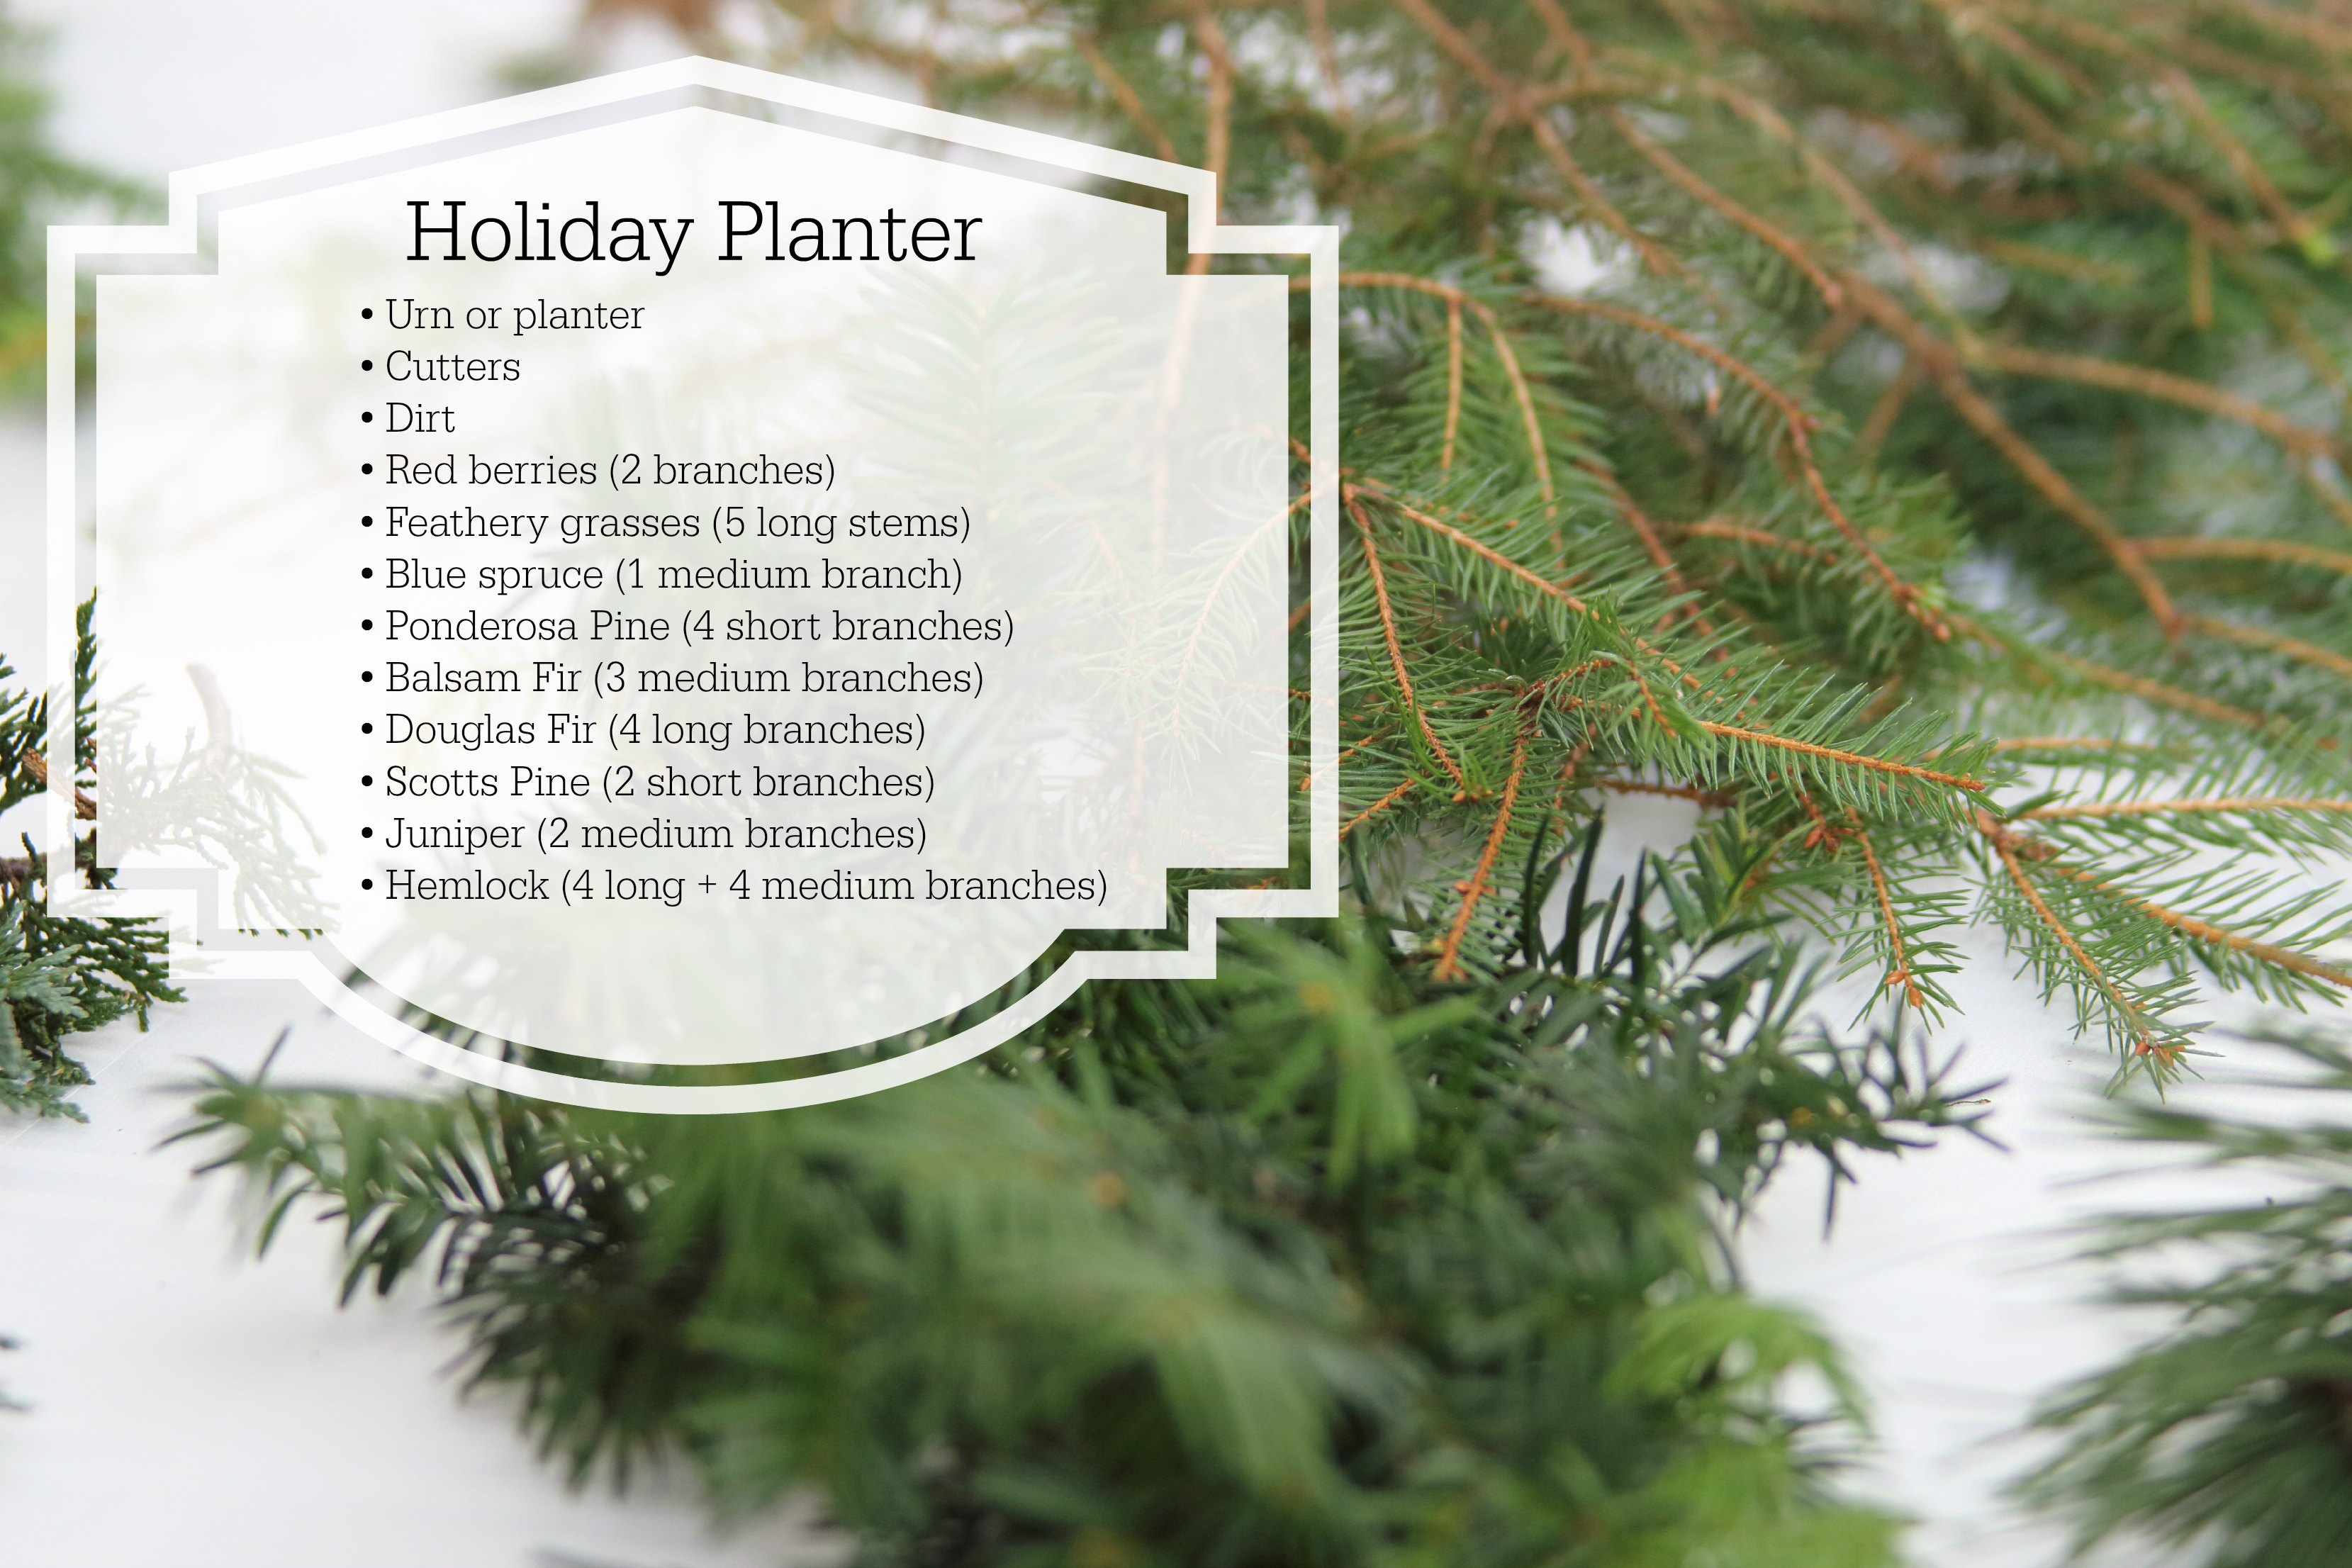
What you’ll need:
• Cutters
• Urn or planter
• Dirt
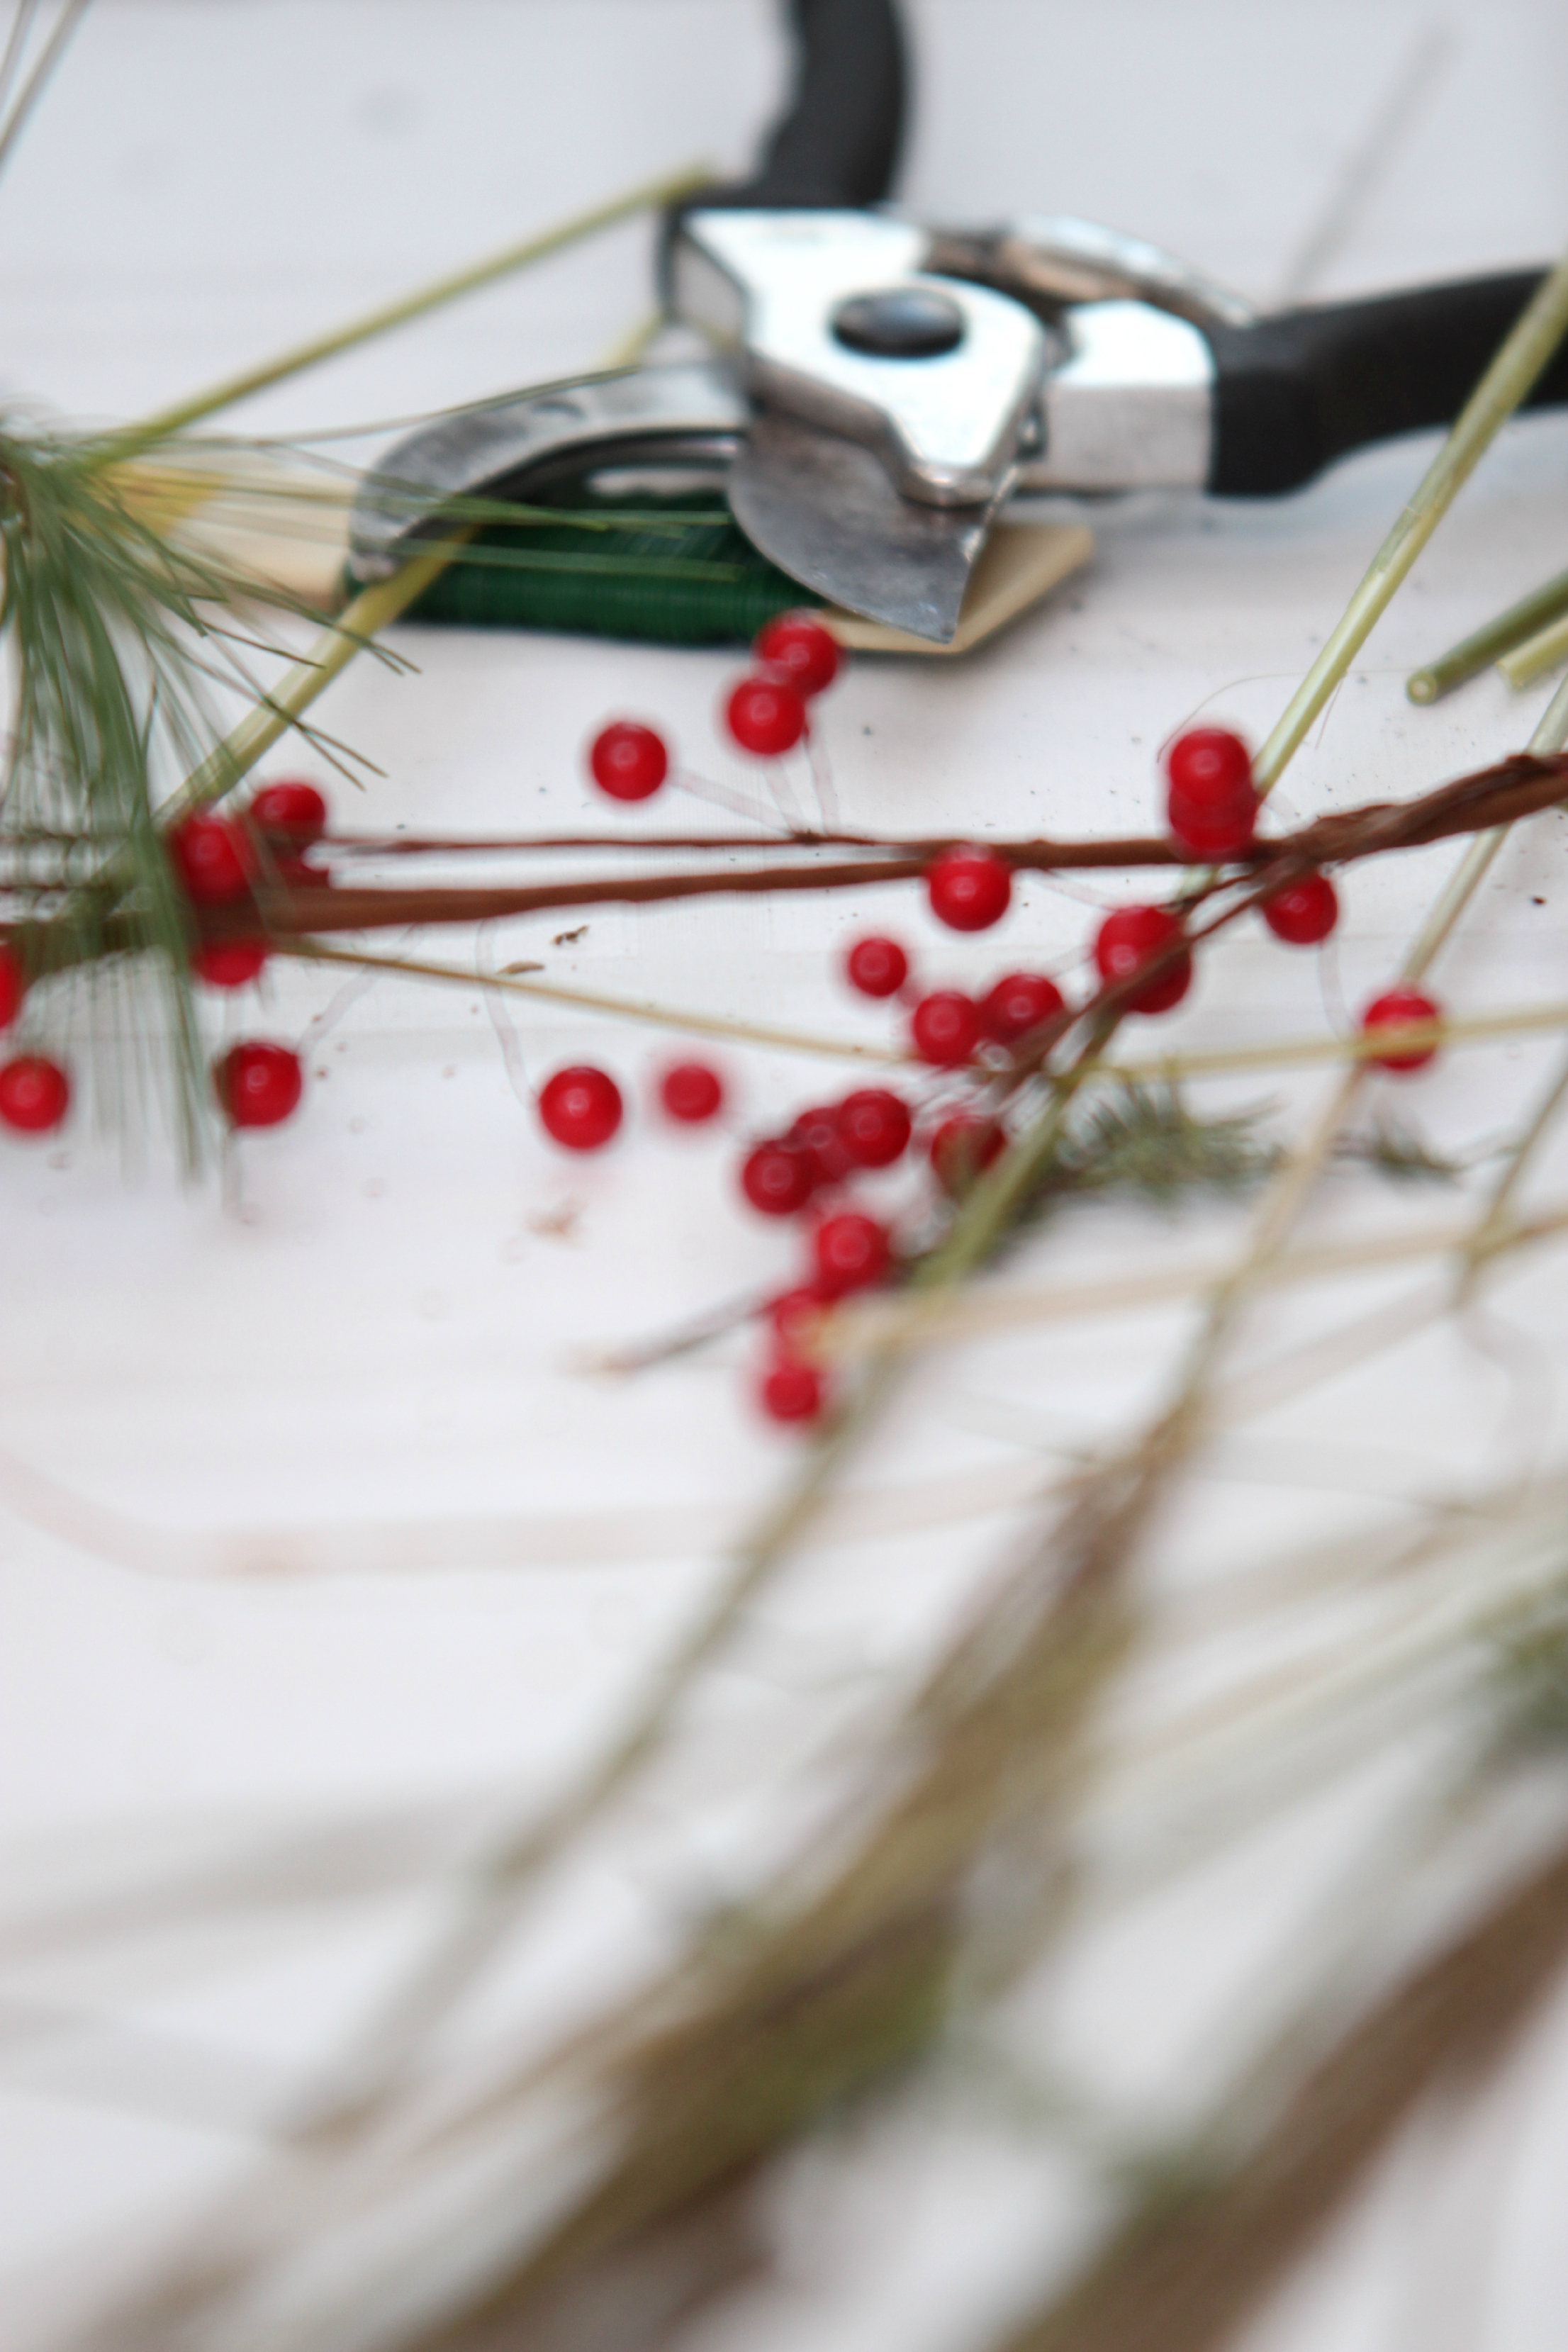
• Red berries (2 branches)
• Feathery Grasses (5 long stems)
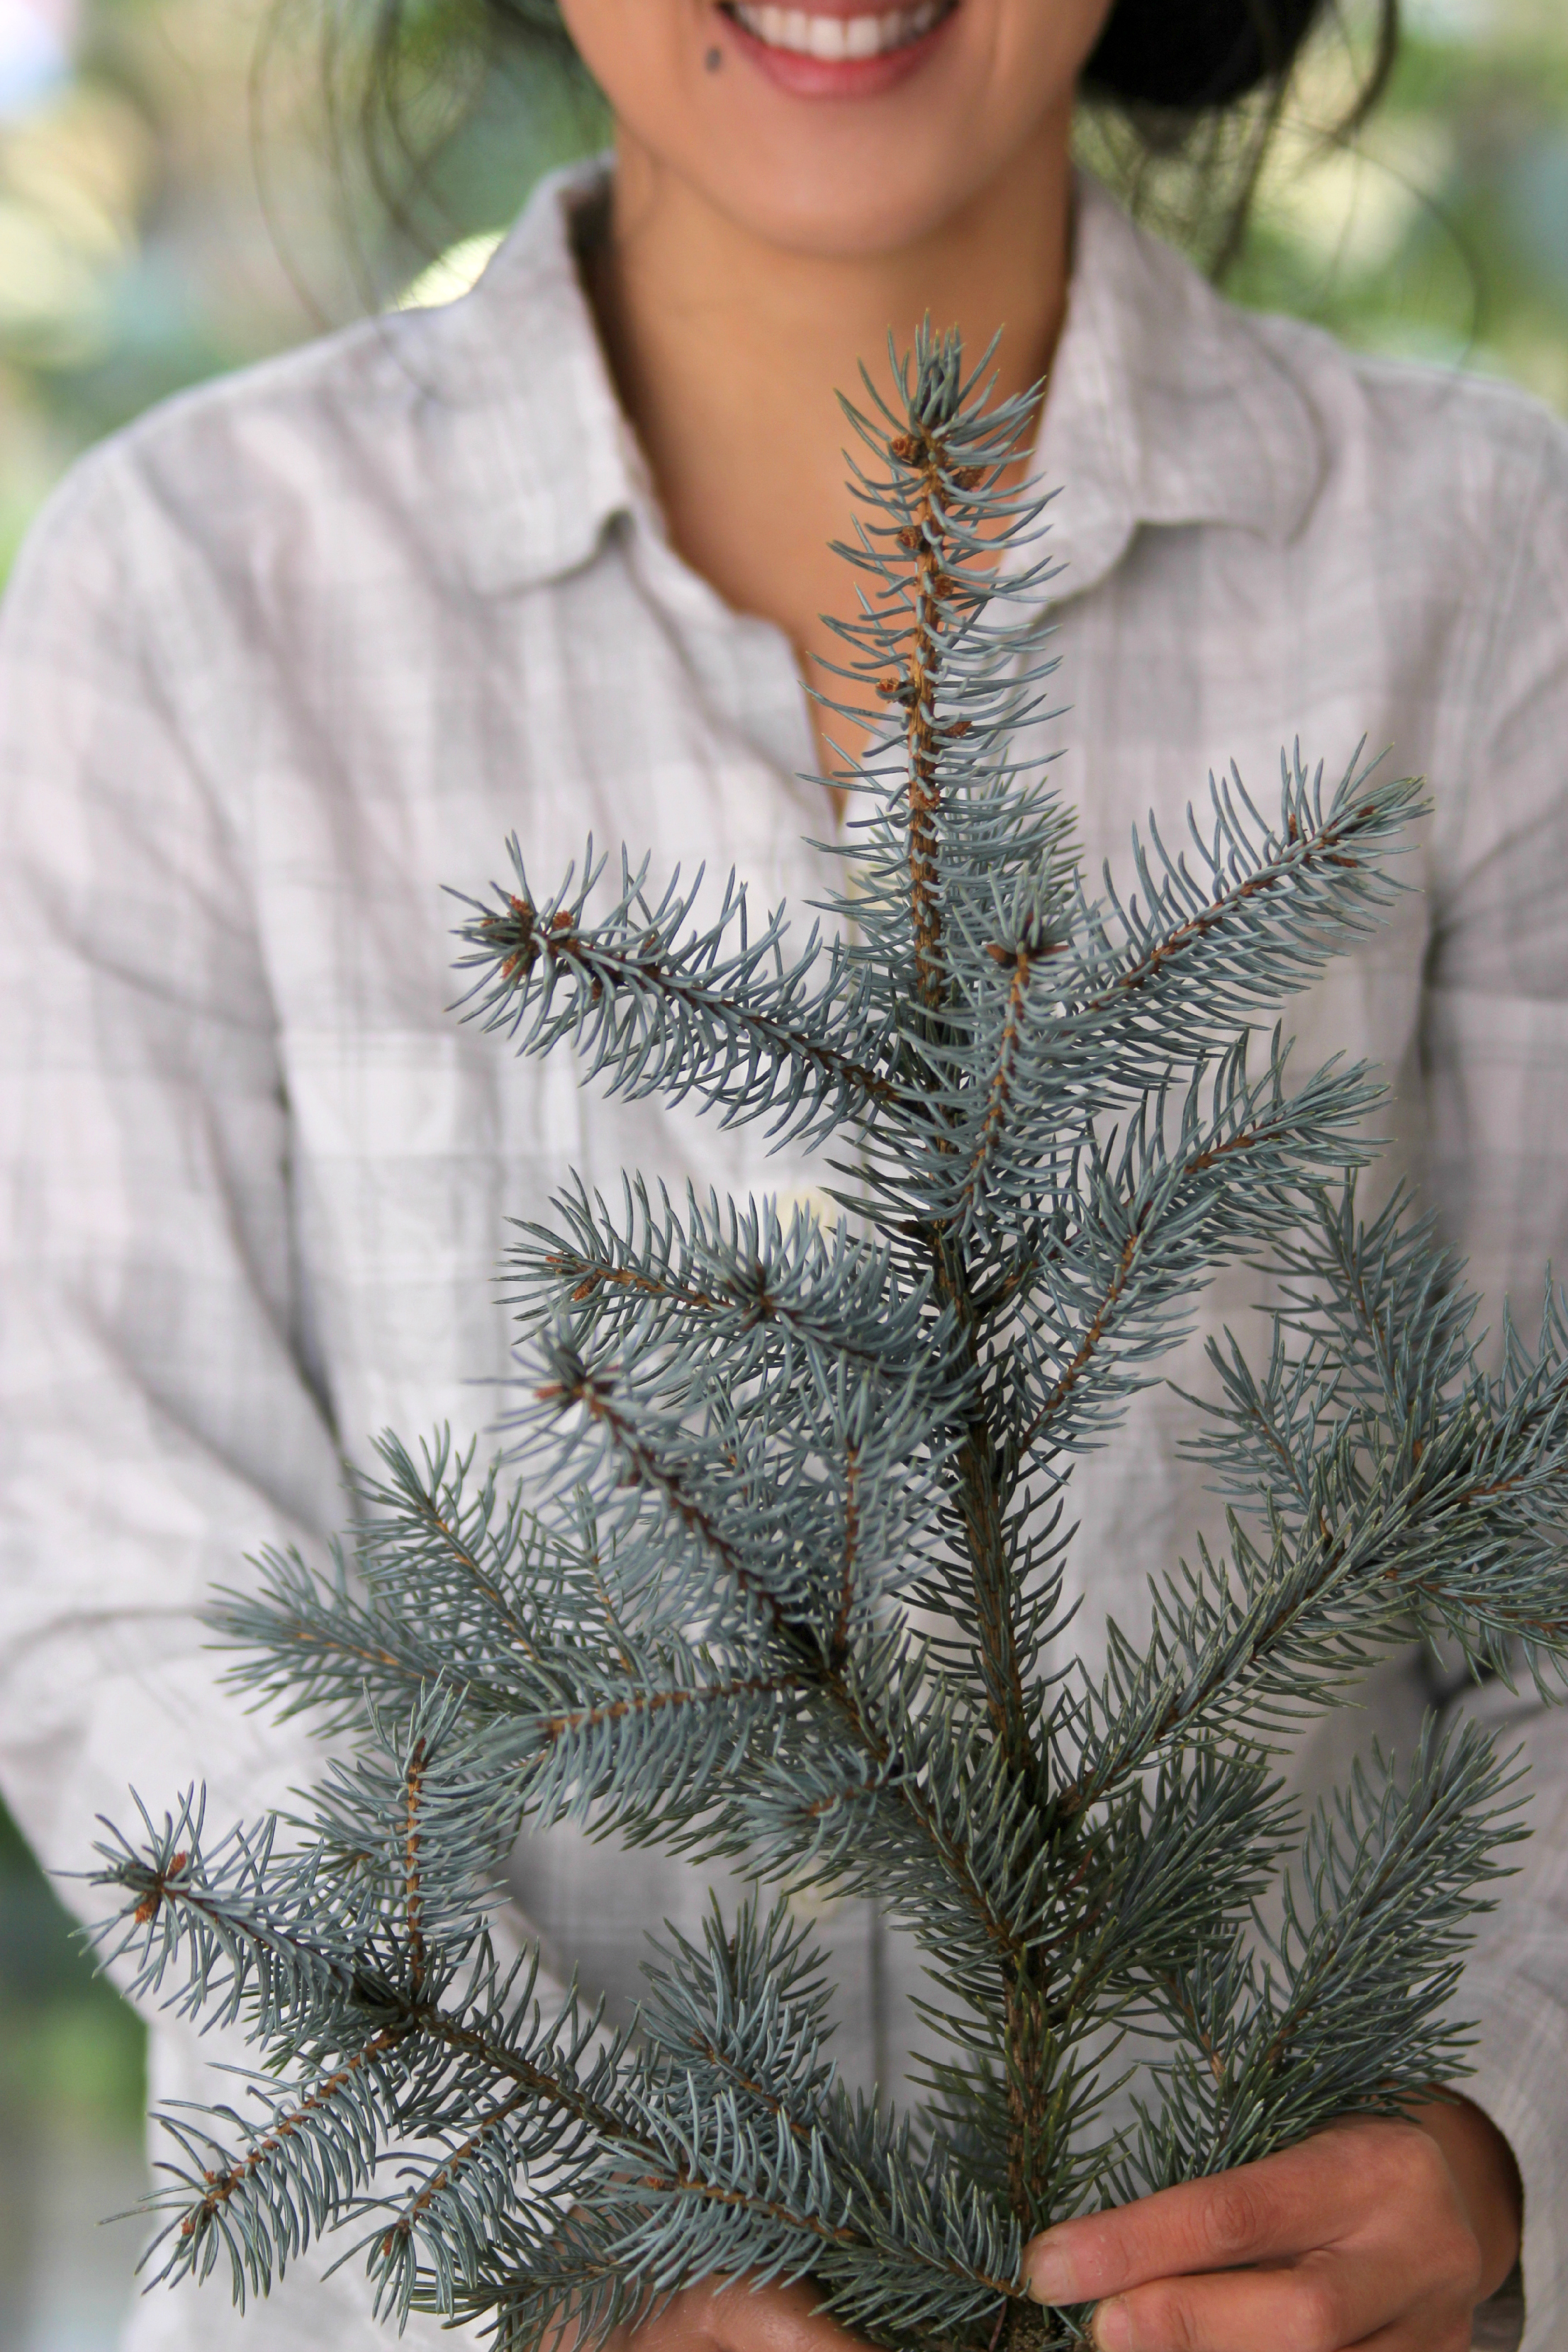
• Blue Spruce (1 medium branch)
• Ponderosa Pine (4 short branches)
• Balsam Fir (3 medium branches)
• Douglas Fir (4 long branches)
• Scotch Pine (2 short branches)
• Juniper (2 medium branches)
• Hemlock (4 long branches, 4 medium branches)
A few notes:
Honestly, you can use any evergreen branches your heart desires. I like having different textures, colors, and lengths, but use what you like and what is available.
I tend to pick branches that are somewhat straight. If this was a floral arrangement, I would pick a handful of flower stems that were more whimsical, but straight evergreen branches tend to bend and go where they please. When I tried using a few branches that were whimsical, it made the whole arrangement look messy and like it had a seriously bad hair day. But that’s just my opinion.
Lastly, as you place the branches, you may find that a branch may need to be trimmed in order to not be the exact height as branches next to it. The key is to never have any branch be the exact same height as another branch.
Instructions:
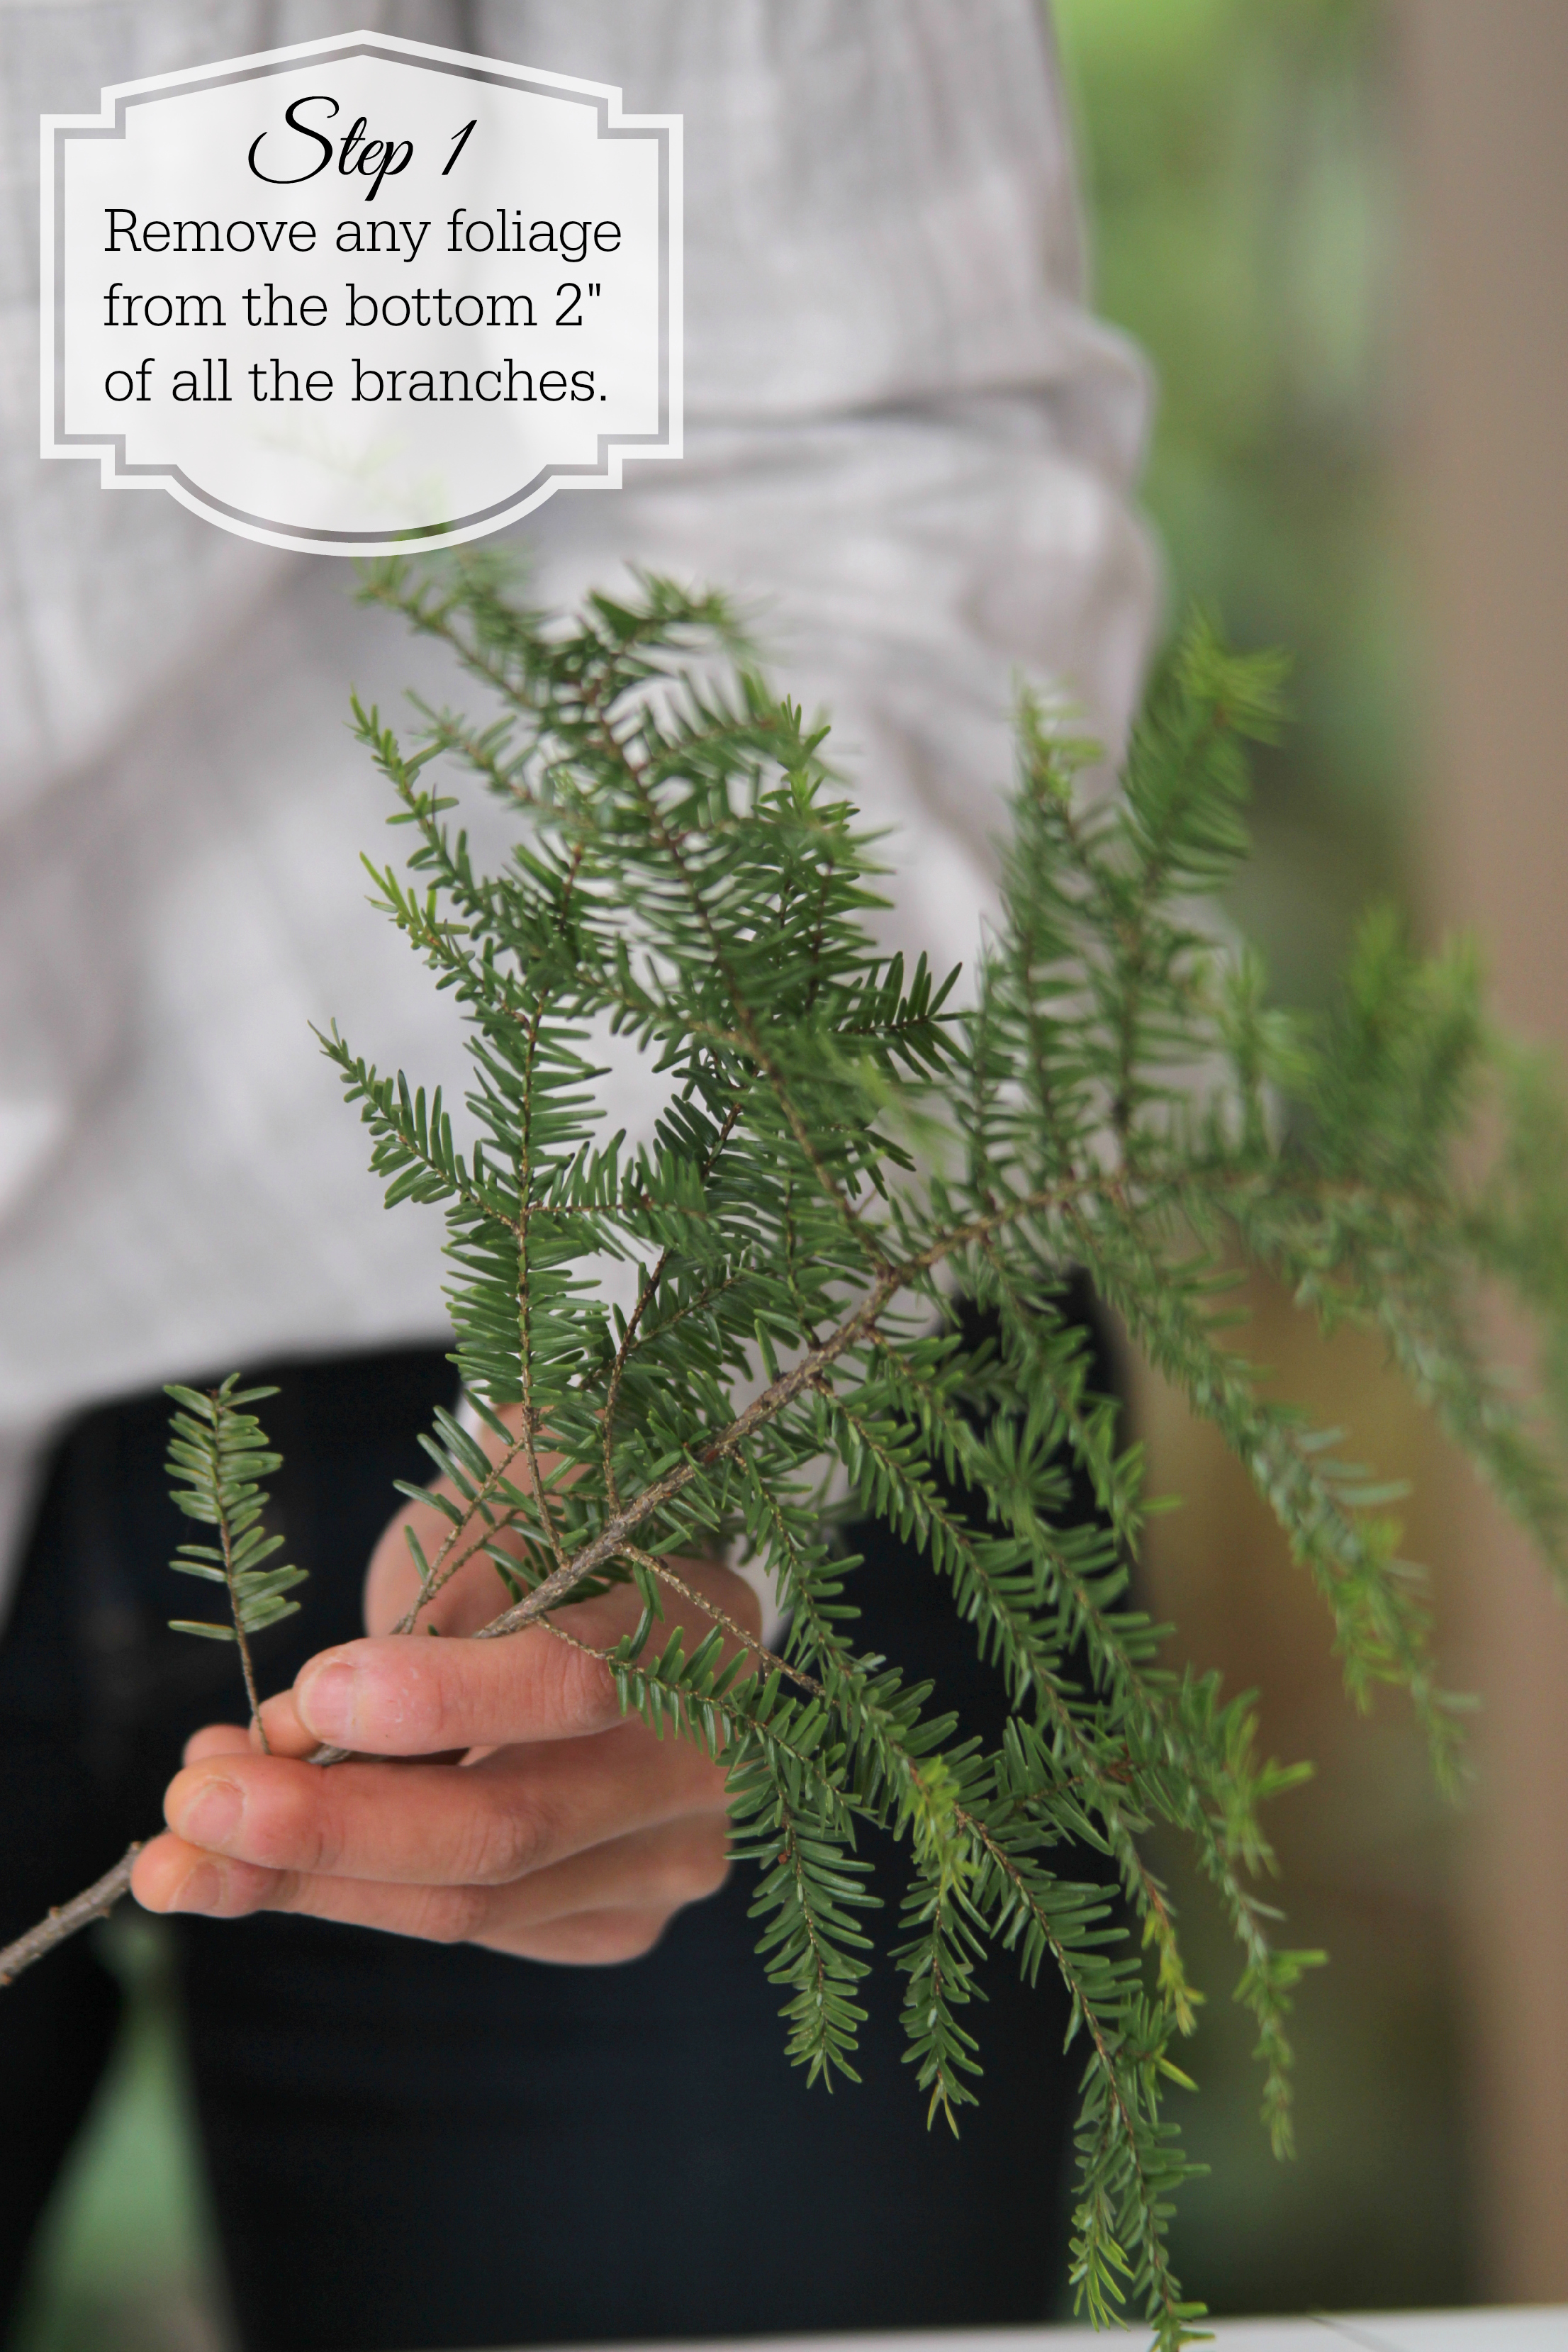
1. Remove any foliage (needles or berries) from the bottom 2 inches of all the branches. Having these few inches of clean branch makes placing them in the dirt a lot easier.
2. Fill your planter with dirt. I didn’t fill the planter all the way to the top because leaving a few inches allows the branches to lean against the planter and have some support.
You also don’t need to use a black plastic insert inside your planter. I use one when I want the cleanup to be super easy or when I need to switch out arrangements quickly.
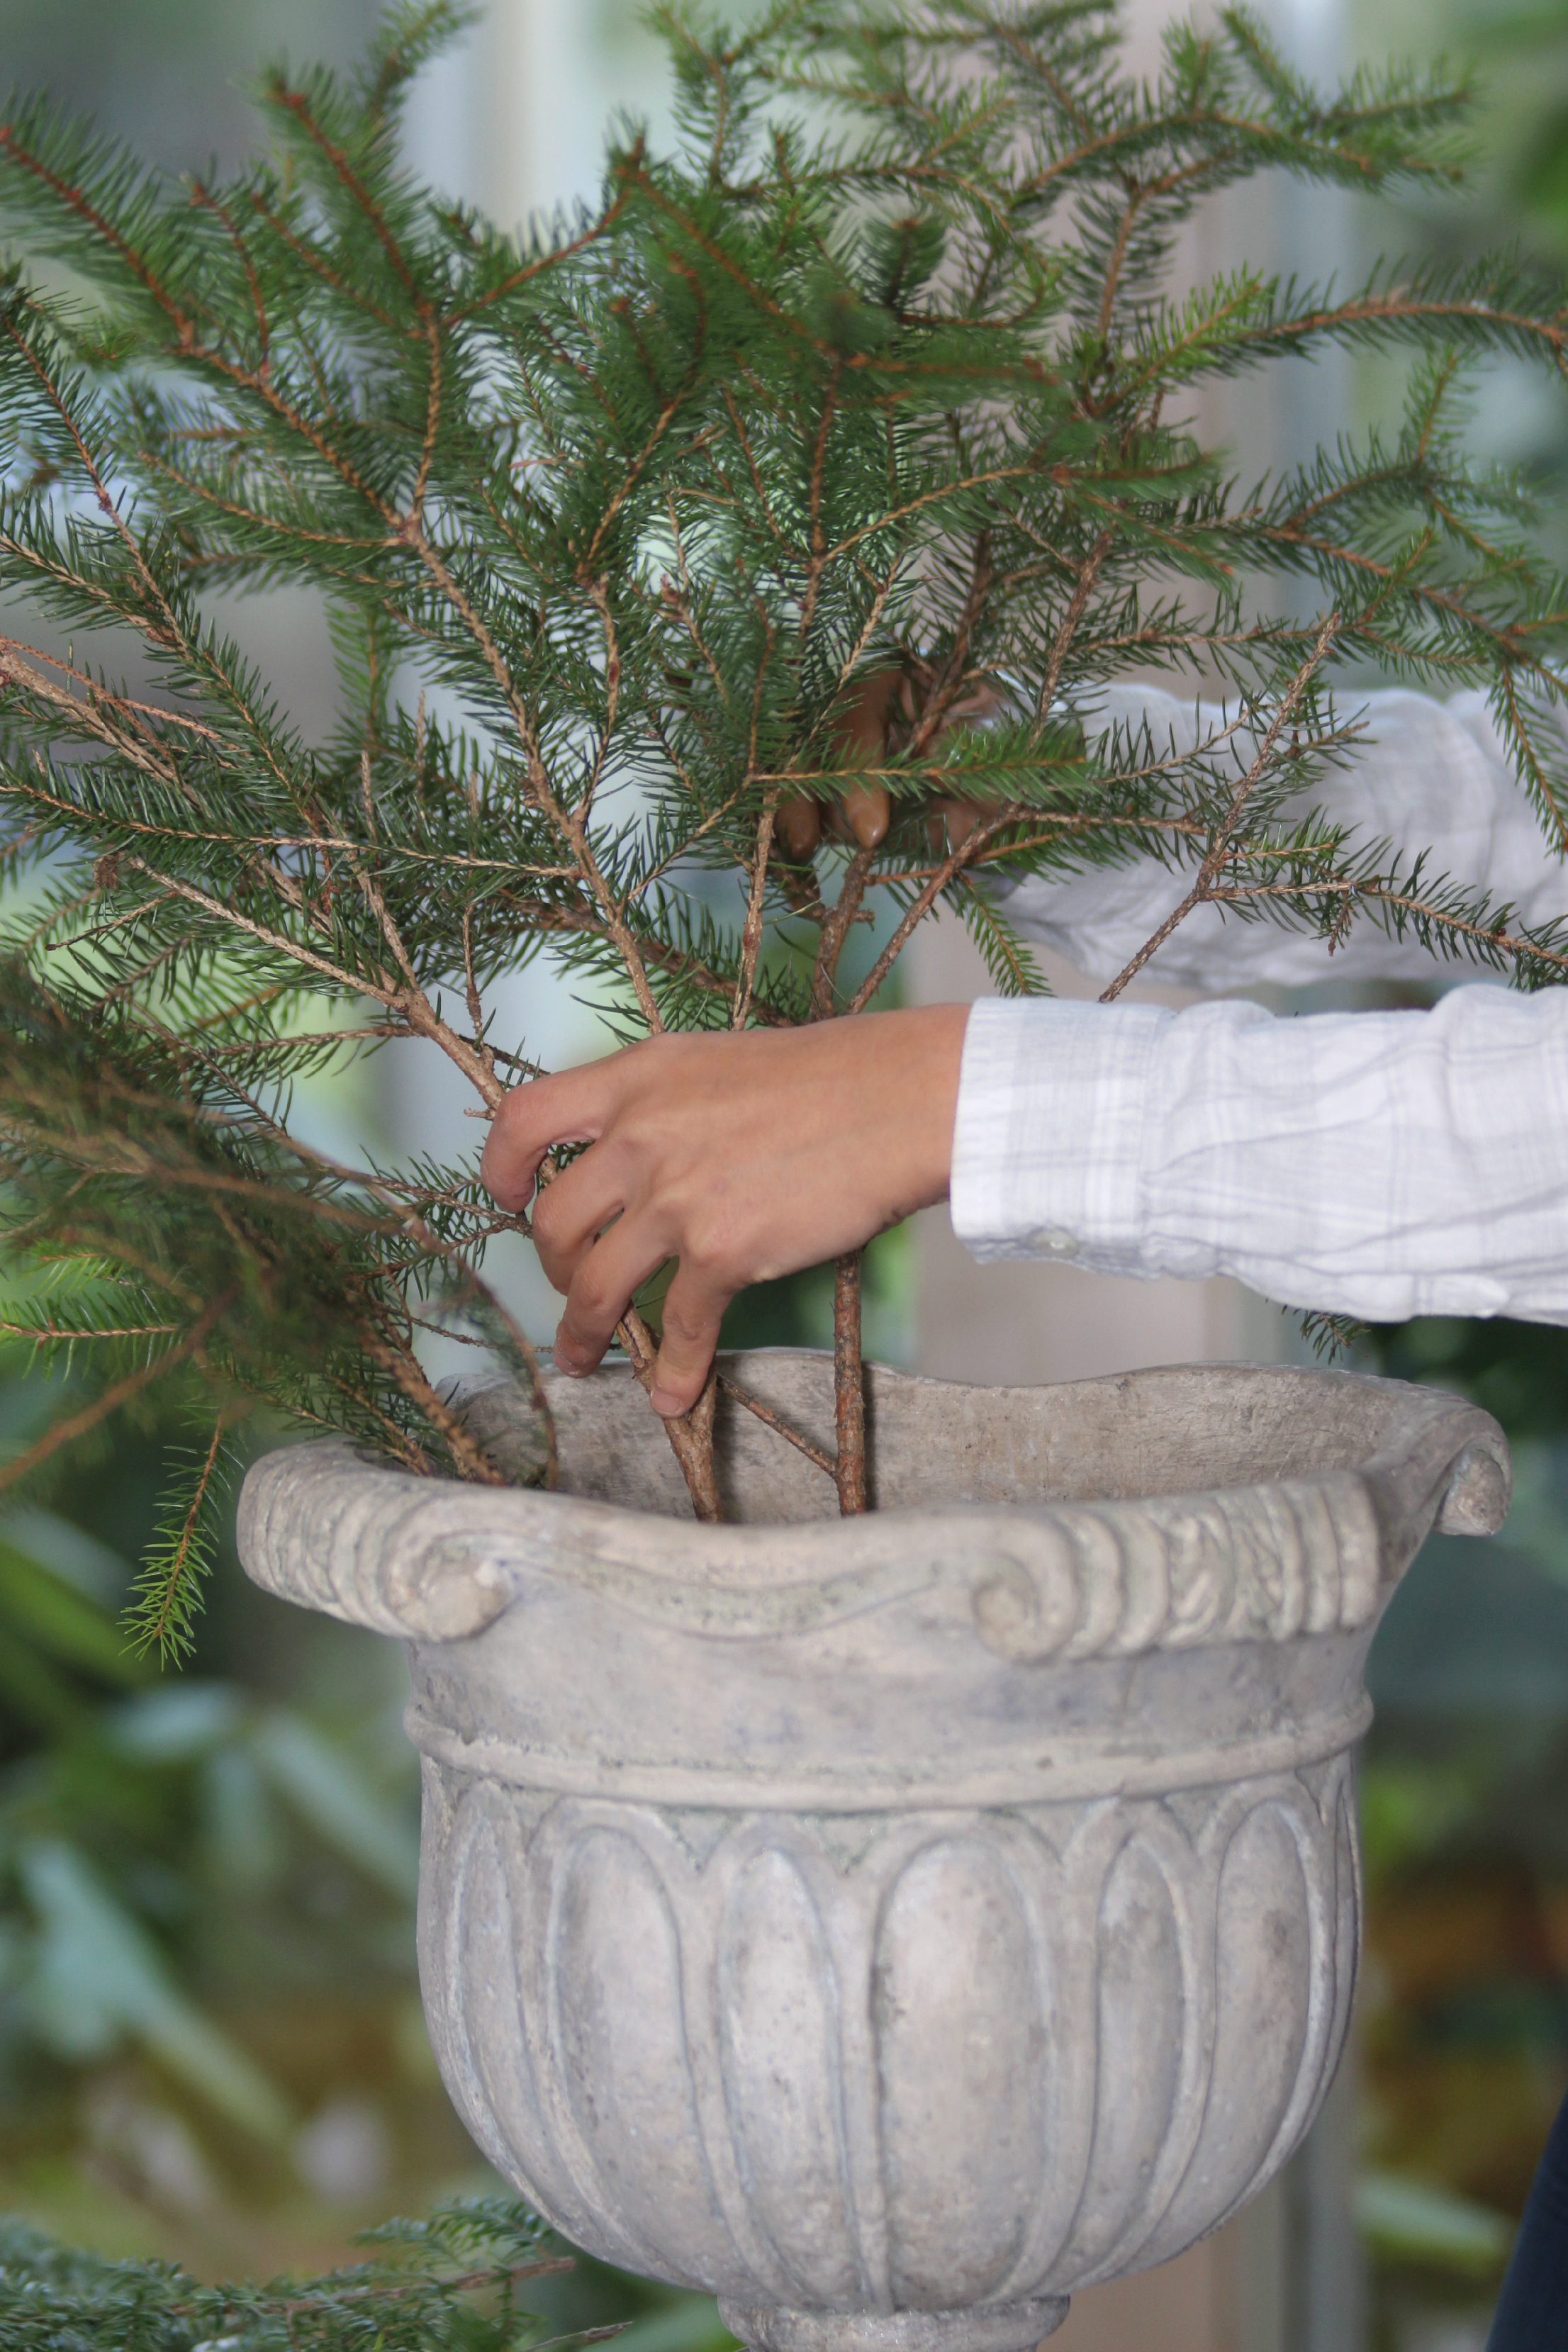
3. Take 1 – 2 of the douglas fir and place them in the dirt to the back right of your planter.
Take 1 long hemlock branch and place it with the douglas firs.
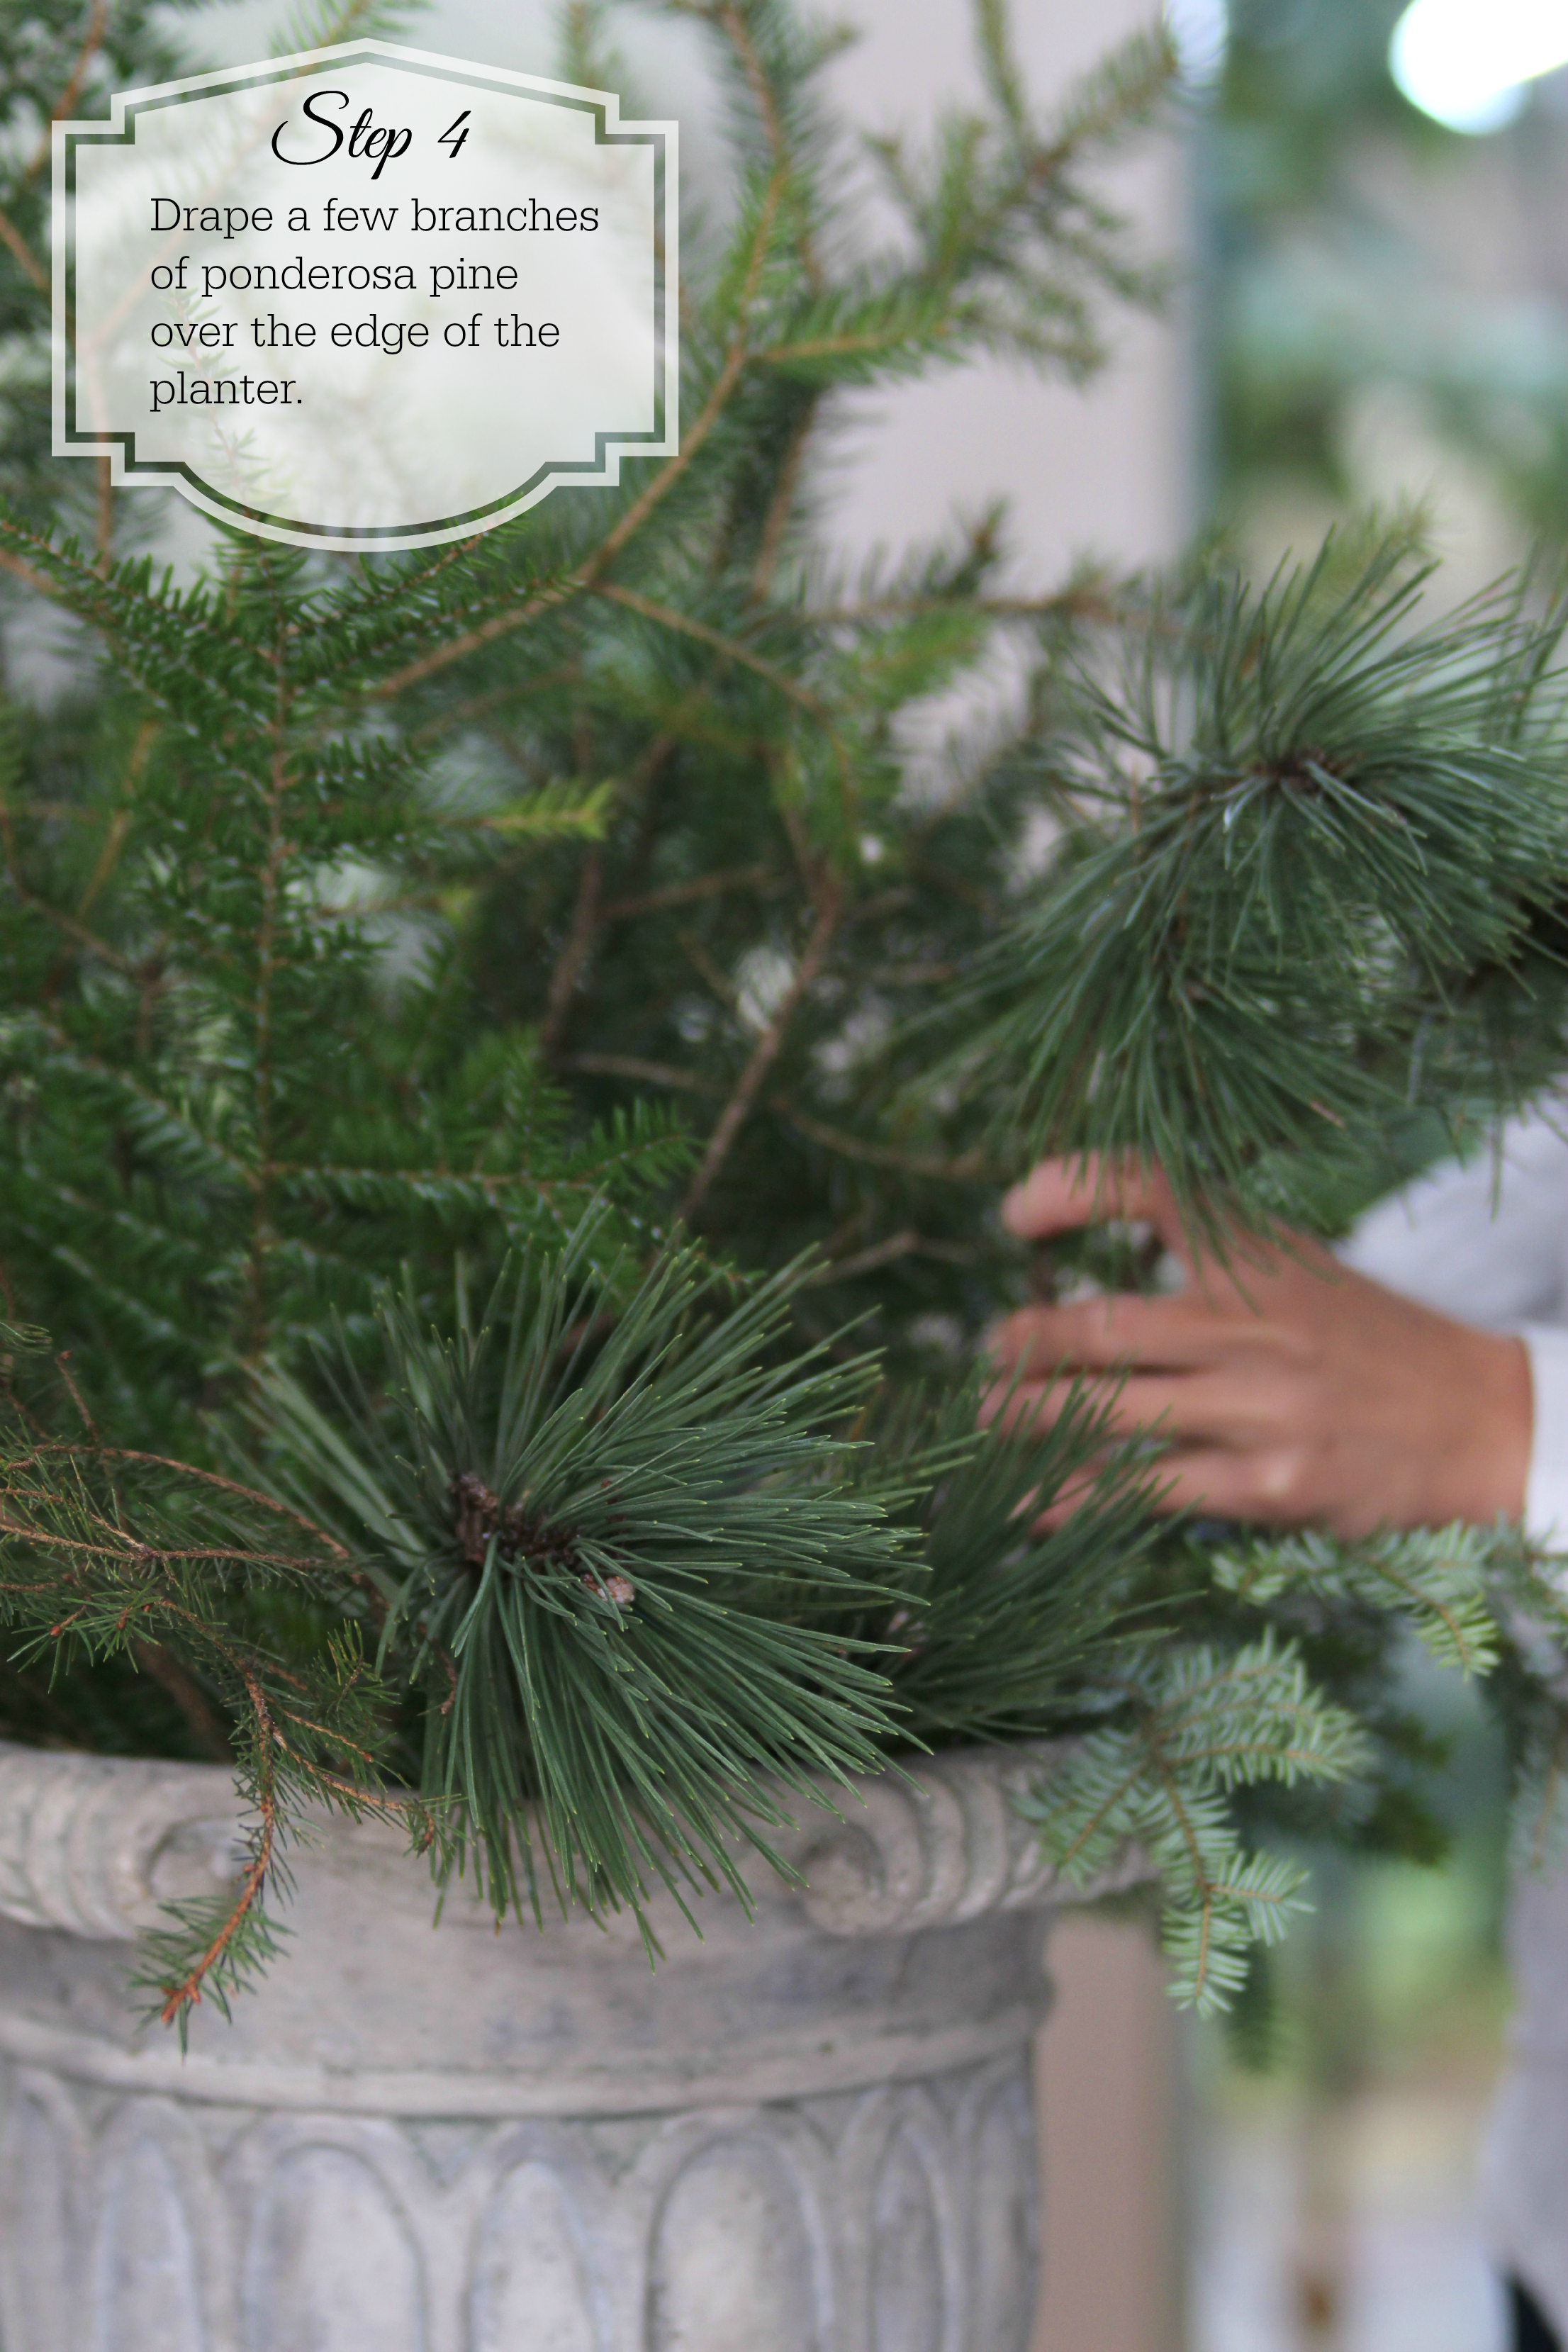
4. Take 2 branches of your ponderosa pine and place them across from the douglas fir at the front left of the planter, hanging over the edge.
These two clusters (step 3 ) will help guide you in placing the other branches.
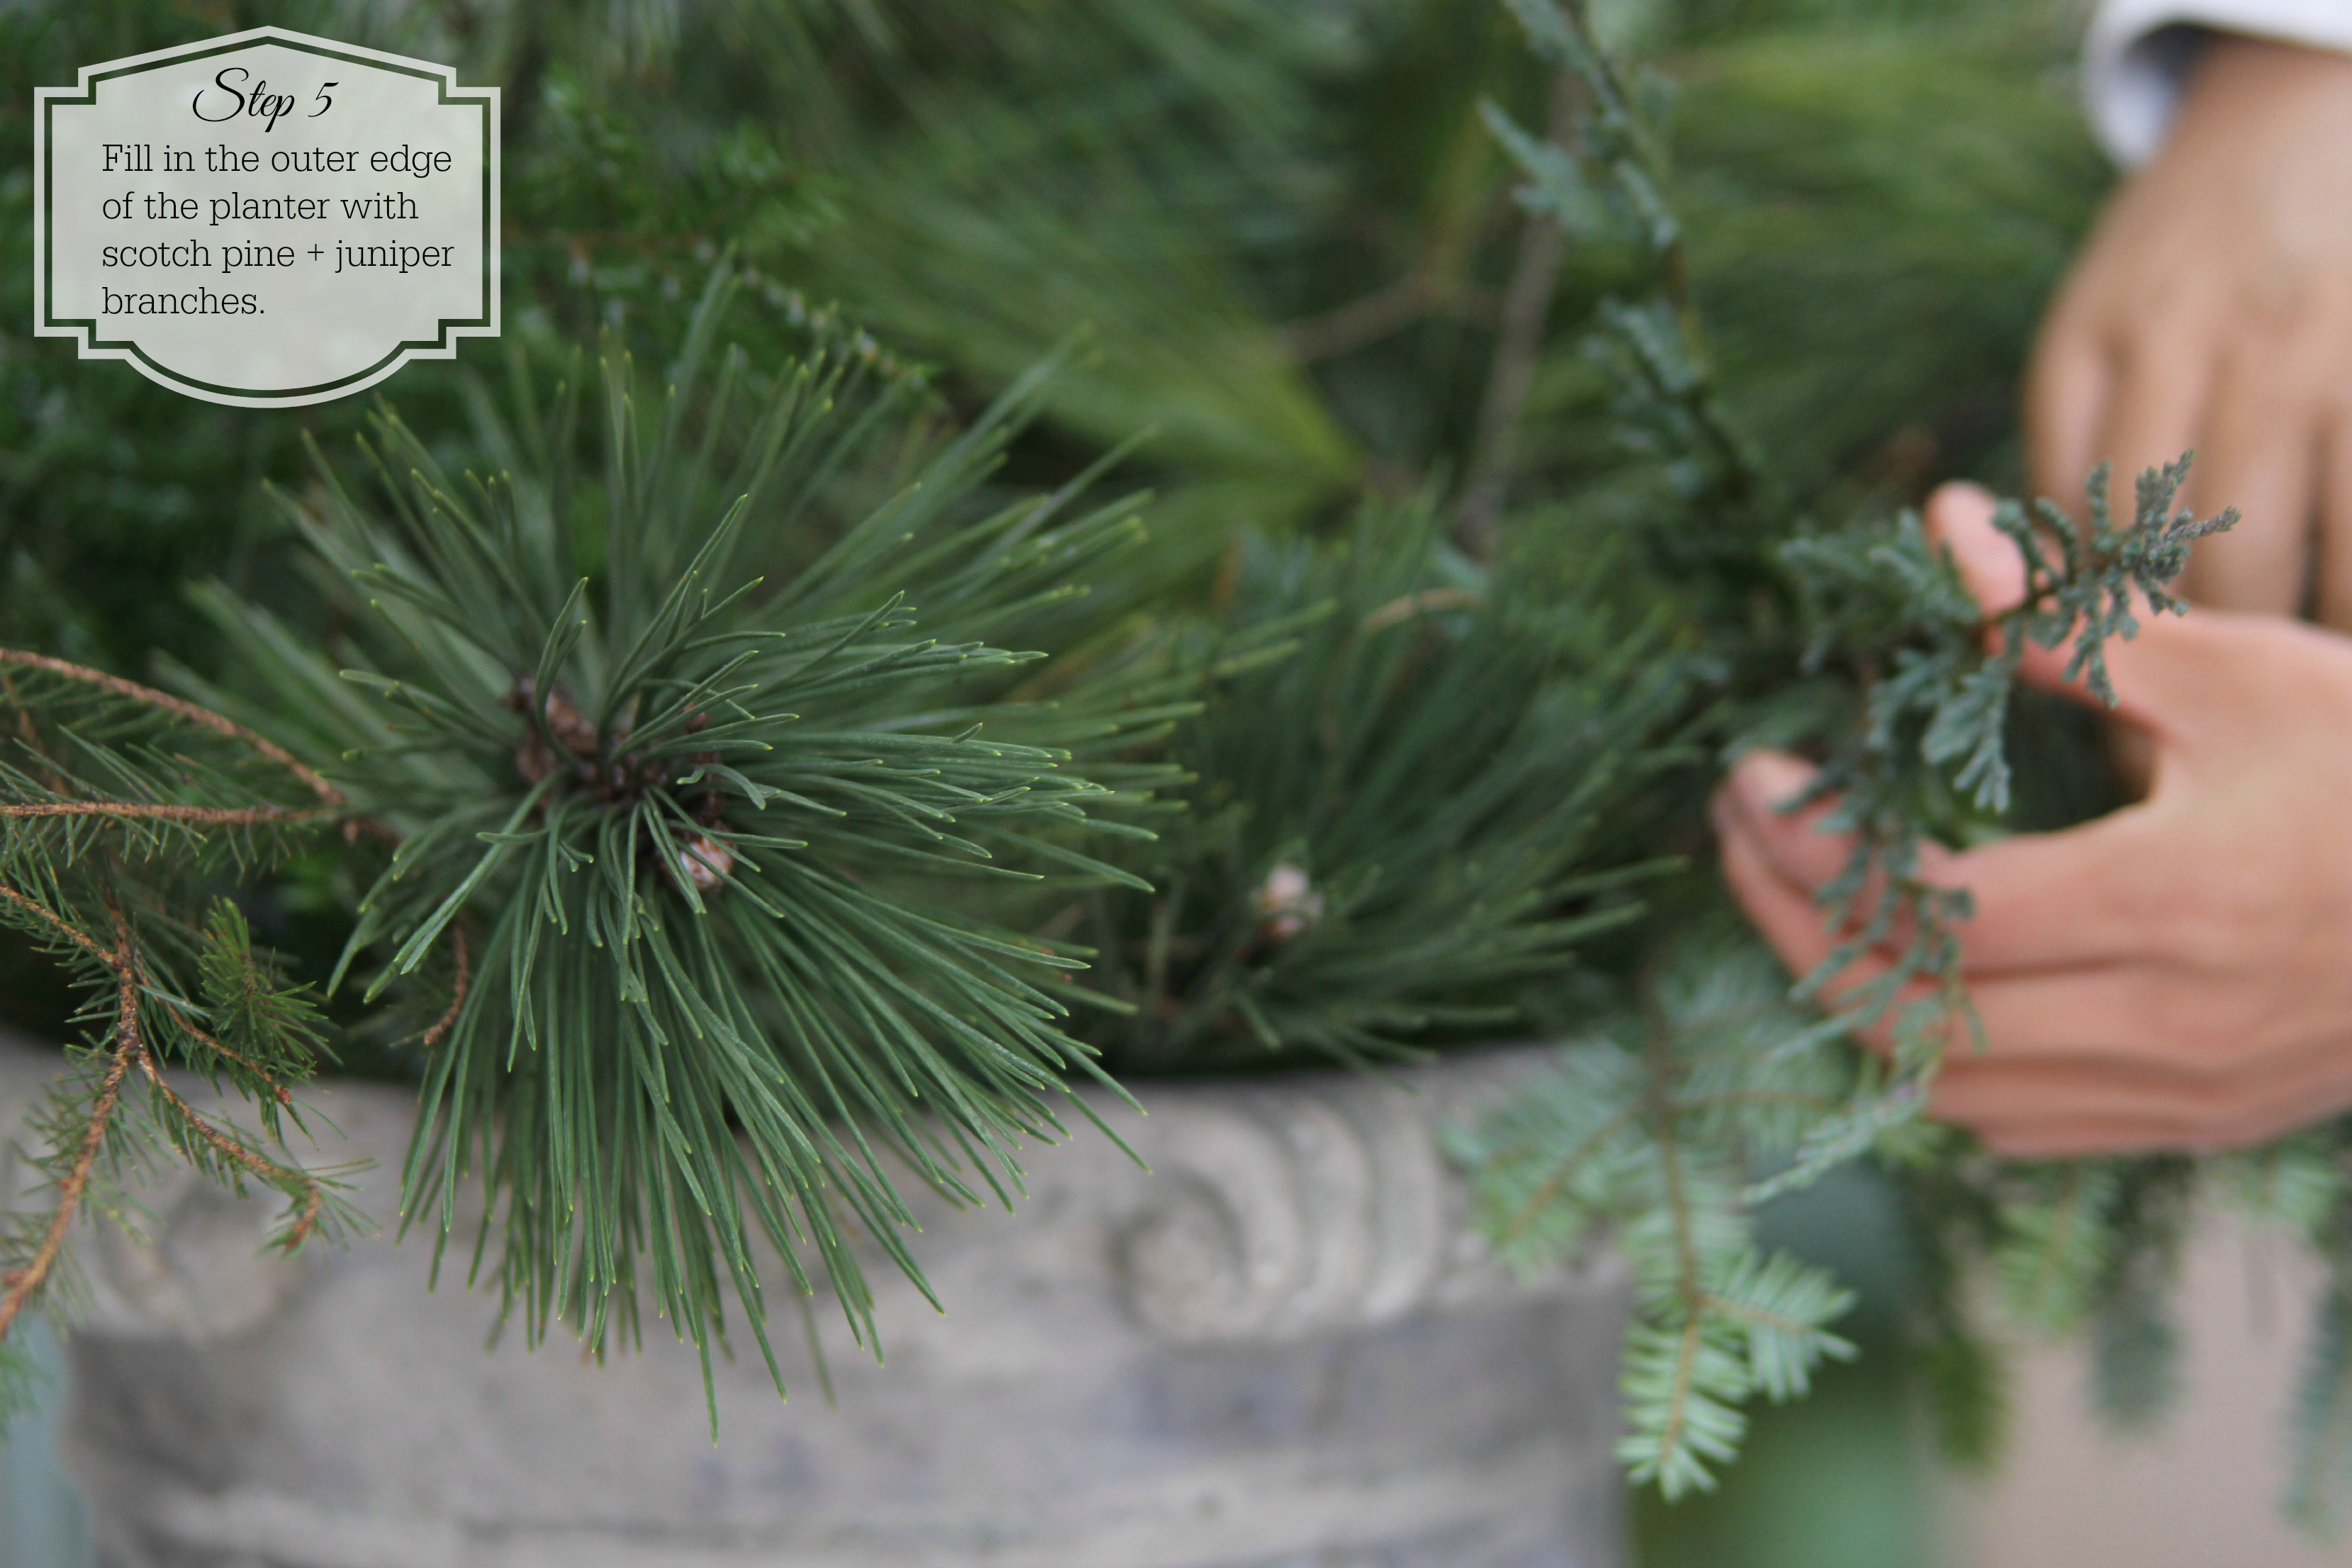
5. Take 1 – 2 branches of the scotch pine and juniper and place in the empty spaces around the outer edge of the planter, hanging over the edge.
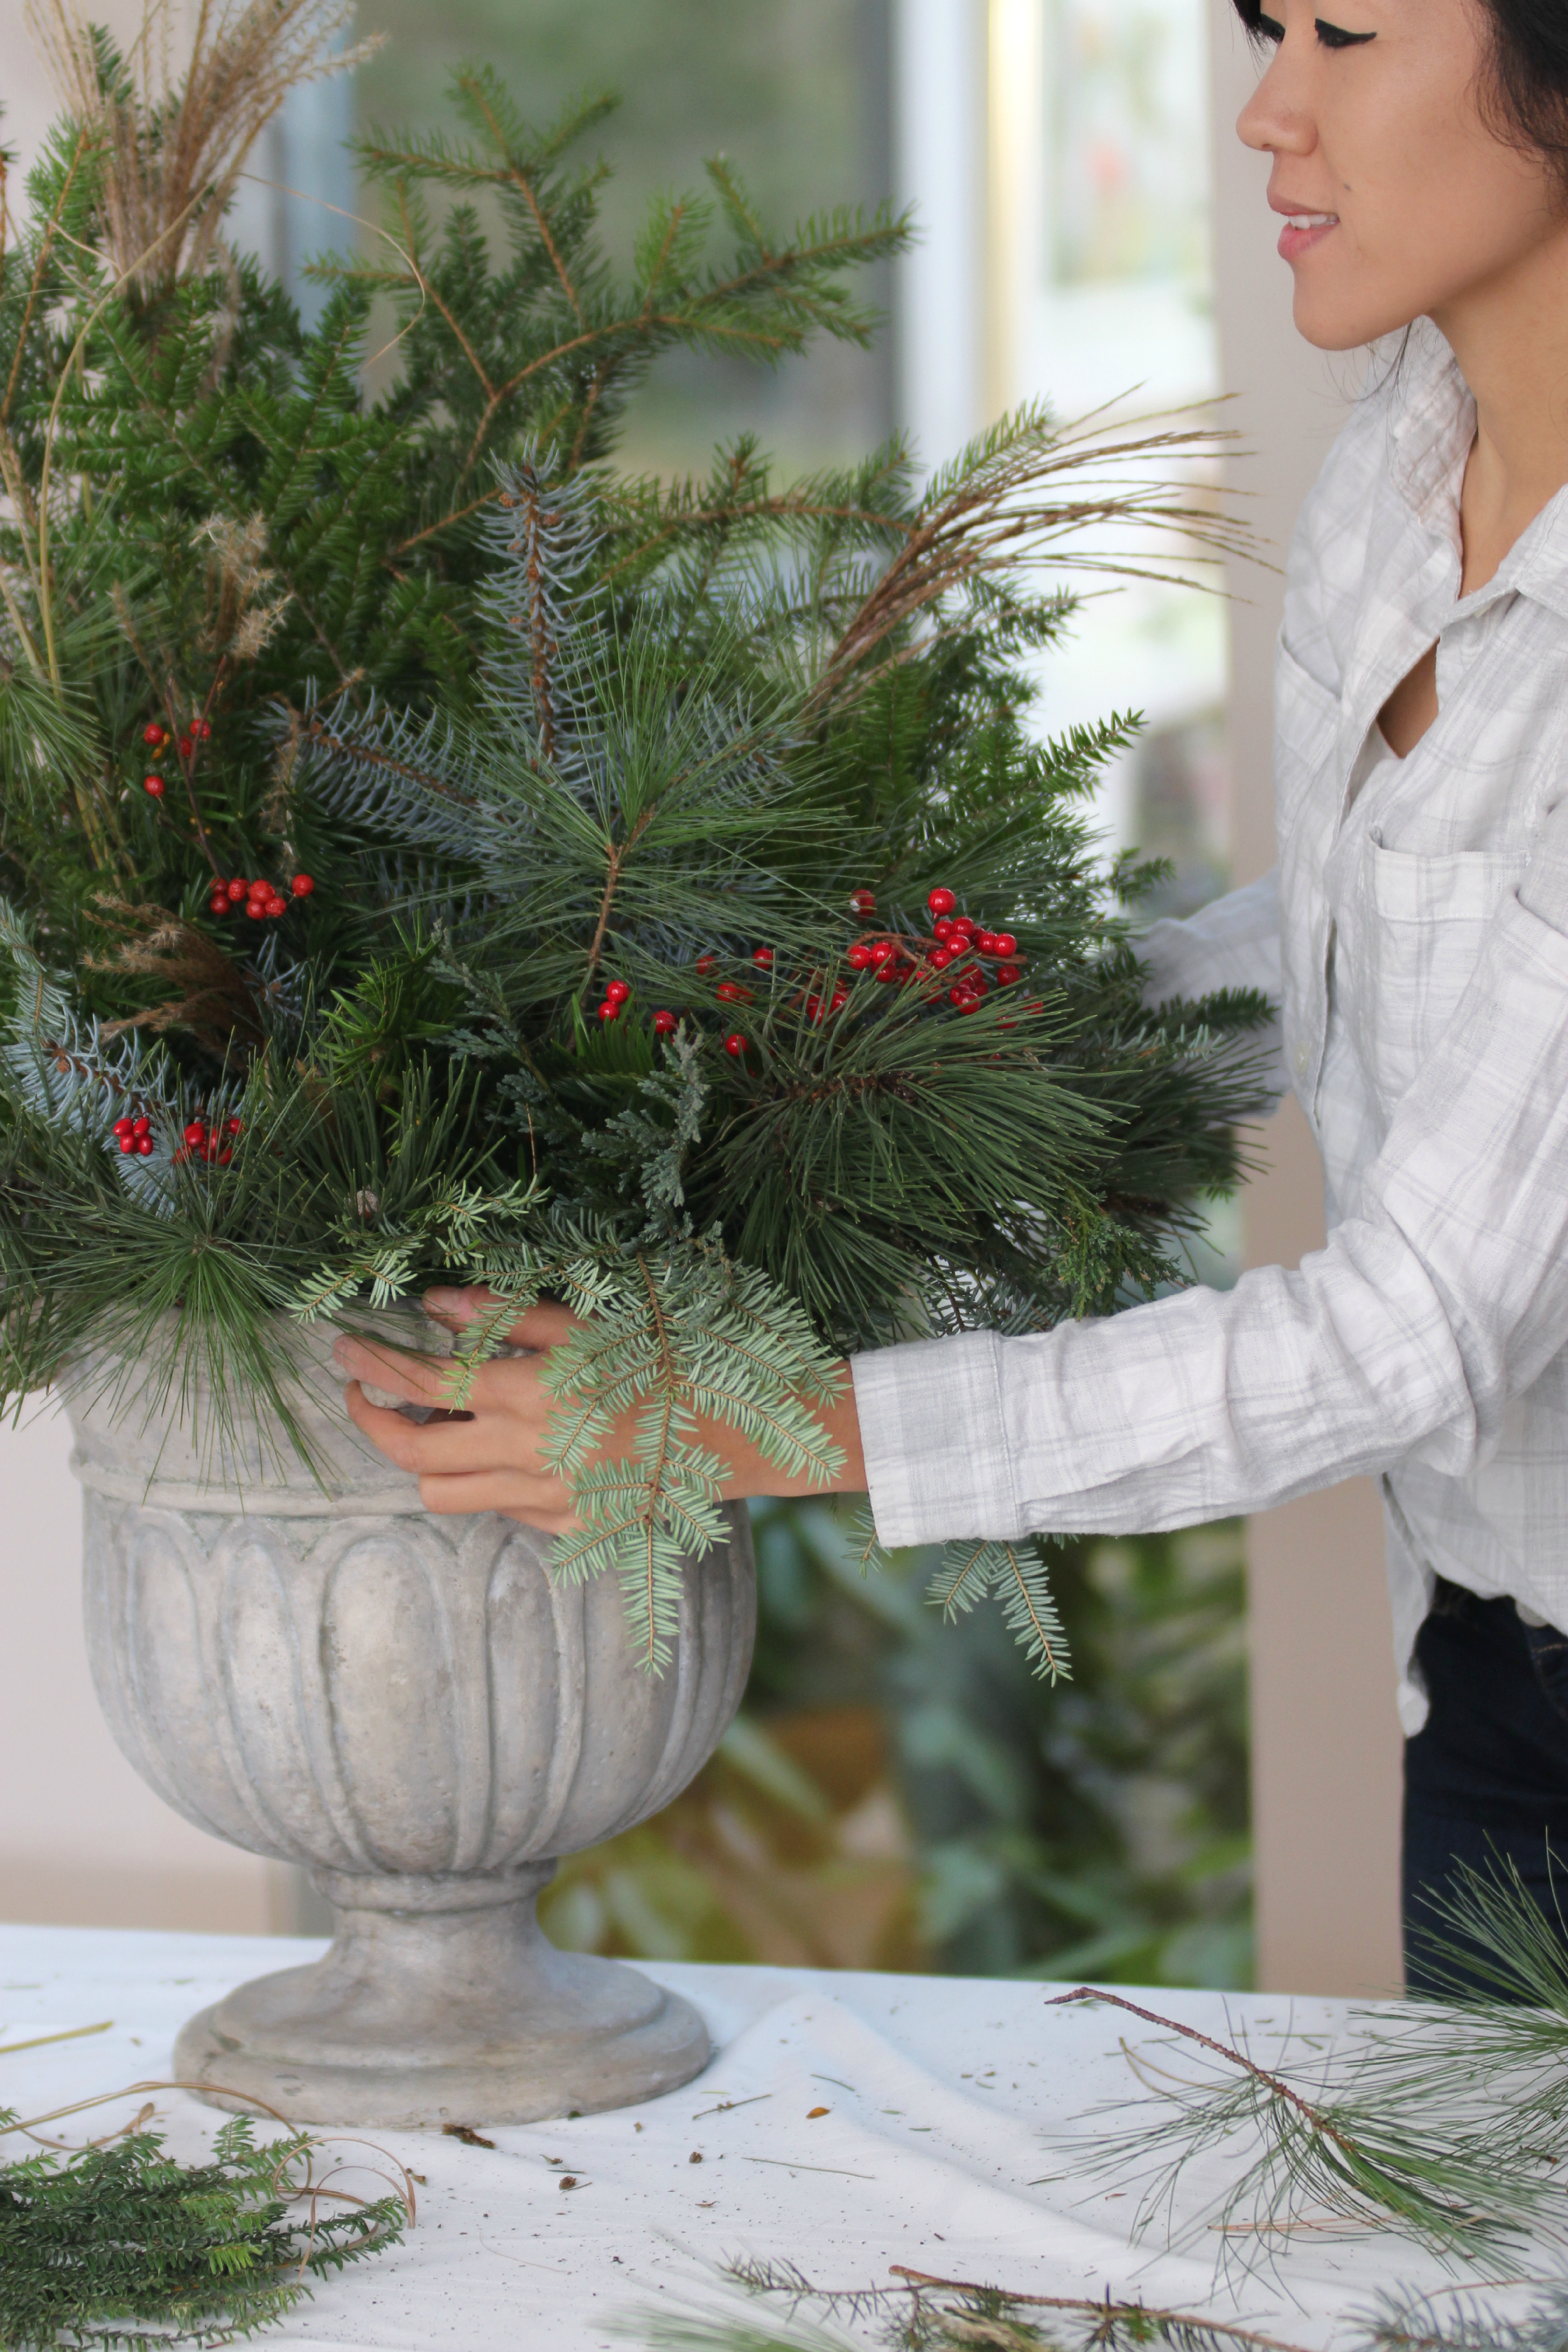
6. Fill in the planter with any remaining evergreen branches (balsam fir, blue spruce, douglas fir, hemlock, etc). Keep in mind the asymmetry and the flow of the tall branches on the right to the shorter branches on the left. Always walk around your planter and look at it from all angles. Try not to create a “flat” arrangement” but instead a “round” one.
7. Once you have placed all of your evergreen branches, take a few of the longest feathery grasses and place them near your first cluster of douglas fir (step 3). Then take the remaining few grasses, cut to any desired length, and place them throughout the arrangement
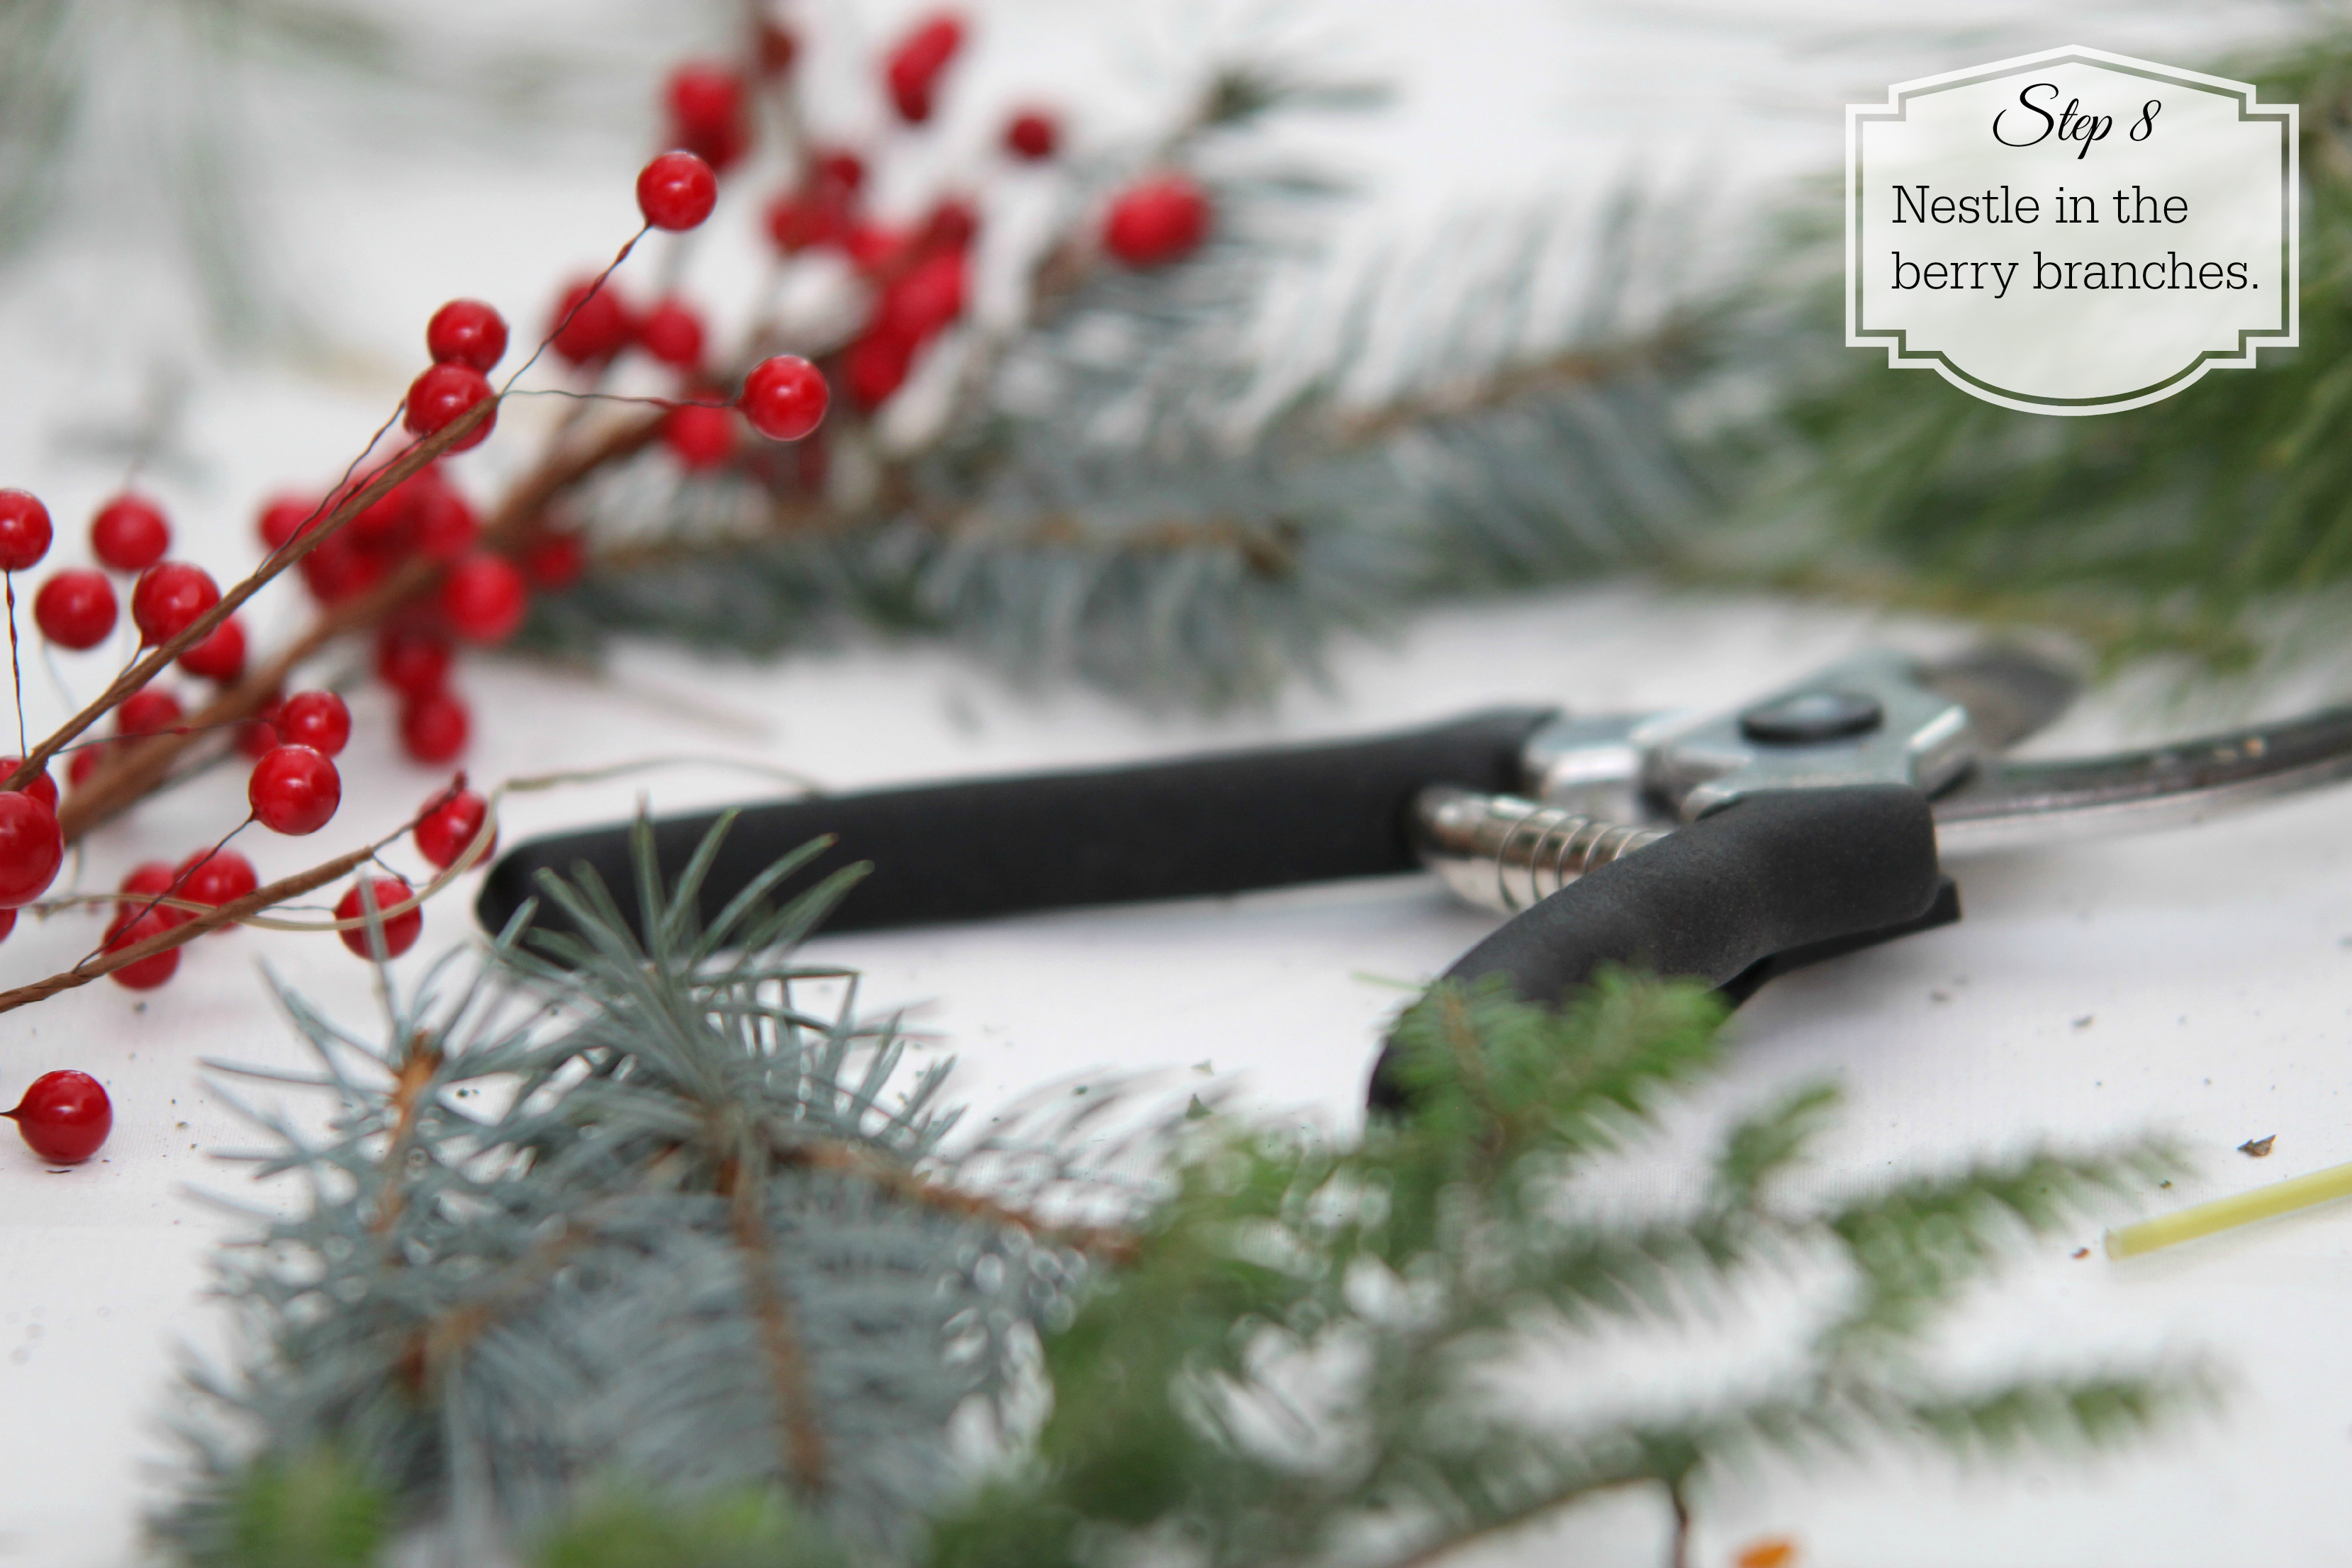
8. Take your berry branches and nestle them in amongst the evergreens.